Django app with HttpPlatformHandler in Azure App Services (Windows)
In my previous blog Deploying Django App to Azure App Services using Git, I have provided detailed steps on how to run Django app in Azure App services using wfastcgi
wfastcgi.py provides a bridge between IIS and Python using WSGI and FastCGI, similar to what mod_python provides for Apache HTTP Server.
Even though using wfastcgi was preferred way to run Python apps in IIS. I would like to provide an alternate solution using HTTP Platform Handler in this blog.
Below are list of steps we would follow
- Create Sample Project
- Create Azure WebApp and Use Site Extension to Upgrade Python
- Create and Change Deployment script
- Adding web.config (for production app use second option with waitress)
- Publish App
You can find a Sample Python Django project with above operations @ GitHub Link
Create Sample Project
Follow https://www.djangoproject.com/start/ to get started with Django
- Install Django and
- Write your first Django app
(or)
If you have PyCharm, Follow details at below link to create a sample app
https://www.jetbrains.com/help/pycharm/2016.1/creating-django-project.html
Create Azure WebApp and Use Site Extension to Upgrade Python
Navigate to Azure portal
- Create a new web app
- Setup Continuous Deployment
- Navigate to your App Service blade, select Extensions and then Add.
- From the list of extensions, scroll down until you spot the Python logos, then choose the version you need
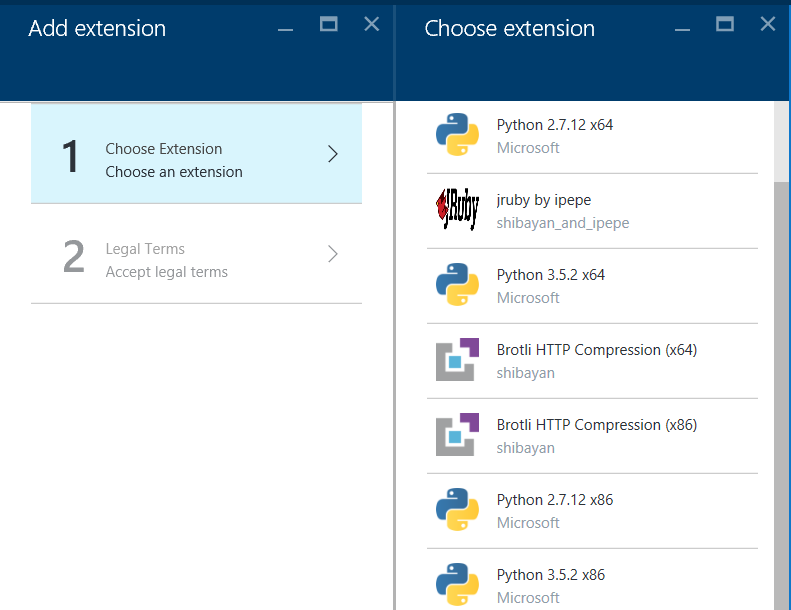 {.full-img}
For this blog I’m choosing Python 2.7.12 x64, It would install new version of python @ D:\home\Python27
Create and Change Deployment script
I have explained more on how to utilize deployment script and what it does @ link. you can use this script to run commands on Azure App after moving code to it.
Install Azure Cli using below command
npm install azure-cli -g
Use Below command to create deployment script.
azure site deploymentscript --python
Above step would create below two files
- .deployment
- deploy.cmd
Note: If you haven’t used nodejs/npm earlier, Create above files manually and copy content for these files from https://github.com/prashanthmadi/azure-django-httphandler
Replace content of deploy.cmd file with content at Link
We are changing default deployment script(removing virtual environment creation and others) and adding below content to install packages listed in requirements.txt
:: 2. Install packages
echo Pip install requirements.
D:\home\Python27\python.exe -m pip install --upgrade -r requirements.txt
IF !ERRORLEVEL! NEQ 0 goto error
Adding web.config(Development Mode)
Note: Ignore this section for production app
Azure web apps would use IIS which can be configured using web.config file. In our web.config file we would ask the requests to use httpplatformhandler and forward them to python.exe
Create below file at root folder and copy content from link
web.config
<?xml version="1.0" encoding="UTF-8"?>
<configuration>
 <system.webServer>

  <handlers>
    <add name="httpPlatformHandler" path="*" verb="*"
               modules="httpPlatformHandler" resourceType="Unspecified"/>
  </handlers>

  <httpPlatform processPath="D:\home\Python27\python.exe" arguments="manage.py runserver %HTTP_PLATFORM_PORT%" requestTimeout="00:04:00" startupTimeLimit="120" startupRetryCount="3" stdoutLogEnabled="true">
    <environmentVariables>
     <environmentVariable name="PYTHONPATH" value="D:\home\site\wwwroot"/>
    </environmentVariables>
  </httpPlatform>

 </system.webServer>
</configuration>
Adding web.config(Production Mode - Using Waitress)
Waitress is meant to be a production-quality pure-Python WSGI server with very acceptable performance
Django app by default uses a development server which would be started when we execute manage.py file. I would provide steps to use Waitress instead below
Create web.config file with below content
<?xml version="1.0" encoding="UTF-8"?>
<configuration>
 <system.webServer>
  <handlers>
   <add name="httpPlatformHandler" path="*" verb="*"
             modules="httpPlatformHandler" resourceType="Unspecified" />
  </handlers>

  <httpPlatform processPath="D:\home\Python27\python.exe"
 arguments="run_waitress_server.py" requestTimeout="00:04:00" startupTimeLimit="120" startupRetryCount="3" stdoutLogEnabled="true">
   <environmentVariables>
    <environmentVariable name="PYTHONPATH" value="D:\home\site\wwwroot" />
    <environmentVariable name="PORT" value="%HTTP_PLATFORM_PORT%" />
   </environmentVariables>
  </httpPlatform>
 </system.webServer>
</configuration>
If you observe carefully, we have changed
- httpplatform arguments section to
run_waitress_server.pyinstead ofmanage.py runserver %HTTP_PLATFORM_PORT% - Added new evnironmentVariable
PORTto pass the internal port number we use in waitress
Add below line at the end in requirements.txt file. This would install waitress module during deployment
waitress==1.0.1
Create a new file run_waitress_server.py with below content
import os
from waitress import serve
from django.core.wsgi import get_wsgi_application
os.environ.setdefault("DJANGO_SETTINGS_MODULE", "djangosql.settings")
application = get_wsgi_application()
serve(application,host="0.0.0.0",port=os.environ["PORT"])
I have seen some Azure users facing issue with ssl. set url_scheme to resolve the issue as below
serve(application,host="0.0.0.0",port=os.environ["PORT"],url_scheme='https')
Publish App
Navigate to your root folder and commit your changes to WEB_APP_GIT_URL
git init
git add .
git commit -m "initial commit"
git remote add sampledjangoapp WEB_APP_GIT_URL
git push sampledjangoapp master
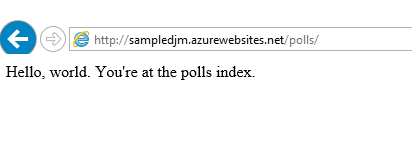
Here is my App on Azure After publish
You can find a Sample Python Django project with above operations @ GitHub Link
Serving Static Files
I have seen couple of users complaining about static files. Here is the fix for it
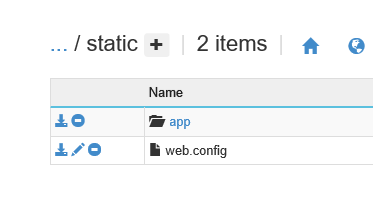
Use below line of code(at D:\home\site\wwwroot using kudu console) to generate static file folder in Django app, we can also stitch this inside deploy.cmd to automate it. Version number in url may change based on your python installation.
D:\home\python27\python.exe manage.py collectstatic --noinput
Once you have static folder in D:\home\site\wwwroot folder as above screenshot
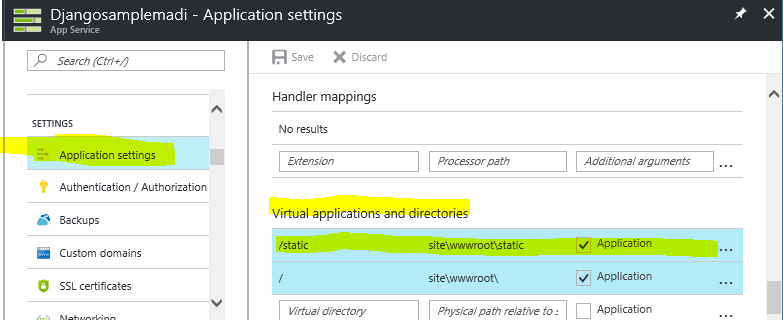
- Navigate to Azure Portal and add a new section in
Virtual application and directoriesunderApplication Settingswith below values
key : /static
value : site\wwwroot\static
mark the application checkbox
- Navigate to
D:\home\site\wwwroot\staticfolder and add web.config file with below content
D:\home\site\wwwroot\static\web.config content
<?xml version="1.0"?>
<configuration>
    <system.webServer>
        <handlers>
           <clear />
            <add
                name="StaticFile"
                path="*" verb="*" modules="StaticFileModule,DefaultDocumentModule,DirectoryListingModule"
                resourceType="Either"
                requireAccess="Read" />
        </handlers>
    </system.webServer>
</configuration>
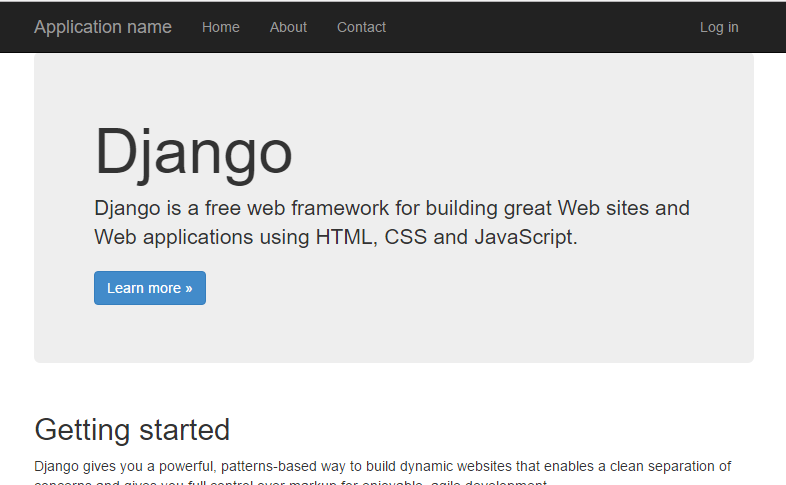
Final Output (with static files working)
