Adding SSL/TLS certificates for Apache and NGINX on Azure Virtual Machines
This post will be an overview of how to add an TLS/SSL certificates to your Apache or NGINX Web Server running on an Azure Virtual Machine. These examples will be using an Ubuntu 20.04 machine and an App Service Certificate for the certificate that we want to secure our Web Servers with.
Prerequisites
This post will assume you have at least bought the App Service Certificate already and have a domain pointed to the Virtual Machine. If you do not already have an App Service Certificate, you can follow these steps. Make sure that steps 1-3 (Import to Key Vault, Verify Domain ownership, certificate ready to use) are completed prior to this.
For purchasing a domain, an App Service domain can be purchased and assigned to the Virtual Machine being used. This blog post can be followed for an Azure Virtual Machine specifically.
NOTE: The UI in the above blog post has changed since the post was created, but the method of assigning the domain remains the same.
Download the App Service Certificate and extract the cert files
After successfully following the above steps with the App Service Certificate and importing into the Key Vault, the certificate should be stored as a ‘secret’. We’ll want to export the certificate from our Key Vault. Follow the steps in the link. The below can be followed along as well:
- Go to your Key Vault and select ‘Secrets’
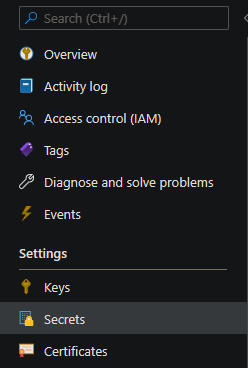
- Click on your Certificate name

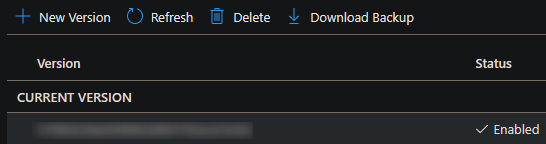
- Click on the ‘Current Version’
- Click ‘Download as a certificate’ and keep the Content type as ‘application/x-pkcs12’
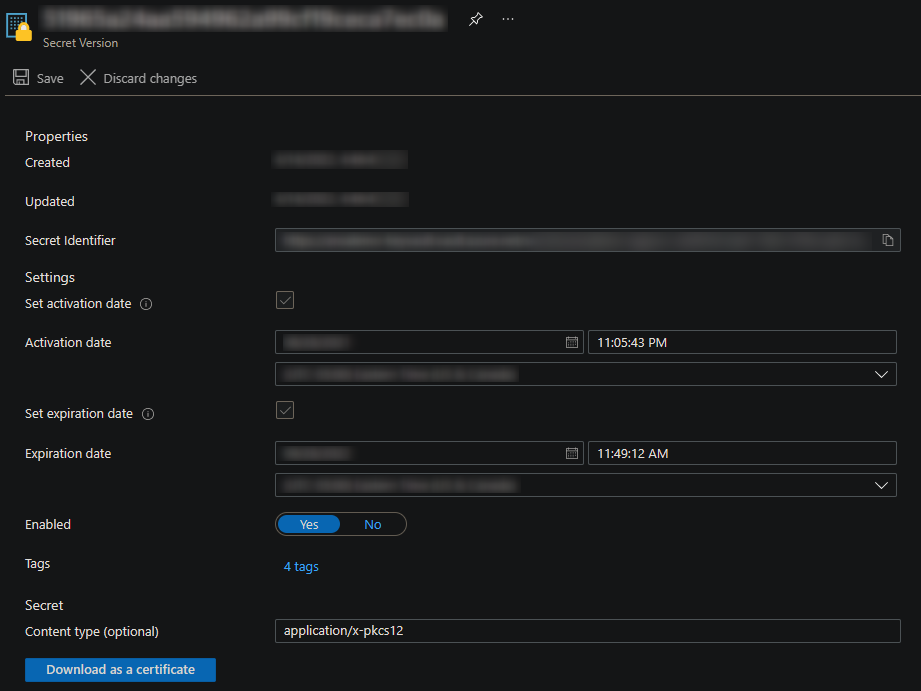
At this point the certificate should be downloaded to your machine.
Extracting the key (.key) and certificate (.pem) - *NIX terminals
If you’re using some bash-type shell (eg. Git Bash) or have WSL2 installed on your machine then it is likely that OpenSSL is already available. We’ll be using this to extract the files we need from the .pfx file.
- Navigate to the directory that contains the downloaded
.pfxfile, which is the certificate we downloaded in the above step. -
Run the following to extract the certificate:
openssl pkcs12 -in <yourDownloadedKeyVaultCert>.pfx -nocerts -out <yourExtractedPem>.pemYou’ll be prompted for a Import Password and a PEM pass phrase.
 Enter Import Password:
 Enter PEM pass phrase:
 Verifying - Enter PEM pass phrase:
The Import Password is empty by default as called out here when downloaded the certificate from Azure initially.
The
PEM pass phrasemust be set and cannot be left blank. Set a pass phrase and enter it again to verify it. -
Next run
openssl rsa -in <yourExtractedPem>.pem -out <yourNewKey>.keyto get the.keyfile. You’ll be prompted with apass phraseagain which should be the same one set in step 2. -
Lastly, get the server certificate with
openssl pkcs12 -in <yourDownloadedKeyVaultCert>.pfx -clcerts -nokeys -out <serverCert>.pem. You’ll be prompted for aImport Passwordagain, which is the one for the original Key Vault certificate. As mentioned above, this is empty by default so leave the prompt blank and press enter. - In total you should have 4 files, 2 of which we’ll need to bring to our Virtual Machine.
<yourDownloadedKeyVaultCert>.pfx(the original Key Vault certificate)<yourExtractedPem>.pem(the first encrypted.pem)<yourNewKey>.key(our decrypted.keyfrom<yourExtractedPem>.pem)<serverCert>.pem(our extracted certificate from<yourDownloadedKeyVaultCert>.pfx)
- We’ll need to bring
<yourNewKey>.keyand<serverCert>.pemto the Virtual Machine.
Extracting the key (.key) and certificate (.pem) - Windows terminals
If there is no option to run *NIX-like terminals then it’s possible to download a OpenSSL client for Windows. There are a few different client download options and ultimately it is up to the user to decide which download to choose from. After a successful installation the above steps for *NIX can be followed as well. The only difference here is possibly needing to use openssl.exe instead of just openssl when running the above commands.
Uploading the files to the Virtual Machine
An easy way to get the files up to the Virtual Machine is to use the scp command. The documentation on using SCP to move files to and from a Linux Virtual Machine can be used. The below can be followed as well - this should work on *NIX and Windows type terminals.
-
Run
scp <yourNewKey>.key <serverCert>.pem <yourVMUser>@<yourVMIP>:~.Example:
scp mykey.key mycert.pem user@12.345.678.910:~ - Alternatively, you can run a
scpfor each file to copy them up individually. - The directory location these files are copied to normally should not matter. The location needs to be remembered for later steps.
NOTE: This example copies the files to
/home/<user>(noted by the~in the above command). If you are trying to copy these files outside of/home/<user>you may see aPermission Deniederror depending on your user priviledges and authentication method. If so, copy them to/home/<user> (~)instead.
Apache
Installation
If Apache has not been installed yet on this Virtual Machine then the following commands can be ran:
sudo apt-get updatesudo apt-get install apache2.
After a successful installation apache2 will start to run automatically afterwards. You can check the status of apache2 with sudo systemctl status apache2.
- Browse your domain and/or Virtual Machine IP with
http://. You should now see the default Ubuntu/Apache welcome page.
NOTE: To ensure that
apache2starts after a machine reboot or stop/start, runsudo systemctl enable apache2. Otherwise you may have to manually start the service.
Enable SSL/TLS
- Navigate to /etc/apache2/sites-available. Two files should be in this directory,
000-default.confanddefault-ssl.conf. For the sake of this guide, we’ll be changingdefault-ssl.conf. - With your text editor of choice open the
default-ssl.conffile for editing. - Look for the following lines in
default-ssl.conf. By default they’re set to the below values:
    SSLCertificateFile      /etc/ssl/certs/ssl-cert-snakeoil.pem

    SSLCertificateKeyFile /etc/ssl/private/ssl-cert-snakeoil.key
We need to update these to point to our certificate and key location that we uploaded earlier. The below assumes we moved our .pem and .key into /etc/ssl/certs and /etc/ssl/private respectively
    SSLCertificateFile      /etc/ssl/certs/<serverCert>.pem

    SSLCertificateKeyFile /etc/ssl/private/<yourNewKey>.key
If you had moved this into another location, such as /home, it would look like the following:
    SSLCertificateFile      /home/myuser/<serverCert>.pem

    SSLCertificateKeyFile /home/myuser/<yourNewKey>.key
NOTE: While editing
default-ssl.confit may be good to edit any other Directives needing to be changed as desired, such asServerName.
- Save the file. Run
sudo a2ensite default-ssl.confto activate the Virtual Host. You should see an output like this:Enabling site default-ssl. To activate the new configuration, you need to run: systemctl reload apache2 - Before reloading/restarting
apache2- runsudo a2enmod sslto enable the SSL module. You should see output along the lines of the below:Considering dependency setenvif for ssl: Module setenvif already enabled Considering dependency mime for ssl: Module mime already enabled Considering dependency socache_shmcb for ssl: Enabling module socache_shmcb. Enabling module ssl. See /usr/share/doc/apache2/README.Debian.gz on how to configure SSL and create self-signed certificates. To activate the new configuration, you need to run: systemctl restart apache2 - Prior to restarting Apache run
sudo apache2ctl configtestto make sure our syntax is still valid after changing ourdefault-ssl.conffile. If it’s valid we’ll see the below output:
Syntax OK
-
We’re now okay to restart Apache. We can do this with
sudo systemctl restart apache2. Runsudo systemctl status apache2to validate Apache was able to start correctly. -
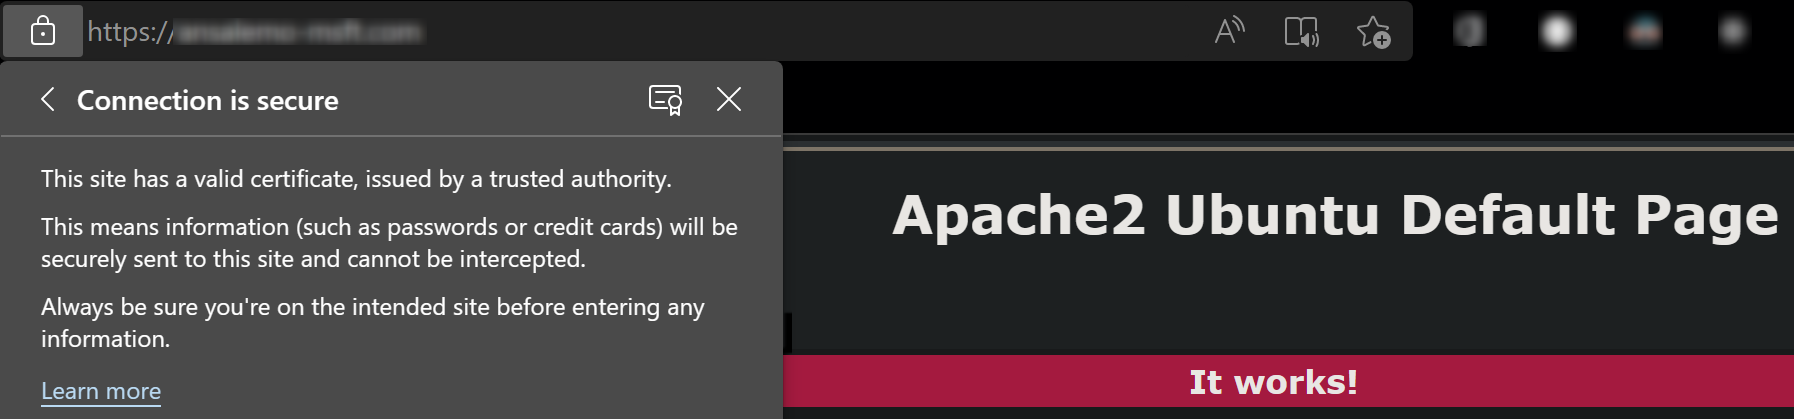
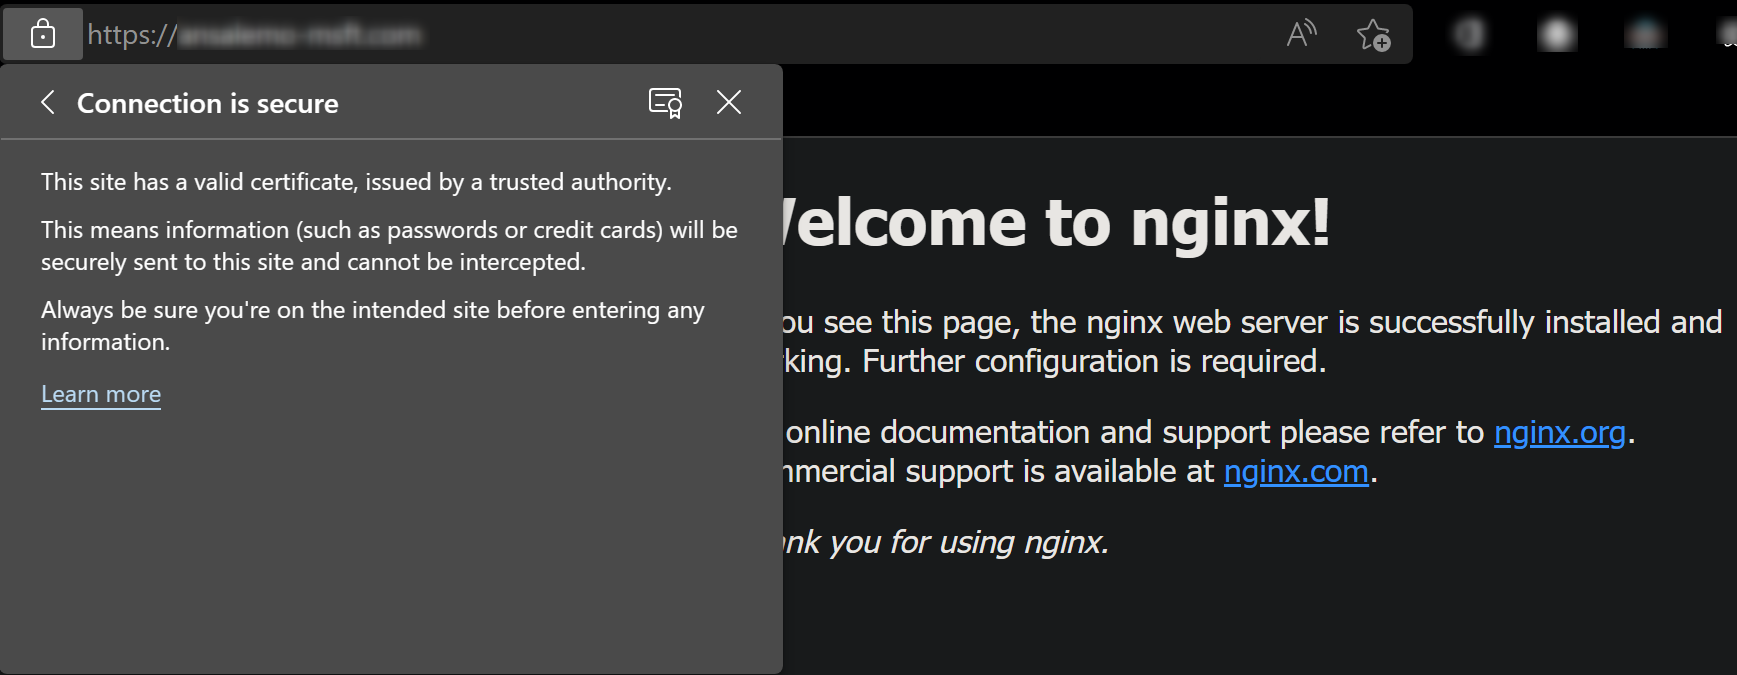
Browsing your domain with
https://should reflect it is now secured with a valid certificate.
Troubleshooting
Domain doesn’t load over HTTPS - ‘Connection Refused’
-
Ensure that the
default-ssl.conffile was activated withsudo a2ensite default-ssl.conf. If you’re using a different file instead of this one replacedefault-ssl.confwith that file instead.This will create a file of the same name under
/etc/apache2/sites-enabledthat is symlinked to the one under/etc/apache2/sites-available. Validate this file was created insites-enabledas well. - Ensure the Apache SSL module was activated with
sudo a2enmod ssl. - Any
.conffile changes or module activation will only be picked up whenapache2is restarted or reloaded. Ensure this was done for Apache after any of these changes.
Apache won’t start after making changes
- Run
sudo systemctl status apache2to check the status. This will normally show what may be wrong as well. - Ensuring a syntax check is done with
sudo apache2ctl configtestafter doing changes but before restarting/reloadingapache2can help prevent this. Syntax issues may causeapache2to fail starting up.
Browser times out trying to load the https:// domain - “site.com took to long to response”
- Ensure that the Network Security Groups (NSG’s) assigned to this Virtual Machine has port 443 allowed for traffic. This can be checked by going to the Networking tab in the Azure Portal for the Virtual Machine.
- If needed, move the priority of the Inbound Port Rule to a higher priority (lower number) if other rules are conflicting with this.
NGINX
Installation
If NGINX has not been installed yet on this Virtual Machine then the following commands can be ran:
sudo apt-get updatesudo apt-get install nginx.
After a successful installation nginx will start to run automatically afterwards. You can check the status of nginx with systemctl status nginx.
- Browse your domain and/or Virtual Machine IP with
http://. You should now see the default NGINX welcome page.
NOTE: To ensure that
nginxstarts after a machine reboot or stop/start, runsudo systemctl enable nginx. Otherwise you may have to manually start the service.
Enable SSL/TLS
- Navigate to /etc/nginx/sites-available. One file should be in this directory,
default.conf(or justdefault). For the sake of this guide, we’ll be changingdefault.confto enable SSL since NGINX allows for optional enabling of this by default in this file. - With your text editor of choice open the
default.conffile for editing. - Look for the following lines in
default.conf. By default they’re set to the below values:
# SSL configuration
#
# listen 443 ssl default_server;
# listen [::]:443 ssl default_server;
#
# Note: You should disable gzip for SSL traffic.
# See: https://bugs.debian.org/773332
#
# Read up on ssl_ciphers to ensure a secure configuration.
# See: https://bugs.debian.org/765782
#
# Self signed certs generated by the ssl-cert package
# Don't use them in a production server!
#
# include snippets/snakeoil.conf;
We’ll want to comment out the two lines containing listen for port 443 and add two directives, ssl_certificate and ssl_certificate_key. Below we again assume our certificate and key is located under /etc/ssl/certs and /etc/ssl/private respectively. Change this path to your certificate and key accordingly. The file should be updated to the below:
# SSL configuration
#
listen 443 ssl default_server;
listen [::]:443 ssl default_server;

ssl_certificate /etc/ssl/certs/<serverCert>.pem;
ssl_certificate_key /etc/ssl/private/<yourKey>.key;

# Note: You should disable gzip for SSL traffic.
# See: https://bugs.debian.org/773332
#
# Read up on ssl_ciphers to ensure a secure configuration.
# See: https://bugs.debian.org/765782
#
# Self signed certs generated by the ssl-cert package
# Don't use them in a production server!
#
# include snippets/snakeoil.conf;
NOTE: While editing
default.confit may be good to edit any other Directives needing to be changed as desired, such asserver_name.
- Save the file. To validate the file was saved with correct syntax run
sudo nginx -tfor a configuration check. If syntax is correct you should get the below output:
nginx: the configuration file /etc/nginx/nginx.conf syntax is ok
nginx: configuration file /etc/nginx/nginx.conf test is successful
- Lastly, run
sudo systemctl reload nginx. You can check the status of NGINX by runningsudo systemctl status nginx. - Browsing your domain with
https://should reflect it is now secured with a valid certificate.
Domain doesn’t load over HTTPS - ‘Connection Refused’
-
Ensure that the
default.conffile had thelistenlines uncommented as well as thessl_certificateandssl_certificate_keydirectives added. If a seperate.confwas added to use as the host file for SSL/Port 443 functionality, ensure this is added correctly by runningln -s /etc/nginx/sites-available/<newConfFile>.conf /etc/nginx/sites-enabled/<newConfFile>.conf. Symlinking in this manner is NGINX’s version of site configuration activation. -
Any
.conffile changes will only be picked up whennginxis restarted or reloaded. Ensure this was done for NGINX after any of these changes.
NGINX won’t start after making changes
- Run
sudo systemctl status nginxto check the status. This will normally show what may be wrong as well. - Ensuring a syntax check is done with
sudo nginx -tafter doing changes but before restarting/reloadingnginxcan help prevent this. Syntax issues may causenginxto fail starting up. For example:
nginx: [emerg] invalid number of arguments in "ssl_certificate" directive in /etc/nginx/sites-enabled/default:44
nginx: configuration file /etc/nginx/nginx.conf test failed
Browser times out trying to load the https:// domain - “site.com took to long to response”
- Ensure that the Network Security Groups (NSG’s) assigned to this Virtual Machine has port 443 allowed for traffic. This can be checked by going to the Networking tab in the Azure Portal for the Virtual Machine.
- If needed, move the priority of the Inbound Port Rule to a higher priority (lower number) if other rules are conflicting with this.


