Deploying Web App for Containers with CI/CD pipelines
This post will cover some ways to set up a CI/CD pipeline and deploy your image to Web App for Containers on Azure.
Overview
You can continuously build and deploy your images to Web App for Containers through GitHub Actions or Azure DevOps pipelines. Through this approach, you can simply push commits to your repository in question - and from there, will kick off the workflows defined below that will automatically build, tag, push and deploy your images to Azure Container Registry and your Web App for Container on Azure.
Prerequisites
Application Logs
IMPORTANT: Ensure that App Service Logs are enabled - review this document on how to do so.
This is important incase the application crashes due to misconfiguration of any of these profilers - given this is all at the application level, we need these logs enabled to see what may have gone wrong. You can view logging in a few ways:
- Diagnose and Solve Problems -> Application Logs
- Log Stream
- Directly through the Kudu site - such as the /newui endpoint (https://sitename.scm.azurewebsites.net/newui) or the normal Kudu site
- An FTP client
Docker Image
A custom Docker Image should be used, otherwise, one will be provided in the source files for this.
Azure DevOps pipelines
NOTE: If you do not have a Azure DevOps organization, review this documentation here to create one
We’ll use be using the project and
Dockerfilefrom this repository. You can use your own project as well.
-
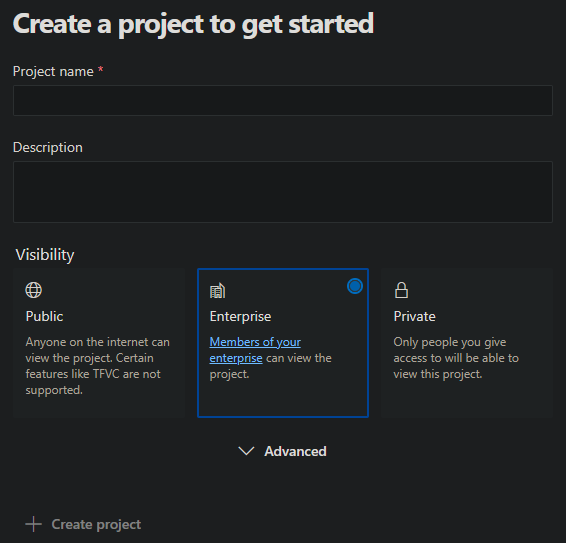
In your Azure DevOps organization, click on New Project in the upper right side of your organization.
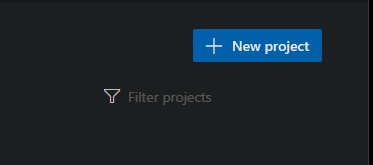
If your organization has no projects, the default page will be one to create a project.
-
Select where your repository is hosted. In this example, I’ll be choosing GitHub
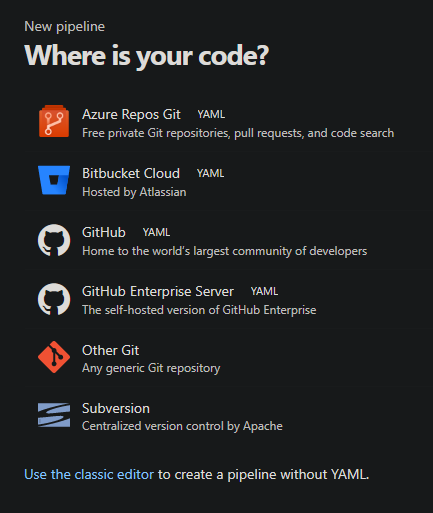
- On the next page, select the specific repository you want to use.
-
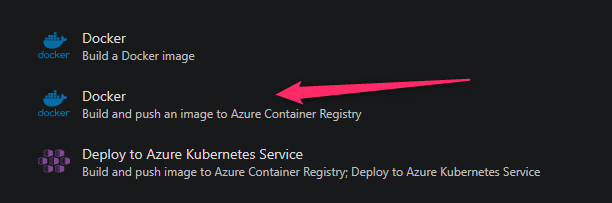
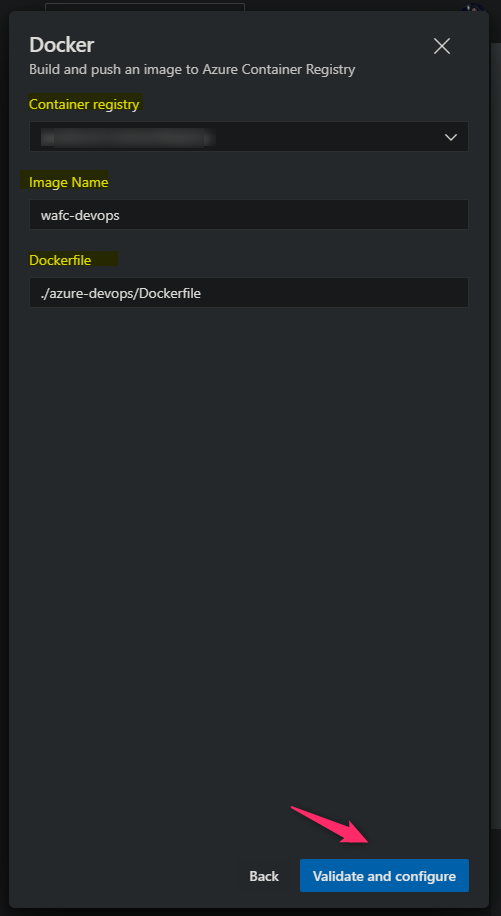
Choose the Docker template that mentions Build and push an image to Azure Container Registry.
- Choose your Subscription on the next panel
- Next, fill out Container Registry, Image Name and Dockerfile location.
- Your Container Registry needs to be located under the Subscription you previously chose
- Your Image Name is arbitrary, choose a name that fits the best for the application
- Your Dockerfile is the location of it.
- If your
Dockerfileexists in the root of the repositry put “.”. - If this exists in a sub directory, you can target it such as in the below screenshot
- If your
- This will produce the below
azure-pipelines.yml- which will be commited to your project root:
# Docker
# Build and push an image to Azure Container Registry
# https://docs.microsoft.com/azure/devops/pipelines/languages/docker

trigger:
- main

resources:
- repo: self

variables:
  # Container registry service connection established during pipeline creation
  dockerRegistryServiceConnection: '00000000-0000-0000-0000-00000000000'
  imageRepository: 'yourimagename'
  containerRegistry: 'youracr.azurecr.io'
  dockerfilePath: './Dockerfile'
  tag: '$(Build.BuildId)'

  # Agent VM image name
  vmImageName: 'ubuntu-latest'

stages:
- stage: Build
  displayName: Build and push stage
  jobs:
  - job: Build
    displayName: Build
    pool:
      vmImage: $(vmImageName)
    steps:
    - task: Docker@2
      displayName: Build and push an image to container registry
      inputs:
        command: buildAndPush
        repository: $(imageRepository)
        dockerfile: $(dockerfilePath)
        containerRegistry: $(dockerRegistryServiceConnection)
        tags: |
          $(tag)
IMPORTANT: This .yml, as it exists, will only build the image and push to your Azure Container Registry. It will not do anything else, such as deploy to an application, until we configure it to do as such.
NOTE: Service Connections is a password-less way to communicate with other services. You can read more about that here.
-
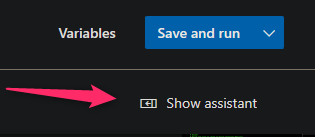
We now need to add the deployment task to deploy the image we just built and pushed to our Azure Container Registry - to our application.
Click on Show Assistant which will pop open a sidebar menu
-
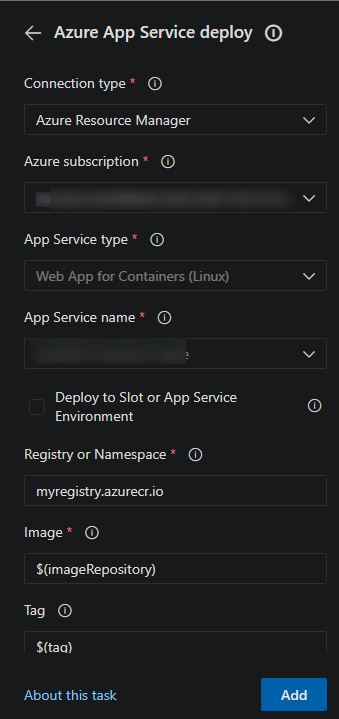
Search for the the Azure App Service deploy task - after selecting this, fill out all needed details.
- Connection Type: Leave this as is - set to Azure Resource Manager.
- Azure subscription: Choose the subscription that the application you’re deploying to is under
- App Service type: Select “Web App for Containers (Linux)”
- App Service name: Choose the Web App for Container you want to deploy to
- Registry or Namespace: Input this in the format of
yourregistry.azurecr.io - Image: Use the variable we have defined already - set this to $(imageRepository)
- Tag: Use the Tag variable we have already defined - which generates a random ID for the tag - set this to $(tag)
The UI should look like this:
NOTE: You may need to use the Authorize button to authorize the Service Connection that gets automatically created to access the selected resource. This is a one time thing.
- We’ll need to change the
.ymla bit to properly integrate the new task, the final output should look as below:
# Docker
# Build and push an image to Azure Container Registry
# https://docs.microsoft.com/azure/devops/pipelines/languages/docker

trigger:
- main

resources:
- repo: self

variables:
  # Container registry service connection established during pipeline creation
  dockerRegistryServiceConnection: '00000000-0000-0000-0000-000000000000'
  imageRepository: 'wafcdevops'
  containerRegistry: 'yourcontainerregistry.azurecr.io'
  dockerfilePath: './Dockerfile'
  tag: '$(Build.BuildId)'

  # Agent VM image name
  vmImageName: 'ubuntu-latest'

stages:
- stage: Build
  displayName: Build and push stage
  jobs:
  - job: Build
    displayName: Build
    pool:
      vmImage: $(vmImageName)
    steps:
    - task: Docker@2
      displayName: Build and push an image to container registry
      inputs:
        command: buildAndPush
        repository: $(imageRepository)
        dockerfile: $(dockerfilePath)
        containerRegistry: $(dockerRegistryServiceConnection)
        tags: |
          $(tag)

- stage: Deploy
  displayName: Deploy
  jobs:
  - job: Deploy
    displayName: Deploy
    pool:
      vmImage: $(vmImageName)
    steps:
    - task: AzureRmWebAppDeployment@4
      inputs:
        ConnectionType: 'AzureRM'
        azureSubscription: '0000000-0000-0000-0000-000000000000'
        appType: 'webAppContainer'
        WebAppName: 'yoursite'
        DockerNamespace: '$(containerRegistry)'
        DockerRepository: '$(imageRepository)'
        DockerImageTag: '$(tag)'
        # NOTE: If your container is not listening on port 80
        # Then it's highly recommended to explicitly set this App Setting to the port exposed in your Dockerfile
        AppSettings: '-WEBSITES_PORT 3000'
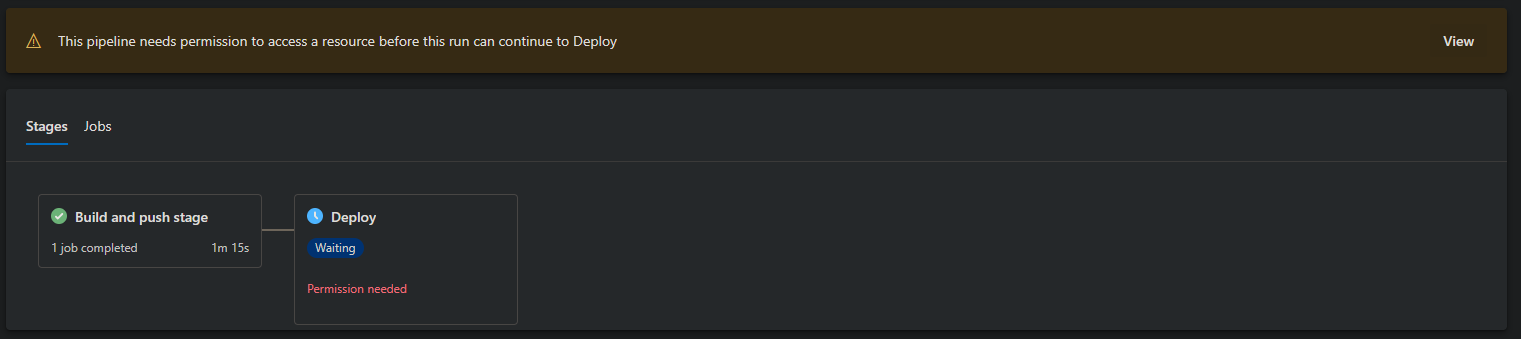
NOTE: You may need to authorize your release on the first deployment attempt. The screen will look like this - and is a one time thing:
-
At this point, the build and deployment should succeed - if you view the application’s App Settings (if this was an existing Container Registry), you’ll see that
DOCKER_CUSTOM_IMAGE_NAME,DOCKER_REGISTRY_SERVER_PASSWORD,DOCKER_REGISTRY_SERVER_URLandDOCKER_REGISTRY_SERVER_USERNAMEwere added - if Admin Credentials were enabled on the Azure Container Registry side.These settings are used from the App Service side to be able to pull the image from Azure Container Registry.
GitHub Actions
We’ll use be using the project and
Dockerfilefrom this repository. You can use your own project as well.
GitHub Actions with Web App for Containers can be easily set up through the Azure Portal. Follow these steps to configure the workflow. This will cover using Username and Password based authentication for logging into the container registry, as well as Service Principal based.
- Navigate to the Azure Portal and go to Deployment Center.
-
Fill out the details in the UI:
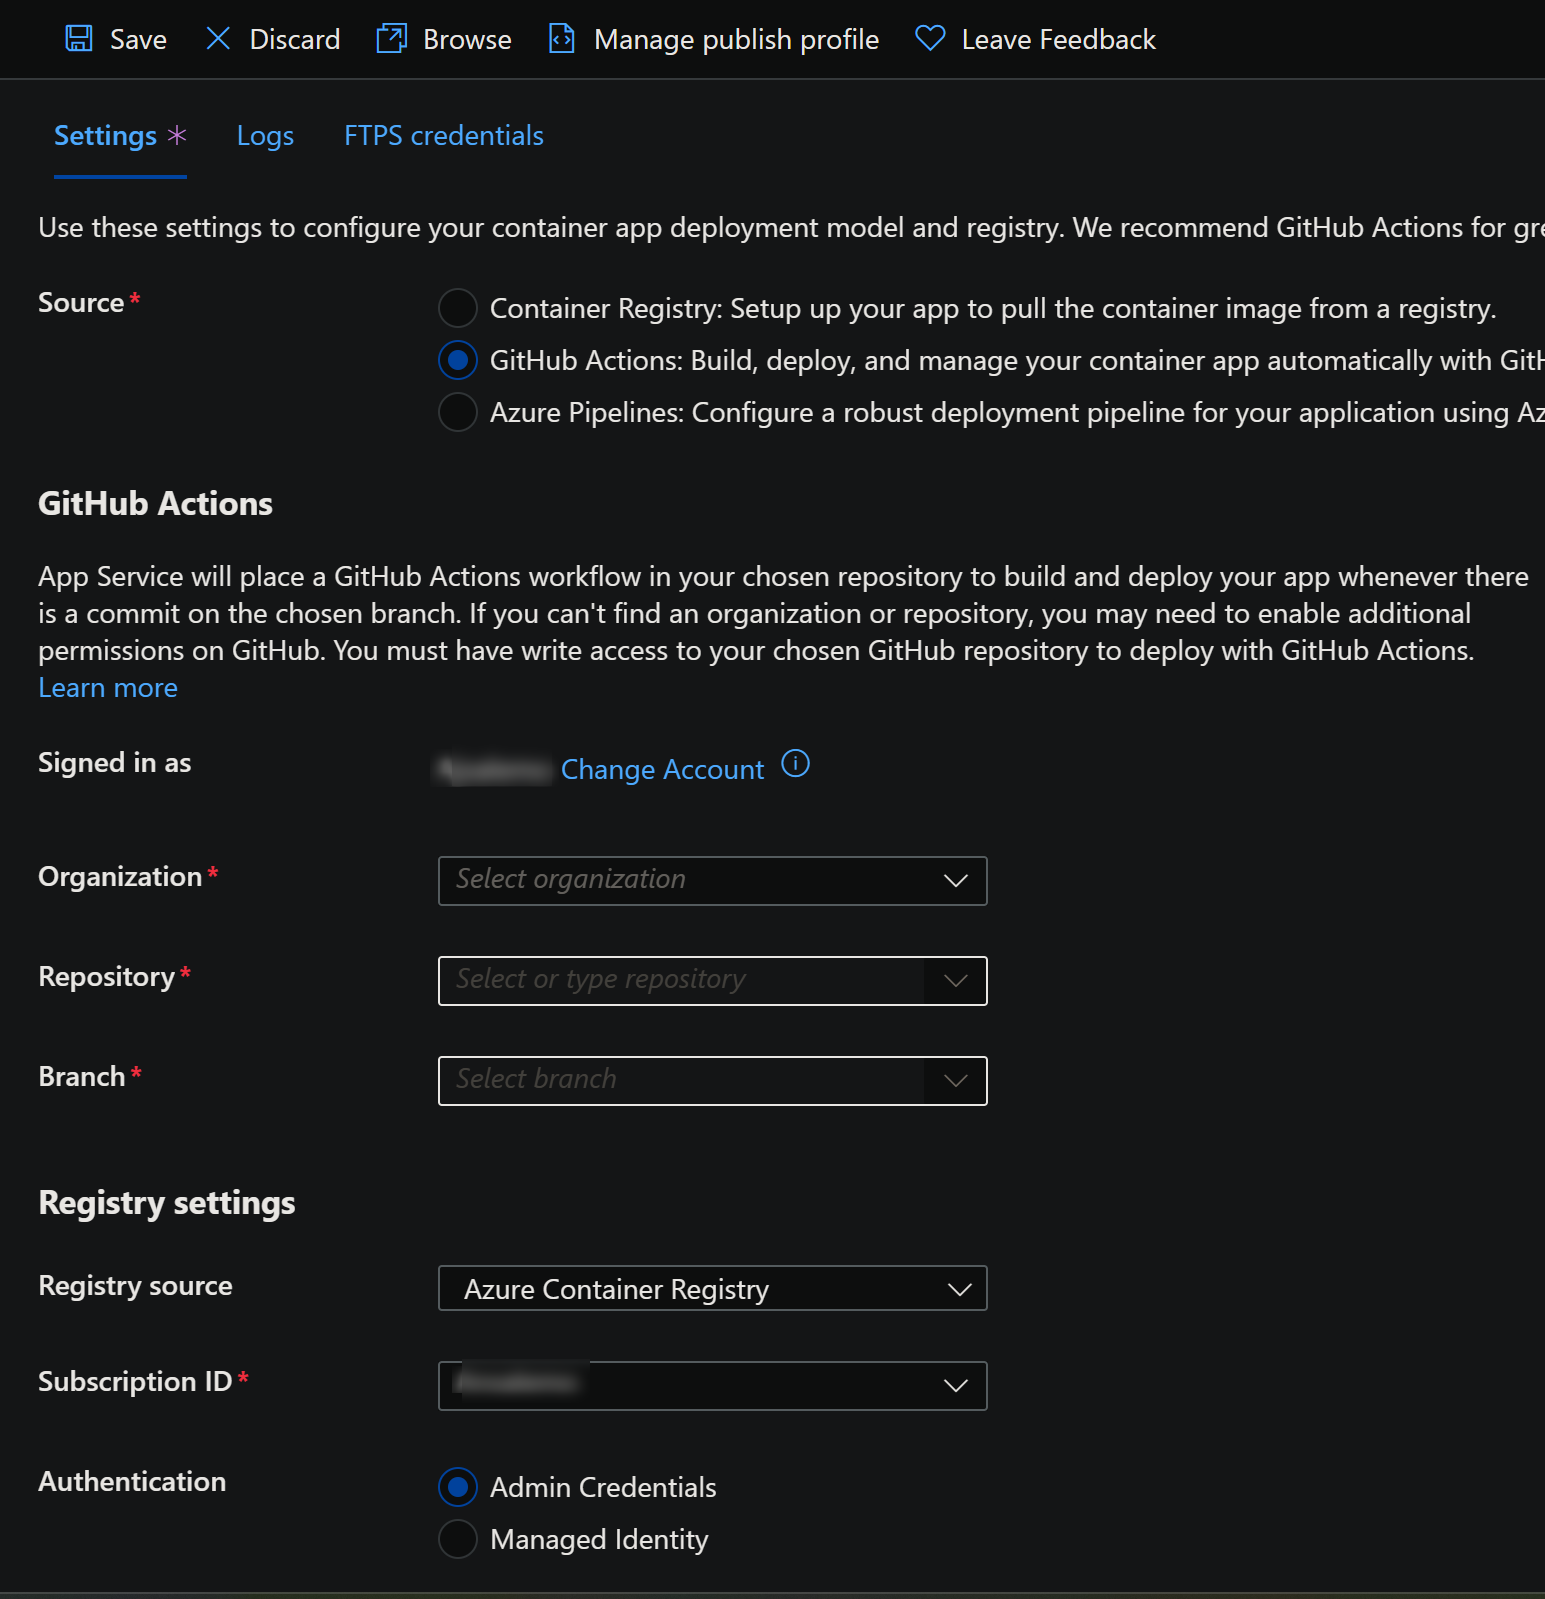
Sign into your GitHub Account.
- Organization: Select your organization in your GitHub Account
- Repository: Select the GitHub repository that contains the custom image we’ll be building from
- Branch: Select the branch from the repository to target
- Registry source: Select your registry source where the image will be pushed to and pulled from. In this example, we’ll be selecting Azure Container Registry
- Subscription ID: Select the Subscription ID of the application we’ll be deployin to.
- Authentication: If following this example, choose Admin Credentials for now, which uses username and password authentication through the registry.
Fill out the rest of the below information in the Deployment Center UI:
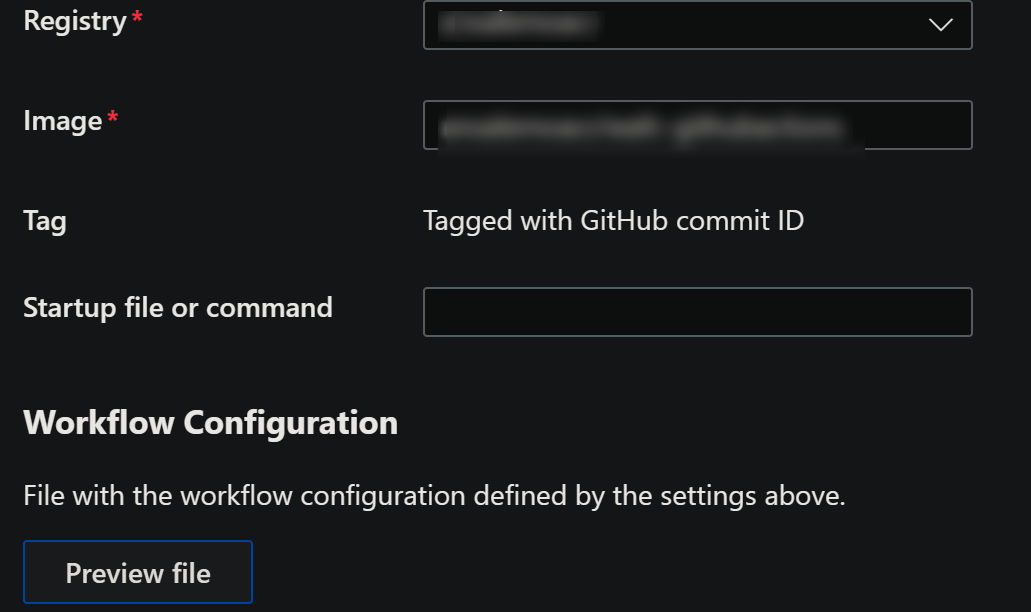
- Registry: Choose your Container Registry
- Image: Input a name for the image to be build as
- Tag: The tag is automatically set to use the GitHub commit ID for the tag, to keep it unique
You can preview the file before saving, the file in question will look like the below - which should be enough to build, push and pull the image for a working application.
# Docs for the Azure Web Apps Deploy action: https://github.com/Azure/webapps-deploy
# More GitHub Actions for Azure: https://github.com/Azure/actions

name: Build and deploy container app to Azure Web App - yoursite

on:
  push:
    branches:
      - main
  workflow_dispatch:

jobs:
  build:
    runs-on: 'ubuntu-latest'

    steps:
    - uses: actions/checkout@v2

    - name: Set up Docker Buildx
      uses: docker/setup-buildx-action@v1

    - name: Log in to registry
      uses: docker/login-action@v1
      with:
        registry: https://youracr.azurecr.io/
        username: ${{ secrets.AzureAppService_ContainerUsername_00000000000000000000000000000000 }}
        password: ${{ secrets.AzureAppService_ContainerPassword_00000000000000000000000000000000 }}

    - name: Build and push container image to registry
      uses: docker/build-push-action@v2
      with:
        push: true
        tags: youracr.azurecr.io/wafc-githubactions:${{ github.sha }}
        file: ./Dockerfile

  deploy:
    runs-on: ubuntu-latest
    needs: build
    environment:
      name: 'production'
      url: ${{ steps.deploy-to-webapp.outputs.webapp-url }}

    steps:
    - name: Deploy to Azure Web App
      id: deploy-to-webapp
      uses: azure/webapps-deploy@v2
      with:
        app-name: 'yoursite'
        slot-name: 'production'
        publish-profile: ${{ secrets.AzureAppService_PublishProfile_00000000000000000000000000000000 }}
        images: 'youracr.azurecr.io/wafc-githubactions:${{ github.sha }}'
This will login to the registry first, build the image afterwards and push this to the selected Container Registry.
After this, it sets the application to pull the image and tag we just pushed to Azure Container Registry.
The App Settings DOCKER_REGISTRY_SERVER_PASSWORD, DOCKER_REGISTRY_SERVER_URL and DOCKER_REGISTRY_SERVER_USERNAME will be automatically added - if Admin Credentials were enabled on the Azure Container Registry side. Note the exclusion of the DOCKER_CUSTOM_IMAGE App Setting, compared to the Azure DevOps example.
Service Principal Authentication
Instead of using username and password authentication, you can use Service Principals to authenticate with the registry.
- See here for creating a new Service Principal to use in this flow with needed permissions.
- See here for using an existing Service Principal to use in this flow with needed permissions.
To do this, the Service Principal will need the AcrPush role, which includes docker pull and docker push access.
We need to add the Service Principal Client (App) ID and Service Principal Client Secret (Password), this will need to be done from the GitHub Side.
- Go to your GitHub Repository that is being used for this deployment
- Go to Secrets -> Secrets and Variables -> Actions


- In the Actions secrets and variables view - click on New repository secret and add the following settings:
SP_APP_ID: This is your Service Principal Client (App) IDSP_PASSWD: This is your Service Principal Client Secret that you’ll need to create
- Lastly, change your
.yamlto the below:
name: Build and deploy container app to Azure Web App - yoursite

on:
  push:
    branches:
      - main
  workflow_dispatch:

jobs:
  build:
    runs-on: 'ubuntu-latest'

    steps:
    - uses: actions/checkout@v2

    - name: Set up Docker Buildx
      uses: docker/setup-buildx-action@v1

    // This is the line we add to authenticate via Service Principal
    // We use this instead of docker/login-action@v1
    - name: Log in to registry
      run: docker login yourregistry.azurecr.io --username ${{ secrets.SP_APP_ID }} --password ${{ secrets.SP_PASSWD }}


    - name: Build and push container image to registry
      uses: docker/build-push-action@v2
      with:
        push: true
        tags: yourregistry.azurecr.io/wafc-githubactions:${{ github.sha }}
        file: ./Dockerfile

...rest of your yaml
If you instead wanted to stay inline with more of what the default template uses, you can reuse the docker/login-action@v1 task. Below is a full example. You can also plug the above example in that doesn’t use docker/login-action@v1 but rather only the docker cli as well in the build portion of the workflow, if desired.
Since the Service Principal was already configured to use AcrPush, we can use it to authenticate via our DOCKER_REGISTRY_SERVER_PASSWORD and DOCKER_REGISTRY_SERVER_USERNAME to pull our image on App Service.
name: Build and deploy container app to Azure Web App - yoursite

on:
  push:
    branches:
      - main
  workflow_dispatch:

jobs:
  build:
    runs-on: 'ubuntu-latest'

    steps:
    - uses: actions/checkout@v2

    - name: Set up Docker Buildx
      uses: docker/setup-buildx-action@v1

    - name: Log in to registry
      uses: docker/login-action@v1
      with:
        registry: https://youracr.azurecr.io/
        username: ${{ secrets.AZURE_SP_CLIENT_ID }}
        password: ${{ secrets.AZURE_SP_CLIENT_SECRET }}


    - name: Build and push container image to registry
      uses: docker/build-push-action@v2
      with:
        push: true
        tags: youracr.azurecr.io/wafc-githubactions:${{ github.sha }}
        file: ./Dockerfile

  deploy:
    runs-on: ubuntu-latest
    needs: build
    environment:
      name: 'production'
      url: ${{ steps.deploy-to-webapp.outputs.webapp-url }}

    steps:
    # You can use this to set App Settings - see here on setting this up - https://github.com/marketplace/actions/azure-app-service-settings
    - uses: azure/login@v1
      with:
        creds: '${{ secrets.AZURE_CREDENTIALS }}'

    - uses: azure/appservice-settings@v1
      with:
        app-name: 'yoursite'
        app-settings-json: |
          [
            {
              "name": "WEBSITES_PORT",
              "value": "3000",
              "slotSetting": false

            },
            {
                "name": "DOCKER_REGISTRY_SERVER_PASSWORD",
                "value": "${{ secrets.AZURE_SP_CLIENT_SECRET }}",
                "slotSetting": false
            },
            {
                "name": "DOCKER_REGISTRY_SERVER_URL",
                "value": "https://${{ secrets.AZURE_CONTAINER_REGISTRY_URL }}",
                "slotSetting": false
            },
            {
                "name": "DOCKER_REGISTRY_SERVER_USERNAME",
                "value": "${{ secrets.AZURE_SP_CLIENT_ID }}",
                "slotSetting": false
            }
          ]

    - name: Deploy to Azure Web App
      id: deploy-to-webapp
      uses: azure/webapps-deploy@v2
      with:
        app-name: 'yoursite'
        slot-name: 'production'
        images: 'youracr.azurecr.io/wafc-githubactions:${{ github.sha }}'
You can additionally configure Managed Identity to pull the image on App Service, or, you can use this code snippet to set otherwise required docker related App Setting used for pulling the image on the App Service.
Adding App Settings
For parity with Azure DevOps, the below shows how to integrate adding App Settings to this flow, as mentioned in the Azure DevOps section - if you’re not using a container that listens on port 80 (in those example, port 3000) - you should be using the WEBSITES_PORT App Setting.
To get set up on authentication, review this documentation for using the azure/appservice-settings@v1 and azure/login@v1 tasks.
NOTE: If you have an existing Service Principal, you can add the JSON below to authenticate with the azure/login task:
{
  "clientId": "00000000-0000-0000-0000-000000000000",
  "clientSecret": "yoursecret",
  "subscriptionId": "00000000-0000-0000-0000-000000000000",
  "tenantId": "00000000-0000-0000-0000-000000000000"
}
Add the below JSON into your Deploy stage:
- uses: azure/login@v1
  with:
    creds: '${{ secrets.AZURE_CREDENTIALS }}'

- uses: azure/appservice-settings@v1
  with:
    app-name: 'yourapp'
    app-settings-json: '[{ "WEBSITES_PORT": "3000" }]'
Troubleshooting
Application Error :(
If your application is showing “Application Error :(“ after deployment, then review the prerequisites on how to enable and find your application logs.
This is normally indicative of an application error - although a failed Docker image pull can cause this as well.
It’s imperative to review these logs to have a better understanding of the issue
DOCKER_* App Settings are empty
If this is after a brand new Azure Container Registry was created - The Admin User is disabled by default. Enabling this enables password-based authentication.
Therefor, if you try to run the above pipeline without this (and without either Managed Identity or some other authentication for a pull) - these variables can’t populate, and the pull will fail.
Go to your Azure Container Registry -> Access keys tab to grab the needed values and add these to your application settings.
unauthorized: authentication required
If during the process of trying to push to your registry you get this error - then review this Azure Container Registry troubleshooting document.
This error can manifest as well from an issue with the Service Connection that’s used for authentication with the registry. In a typical scenario, this is automatically created and can be found under Service Connections in your project - otherwise, one can be manually created as well. Ensure this is targetting the correct registry.
For GitHub Actions (if using a Service Principal): This can happen in a few scenarios - such as: Error response from daemon: Get “https://***.azurecr.io/v2/”: unauthorized: Invalid clientid or client secret.
- Check that the Service Principal Client ID is correct and scoped with RBAC roles properly
- Check that the Client Secret is correct and using the Client Secret Value (and not Client Secret - Secret ID)
‘manifest not found’, tag not found, or image not found
This can happen if the image or tag in the Deploy task, for either GitHub Actions or Azure DevOps pipeline - is different than what was built and tagged in the Stage task.
This is because we may be pulling a non-existant image and/or tag combination. Ensure the image and/or tag is the same name and/or variable throughout the pipeline if dealing with a single image build.
OCI runtime create failed: container_linux.go:380:
When the container is trying to be created to be ran on App Service - you may see this - OCI runtime create failed: container_linux.go:380starting container process caused: exec: "/some/entrypoint.sh" permission denied: unknown.
When building locally, the image may work fine - however, when building on the DevOps agent - and pulling the same image to your local machine, you may get this same issue.
This depends on the Dockerfile and instructions - but this can be most likely attributed to your container entrypoint not having executable permissions.
To resolve this, add a RUN chmod +x /some/entrypoint.sh instruction, and rebuild the image in the pipeline.


