Using a Dapr Secret Store with Azure Key Vault to source credentials for a Dapr State Store
This post will cover using a Dapr Secret Store that grabs secrets from Azure Key Vault - we can then use this configured store to source credentials for other components. This post will be walking through setting up a State Store component.
This walkthrough will be using the Azure Portal. However, the same can be done through ARM or AZ CLI.
Prerequisites
Container App and environment
Make sure that a Container App and Environment are already created. Follow this Azure Portal-based quickstart here.
Azure Key Vault
Create an Azure Key Vault or use an existing one - see here on how to create one through the Azure Portal.
Storage Account
Create an Azure Storage Account - the component in this post is being set up to use Dapr’s State Management component with Blob Storage. Follow this link to create a Storage Account here - you can review how to create a Container for your Blobs here, as well.
Enable Dapr on the application
Step 1 - Dapr
- Go to the Dapr blade on the Container App and select Enabled.
-
A UI like the below will appear:
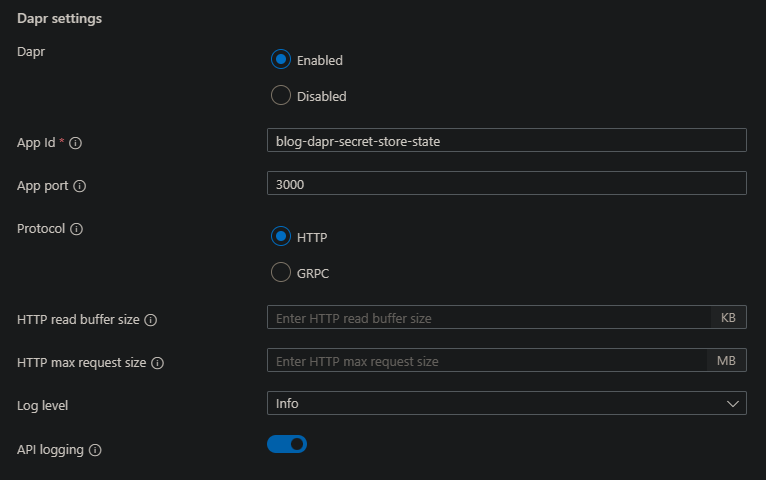
Let’s break this down:
- Dapr: Keep this set to Enabled
- App Id: This is an arbitrary name, but is important remember for later. If you have other microservices depending on this name, make sure it matches to what those applications expect.
- App port: This should be set to the port you use for Ingress on this application.
- Protocol: In this example, we’re setting this to HTTP.
- Log Level: Choose a log level
- API logging: Enable this to see application to Dapr calls.
- Click Save.
Enable the Dapr Secret Store
Step 1 - Managed Identity
To connect securely to our Azure Key Vault, which is we’re we’ll pull our secrets from, we need to enable Managed Identity for authentication as explained here.
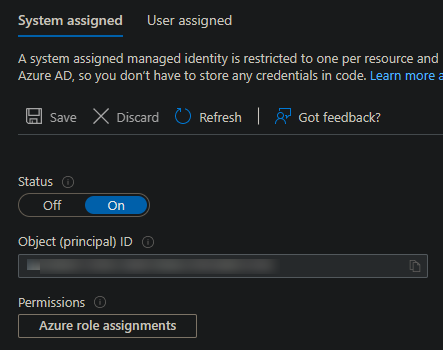
- Go to the Identity blade in your Azure Container App and turn System assigned identity to “On” and then click Save.
NOTE: If you want to use User Assigned identities, read here on how to create one.
-
This will reload the UI with an Object (principal) ID, take note of this ID for later. It will also load a “Permissions” button.
-
We’ll give this identity some permissions for Key Vault Secret access. The access level here may vary depending on project and organization. Click on the Azure role assignments button - this will take you to another UI where you will next click the Add role assignment (Preview) button.
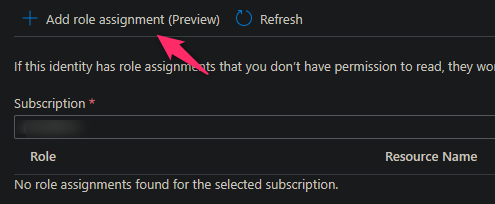
- On the blade that pops up, choose the following:
- Scope: Key Vault
- Subscription: The subscription for this Key Vault
- Resource: Choose the Key Vault you want to access, which should be under the subscription chosen above
- Role: This example will use Key Vault Secrets User
Click save after this is filled out. You’ll see a view like this afterwards with the changes:

Step 2 - Key Vault permissions and secrets
To properly access secrets, we need to give our Managed Identity the proper access policy.
- Go to the Key Vault that is being added to Dapr.
- Select the Access Policies blade.
- Click Create to create an Access Policy.
-
This will open a new UI with 4 options - Permissions, Principal, Application (optional) and Review + Create.

- For Permissions, select at least the Get Secret Permission under Secret Management Operations.
- For Principal, use the Object ID discussed earlier to find the Managed Identity. Selecting this will also let the Application (optional) tab to be skipped.
- After going through this selection, create the policy under Review + create.
-
Ensure the credentials that are being stored as secrets are created ahead of time. Since we’re on the Key Vault page now, go to the Secrets blade and select the Generate/import button to create a secret. We’ll create 3 here, one for the Storage Account name, Storage Account Container and Storage Account key with the following names:

Step 3 - Create the Dapr Secret Store component
We’ll now be creating the Secret Store to be used with out State Management component later.
-
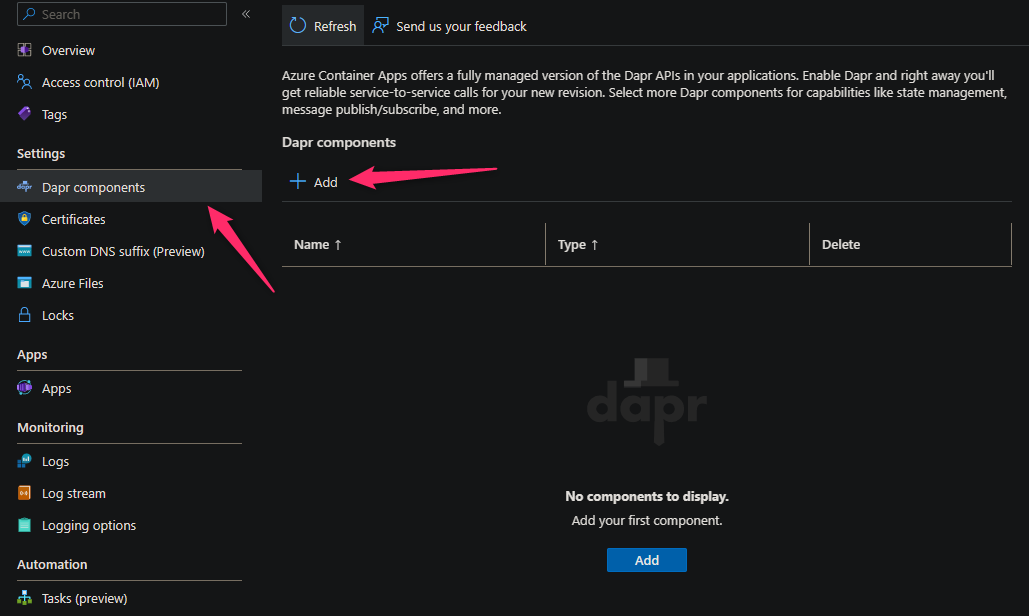
Go to your Container App Environment and select the Dapr components blade. Click *Add to create a new component.
-
Following this approach, let’s create the Secret Store itself:
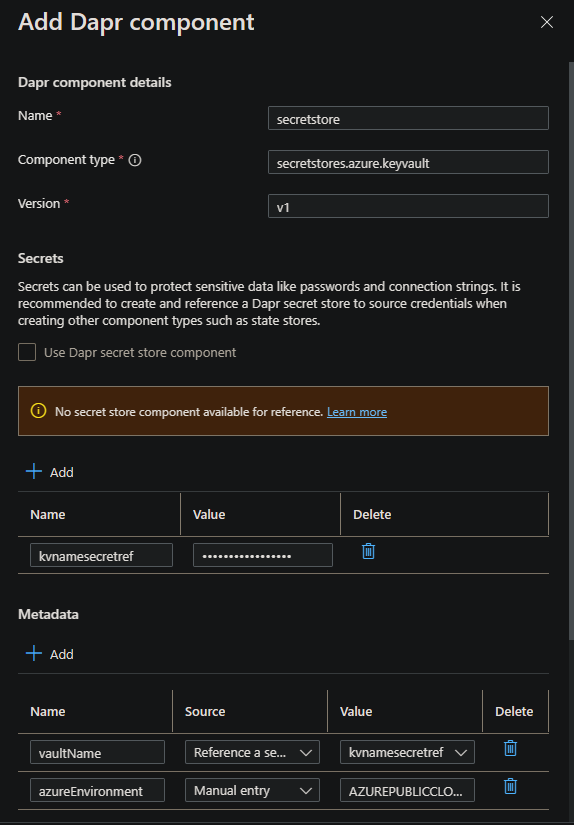
NOTE: Ignore the message regarding “no secret store component available for reference” - this component is to create said store.
Let’s break this down:
- Name: An arbitrary name can go here. This is the name of your component
- Component type: It must be
secretstores.azure.keyvault - Version: It must be
v1 - Secrets: Add a secret with an arbitrary name with just the value of your Key Vault name (not the full Key Vault URL)
- Metadata:
- Add a key of
vaultNamewith a reference to the secret you just created that holds the Key Vault name. Set the source to “Reference a secret” - Add a key of
azureEnvironmenttoAZUREPUBLICCLOUD
- Add a key of
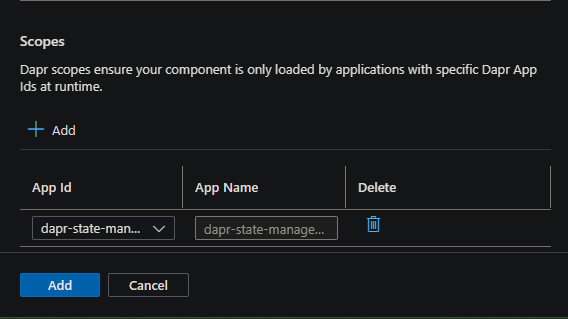
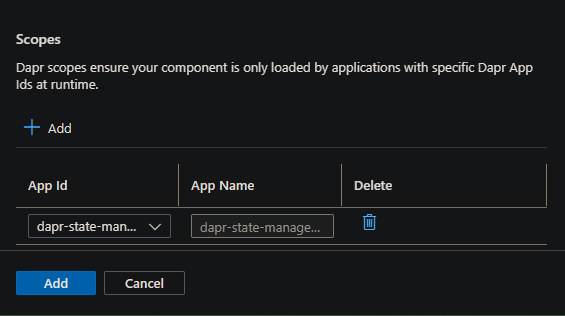
- Scopes:
- Set the App Id to the Container App created earlier (or an existing one being used)
- Click Add to save the component. After a few seconds, the Dapr component should show under the Dapr components blade.
Enable the Dapr State Store
With our Secret Store now created, we can use this to source credentials needed for our State Store.
Step 1 - Create the Dapr State Store component
-
Go to your Container App Environment and select the Dapr components blade. Click Add to create a new component. The
statestorecomponent should be visible after following the above steps.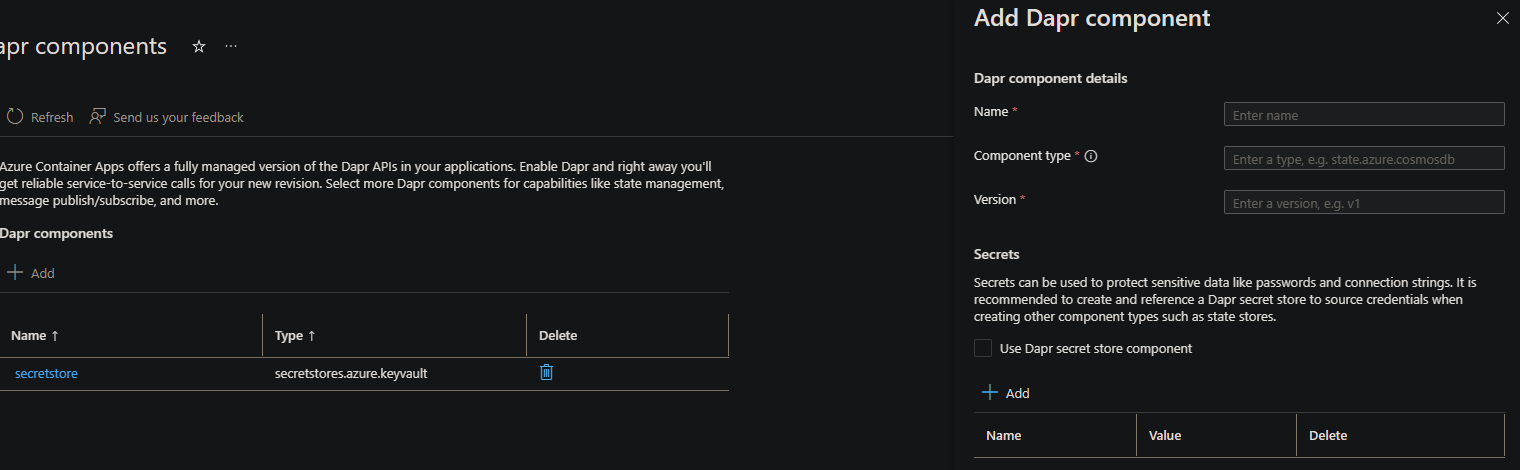
-
We’ll be using Azure Blob Storage for the state store. You can review the Dapr spec for this here. Following the spec, we’ll create the component in the portal as follows:
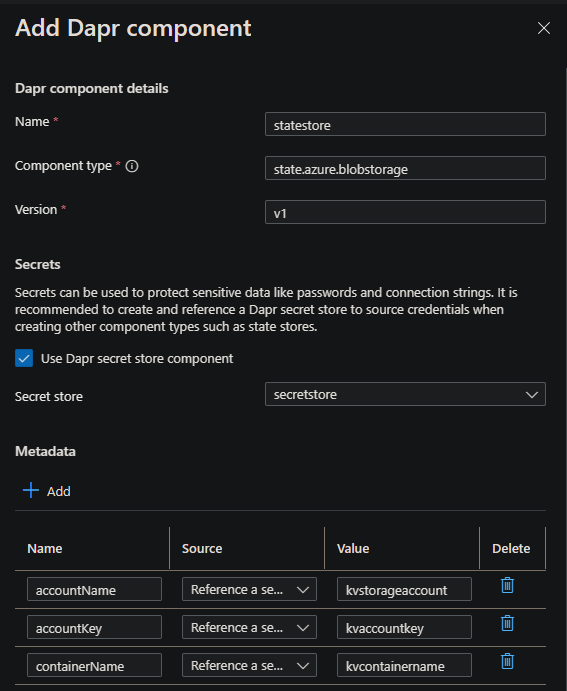
Let’s break this down:
- Name: An arbitrary name can go here. This is the name of your component - however, this must match the name of the statestore you’re referencing to within your codebase - else you will get a
ERR_STATE_STORE_NOT_CONFIGUREDmessage. - Component type: We use
state.azure.blobstoragefor this example - Version: It must be
v1 - Secrets: Select the “Use Dapr secret store component” checkbox. This should populate with the Secret Store previously configured. Use this.
- Metadata:
- Add a key of
accountName. Set the source to “Reference a secret”. The value should be the name of the secret within your Azure Key Vault. - Add a key of
accountKey. Set the source to “Reference a secret”. The value should be the name of the secret within your Azure Key Vault. - Add a key of
containerName. Set the source to “Reference a secret”. The value should be the name of the secret within your Azure Key Vault.
- Add a key of
- Scopes:
- Set the App Id to the Container App created earlier (or an existing one being used)
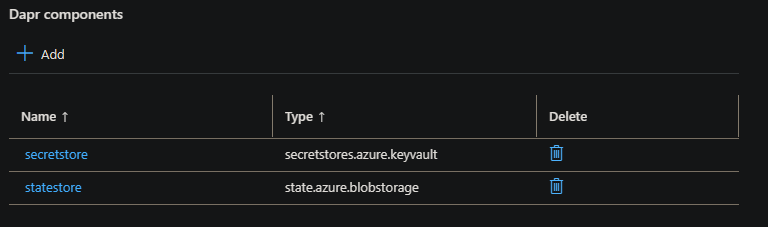
-
You should now see both the Secret Store and State Store components configured:
Test the application
Ideally, following the steps above, should have a running application that can persist state to Azure Blob Storage.
In your Logs blade for the application, you can run the below query which will show Dapr specific logging. We can confirm our components were successfully loaded.
ContainerAppConsoleLogs_CL
| where ContainerAppName_s == "blog-dapr-secret-store-state"
| where Log_s contains "msg=\"component loaded. name:"
| project time_t, Log_s, ContainerAppName_s
Which should show something like the following:
level=info msg="component loaded. name: secretstore, type: secretstores.azure.keyvault/v1"
....
level=info msg="component loaded. name: statestore, type: state.azure.blobstorage/v1"
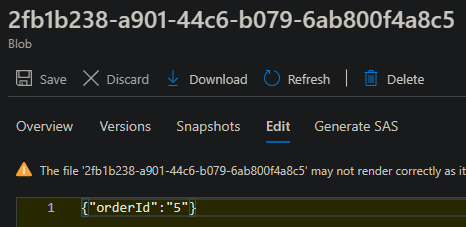
Reviewing your Blob storage should further confirm state is getting persisted if you’re using Dapr API’s to create state. Using an application which uses the below code:
...
const stateUrl = `http://localhost:${daprPort}/v1.0/state/${stateStoreName}`;

const state = [
    {
      // uuid() is a function from the uuidv4 NPM package
      // This example is reduced for simplicity
      key: uuid(),
      value: data,
    },
  ];

await fetch(stateUrl, {
    method: "POST",
    body: JSON.stringify(state),
    headers: {
    "Content-Type": "application/json",
    },
});
...
We can confirm a Blob with a random uuid4 key and a value of the following was created after following the approach in this blog post:
Troubleshooting:
ECONNREFUSED for port 3500
Dapr uses port 3500, which this would likely indicate your component wasn’t saved and/or Dapr is not enabled - a Dapr sidecar container should be running to help field these API calls that these Components created above would handle.
This may manifest as the below:
{
    "message": {
        "cause": {
            "errno": -111,
            "code": "ECONNREFUSED",
            "syscall": "connect",
            "address": "::1",
            "port": 3500
        }
    }
}
Ensure that:
- Dapr is enabled
- The component was properly saved
- There is no issues with the Dapr side care - you can use your Log Analytics workspace to view logging.
Review Application Logging documentation here for further logging options to help troubleshoot.
Revision is stuck provisioning or fails
There are multiple reasons why a Container App revision may go into a failed state - as described here.
If this is the case, follow the steps here to use your Log workspace to run these queries to help shed further light on what may be the blocker.
In the context of this post, you can run the below query in your Log workspace:
ContainerAppConsoleLogs_CL
| where Log_s contains "level=err"
| project Log_s
One possible reason is either your Managed Identity does not have correct permissions, or the Key Vault access policies themselves are not set correct. In which case, this would generate a HTTP 403 - and cause the revision to go into a “failed” state since this logic is ran at container startup:
level=error msg="error getting secret: GET https://some-keyvault.vault.azure.net/secrets/secretname/\n--------------------------------------------------------------------------------\nRESPONSE 403: 403 Forbidden\nERROR CODE: Forbidden\n--------------------------------------------------------------------------------\n{\n \"error\": {\n \"code\": \"Forbidden\",\n \"message\": \"The user, group or application 'appid=00000000-0000-0000-0000-000000000000;oid=00000000-0000-0000-0000-000000000000;iss=https://sts.windows.net/00000000-0000-0000-0000-000000000000/' does not have secrets get permission on key vault 'some-keyvault


