How to set Nginx headers
This post will cover how you can modify Nginx headers, in specific for security perspective but it applies for any custom header needed.
Note: This is just a reference in how to do it, the values posted here are just examples and these are not recommended to use in production scenarios, every app’s purpose is different and will require validation for the best security headers and be tested in a non-production environments first.
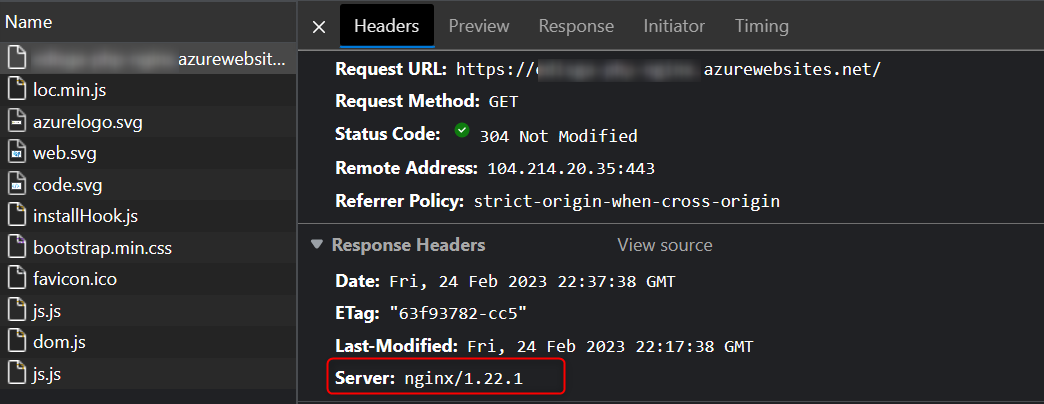
Server Header
As part of the best recommendations for hardening your server is to remove the nginx version, you can do it following the next steps:
App Service Linux
- SSH your web app through
https://SITE-NAME-HERE.scm.azurewebsites.net/webssh - Copy the existing
nginx.conffile withcp /etc/nginx.conf /home/site/ - Modify
nginx.confwithnano /home/site/nginx.conf -
Uncomment
server_tokens offunder http section: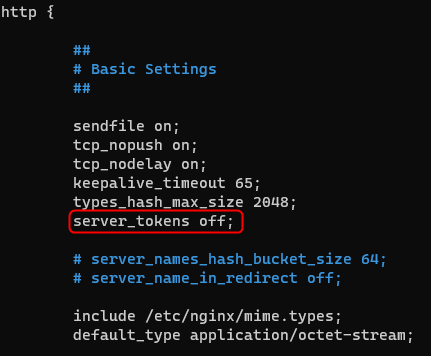
- Save (
Control + o) and thenEnterand close (Control + x) -
Create a startup script in any location inside home directory, example:
/home/site/startup.shwith the following content:#!/bin/bash cp /home/site/nginx.conf /etc/nginx/nginx.conf service nginx reload -
Update
Startup Commandusing Azure Portal fromConfiguration->General Settingswith the startup script location/home/site/startup.sh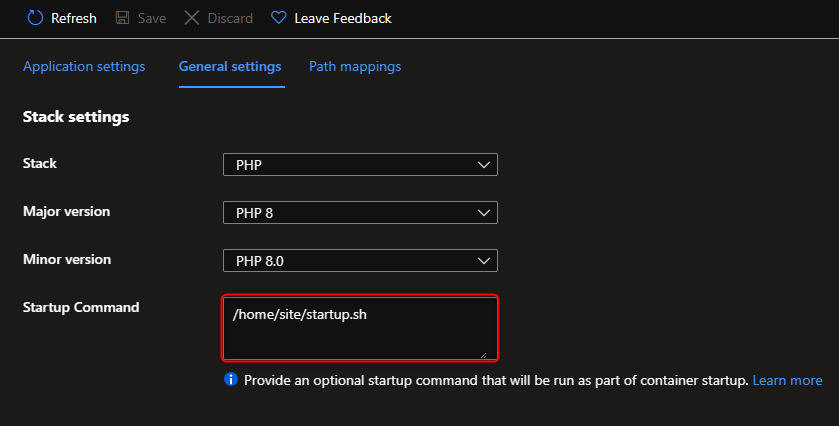
Or using Azure CLI:
az webapp config set --resource-group <resource-group-name> --name <app-name> --startup-file "/home/site/startup.sh"
Azure Virtual Machine
These steps can be applied for Debian based distributions.
- Modify
nginx.confwithsudo nano /etc/nginx/nginx.conf -
Uncomment
server_tokens offunder http section: - Save (
Control + o) and thenEnterand close (Control + x) - Restart nginx with
sudo service nginx restartand test the configuration withsudo nginx -tfor any typo or issue.
Security Headers
You can use add_header directive to add security headers that your server needs, here is a list of the most common ones:
- X-Frame-Options
- Strict-Transport-Security (HTTP Strict Transport Security (HSTS))
- X-XSS-Protection
- Content-Security-Policy (Content Security Policy (CSP))
- Referrer-Policy
App Service Linux
- SSH your web app through
https://SITE-NAME-HERE.scm.azurewebsites.net/webssh - Copy the existing
defaultfile withcp /etc/nginx/sites-enabled/default /home/site/ - Modify
defaultwithnano /home/site/default -
Under
servertag add the security headers:add_header X-Frame-Options "SAMEORIGIN"; add_header Strict-Transport-Security "max-age=31536000; includeSubdomains; preload"; add_header X-XSS-Protection "1; mode=block"; add_header Content-Security-Policy "default-src 'self' http: https: data: blob: 'unsafe-inline'" always; add_header Referrer-Policy "strict-origin";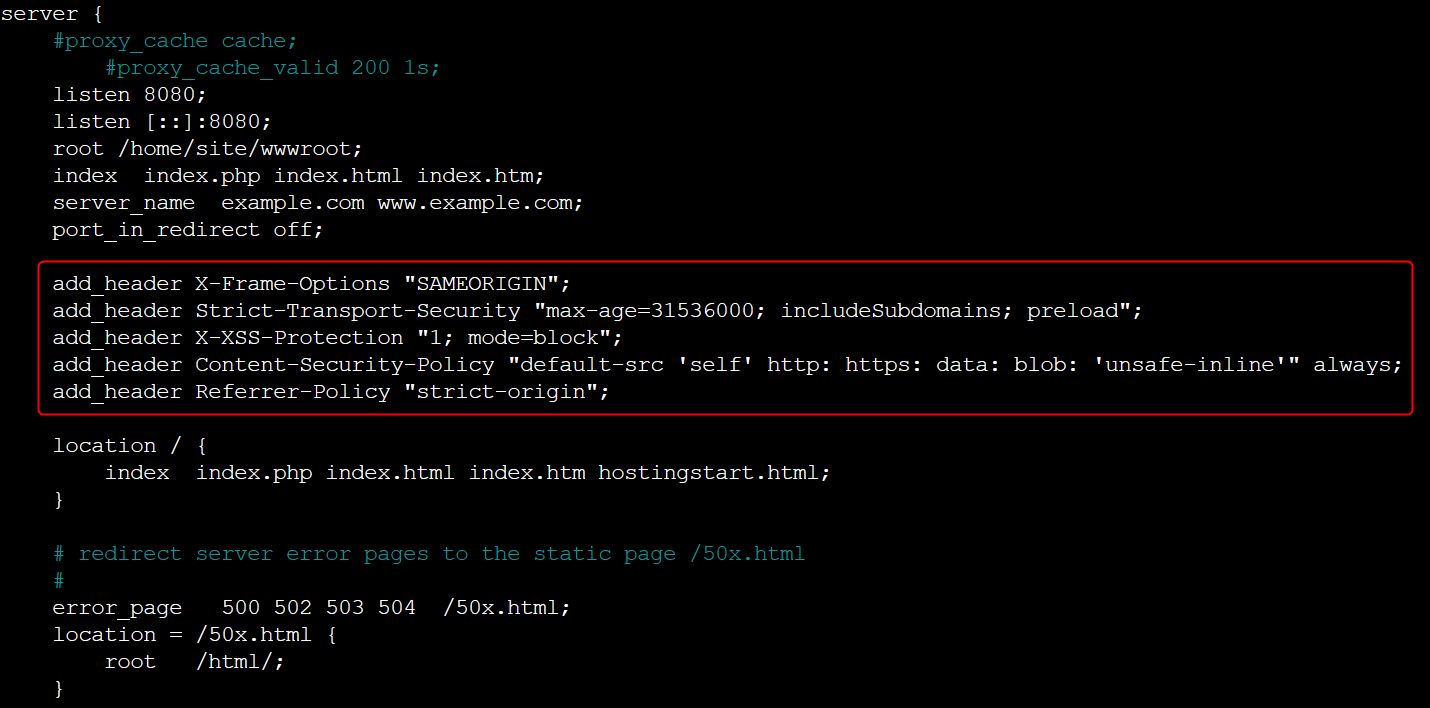
- Save (
Control + o) and thenEnterand close (Control + x) -
Create a startup script in any location inside home directory, example:
/home/site/startup.shwith the following content:#!/bin/bash cp /home/site/default /etc/nginx/sites-enabled/default service nginx reload -
Update
Startup Commandusing Azure Portal fromConfiguration->General Settingswith the startup script location/home/site/startup.shOr using Azure CLI:
az webapp config set --resource-group <resource-group-name> --name <app-name> --startup-file "/home/site/startup.sh"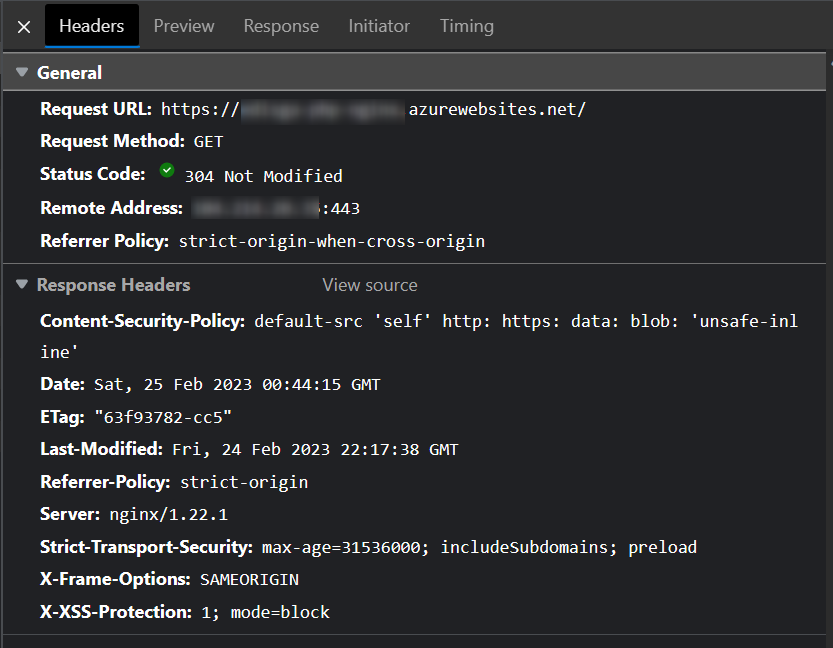
Azure Virtual Machine
- Modify
defaultwithsudo nano /etc/nginx/sites-enabled/default -
Under
servertag add the security headers:add_header X-Frame-Options "SAMEORIGIN"; add_header Strict-Transport-Security "max-age=31536000; includeSubdomains; preload"; add_header X-XSS-Protection "1; mode=block"; add_header Content-Security-Policy "default-src 'self' http: https: data: blob: 'unsafe-inline'" always; add_header Referrer-Policy "strict-origin"; - Save (
Control + o) and thenEnterand close (Control + x) - Restart nginx with
sudo service nginx restartand test the configuration withsudo nginx -tfor any typo or issue.
Note: If you are using Let’s encrypt, cerbot will add this configuration
include /etc/letsencrypt/options-ssl-nginx.confwhich can be conflicting with security headers, review if there is any header that is overwritten in this file.
Additional references
You can find other ways to edit response headers in App Service Linux using code, or services as Application Gateway, Azure Front Door, etc in this reference. “Editing Response Headers on Linux App Service”


