Deploying Reflex Applications to Azure Container Apps
This post will cover deploying Reflex Applications to Azure Container Apps.
Deploying Reflex Application to Azure Container Apps
Reflex is an open-source framework for quickly building beautiful, interactive web applications in pure Python.
This tutorial will cover how to deploy it to Azure Container Apps, building and storing the image using Azure Container Registry.
Prequistes:
- Python installed on your development machine.
- Azure CLI installed on your local machine.
- Azure Container Registry under your Azure Subscription.
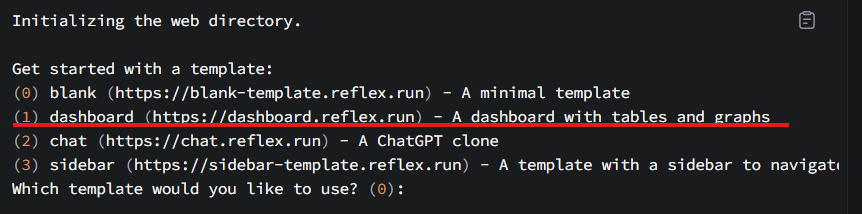
Initailize your reflex application.
Follow the instructions in the reflex quickstart documentation to get started.
For this app we will use the Reflex DashBoard Template.
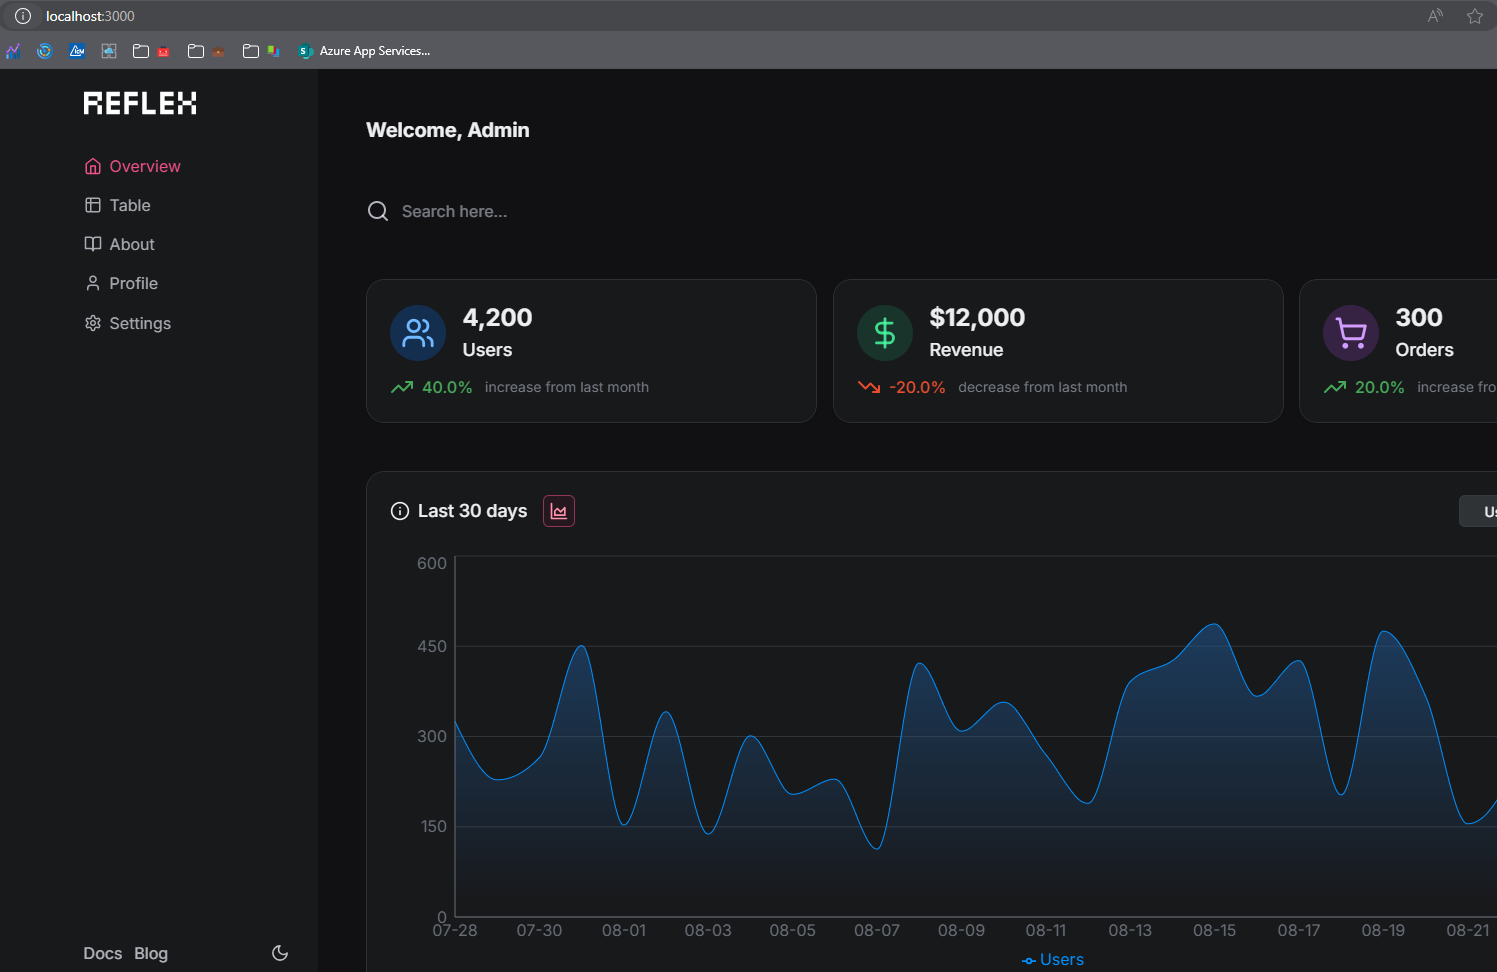
Validate that your application is working successfully on your local machine, before proceeding further.

Deploy to Azure Container Registry
Reflex will require both port 3000 and 8000 to be able to respond to http requests. This is will not work by default on Azure Container Apps as you are only able to expose one http port.
The Reflex documentation provides a solution to this by providing a premade Docker file that uses Caddy to serve the front-end, called app.Dockerfile.
This tutorial will be referencing this Dockerfile with a few minor modifications. You can find all Reflex Dockerfile’s using the following link: reflex/docker-example/app.Dockerfile at main · reflex-dev/reflex (github.com)
Create a .dockerignore file with the following content under your main project directory.
**/venv
**/.web
Create a file called Dockerfile and repaste the following content.
# This Dockerfile is used to deploy a single-container Reflex app instance
# to services like Render, Railway, Heroku, GCP, and others.

# It uses a reverse proxy to serve the frontend statically and proxy to backend
# from a single exposed port, expecting TLS termination to be handled at the
# edge by the given platform.
FROM python:3.11

# If the service expects a different port, provide it here (f.e Render expects port 10000)
ARG PORT=8080
# Only set for local/direct access. When TLS is used, the API_URL is assumed to be the same as the frontend.
ARG API_URL
ENV PORT=$PORT API_URL=${API_URL:-http://localhost:$PORT}

# Install Caddy server inside image
RUN apt-get update -y && apt-get install -y caddy && rm -rf /var/lib/apt/lists/*

WORKDIR /app

# Copy local context to `/app` inside container (see .dockerignore)
COPY . .

# Install app requirements and reflex in the container
RUN pip install -r requirements.txt

# Deploy templates and prepare app
RUN reflex init

# Download all npm dependencies and compile frontend
RUN reflex export --frontend-only --no-zip && mv .web/_static/* /srv/ && rm -rf .web

# Needed until Reflex properly passes SIGTERM on backend.
STOPSIGNAL SIGKILL

EXPOSE $PORT

# Apply migrations before starting the backend.
CMD [ -d alembic ] && reflex db migrate; \
    caddy start && reflex run --env prod --backend-only --loglevel debug
Create a Caddyfile and paste the below content in it. Make sure the file is created under your main project directory.
More information here: Caddyfile
:{$PORT}

encode gzip

@backend_routes path /_event/* /ping /_upload /_upload/*
handle @backend_routes {
        reverse_proxy localhost:8000
}

root * /srv
route {
        try_files {path} {path}/ /404.html
        file_server
}
Your project structure should now look should look something similar to the below screenshot.

Make sure you have installed the Azure CLI and are able to login to your subscription and can access your ACR.
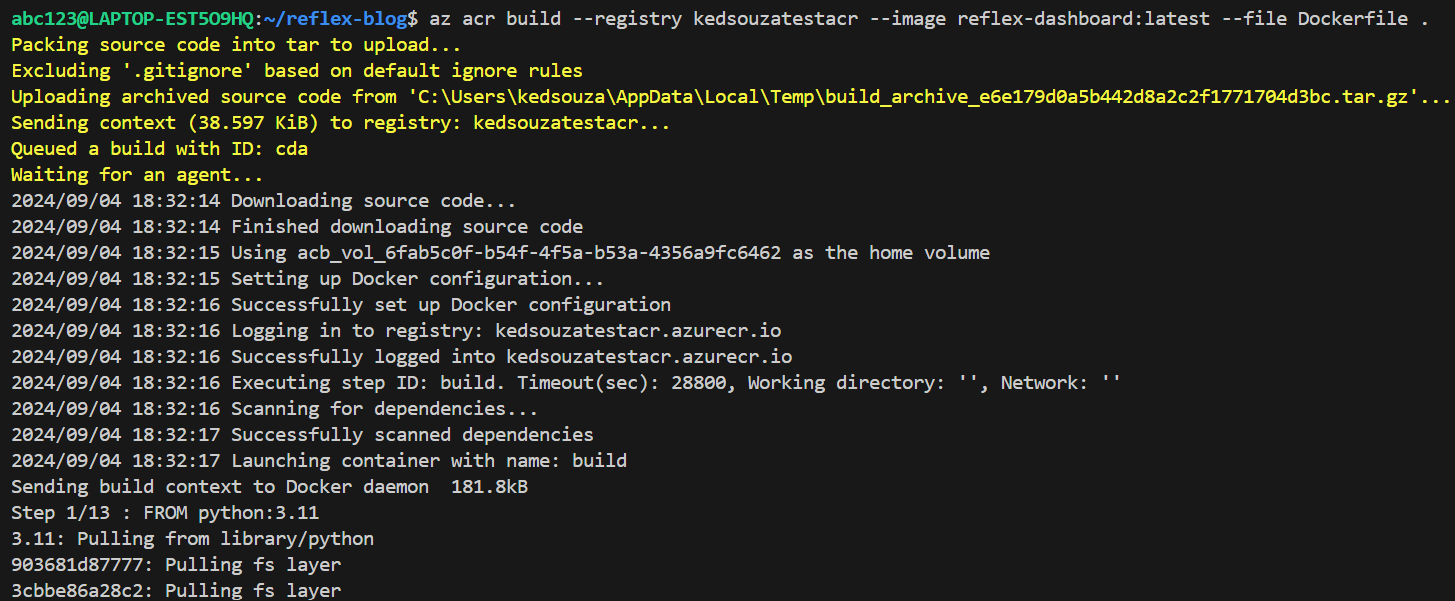
We will use the az acr build command to build this docker image using the above Dockerfile the main project directory as a build context.
More information here: Tutorial - Quick container image build - Azure Container Registry
az acr build --registry {your-acr-name} --image reflex-dashboard:latest --file Dockerfile .
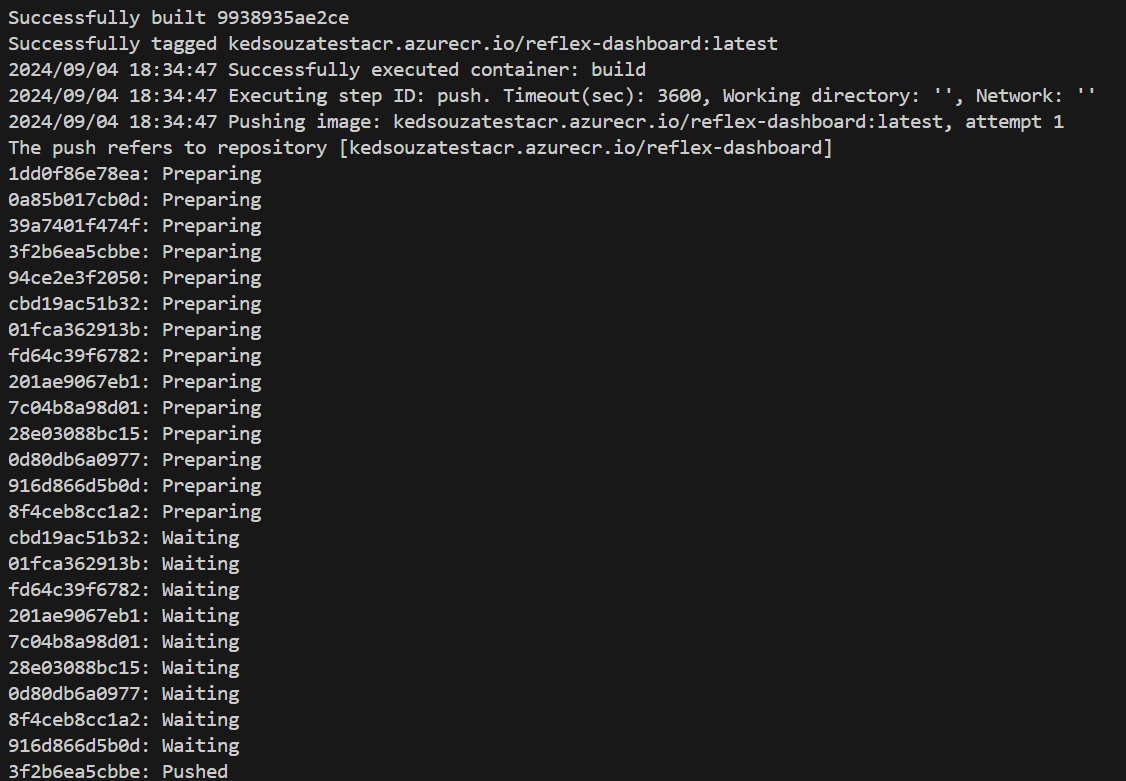
After the acr build command is run should see your acr building and pushing the image layer similar to below.
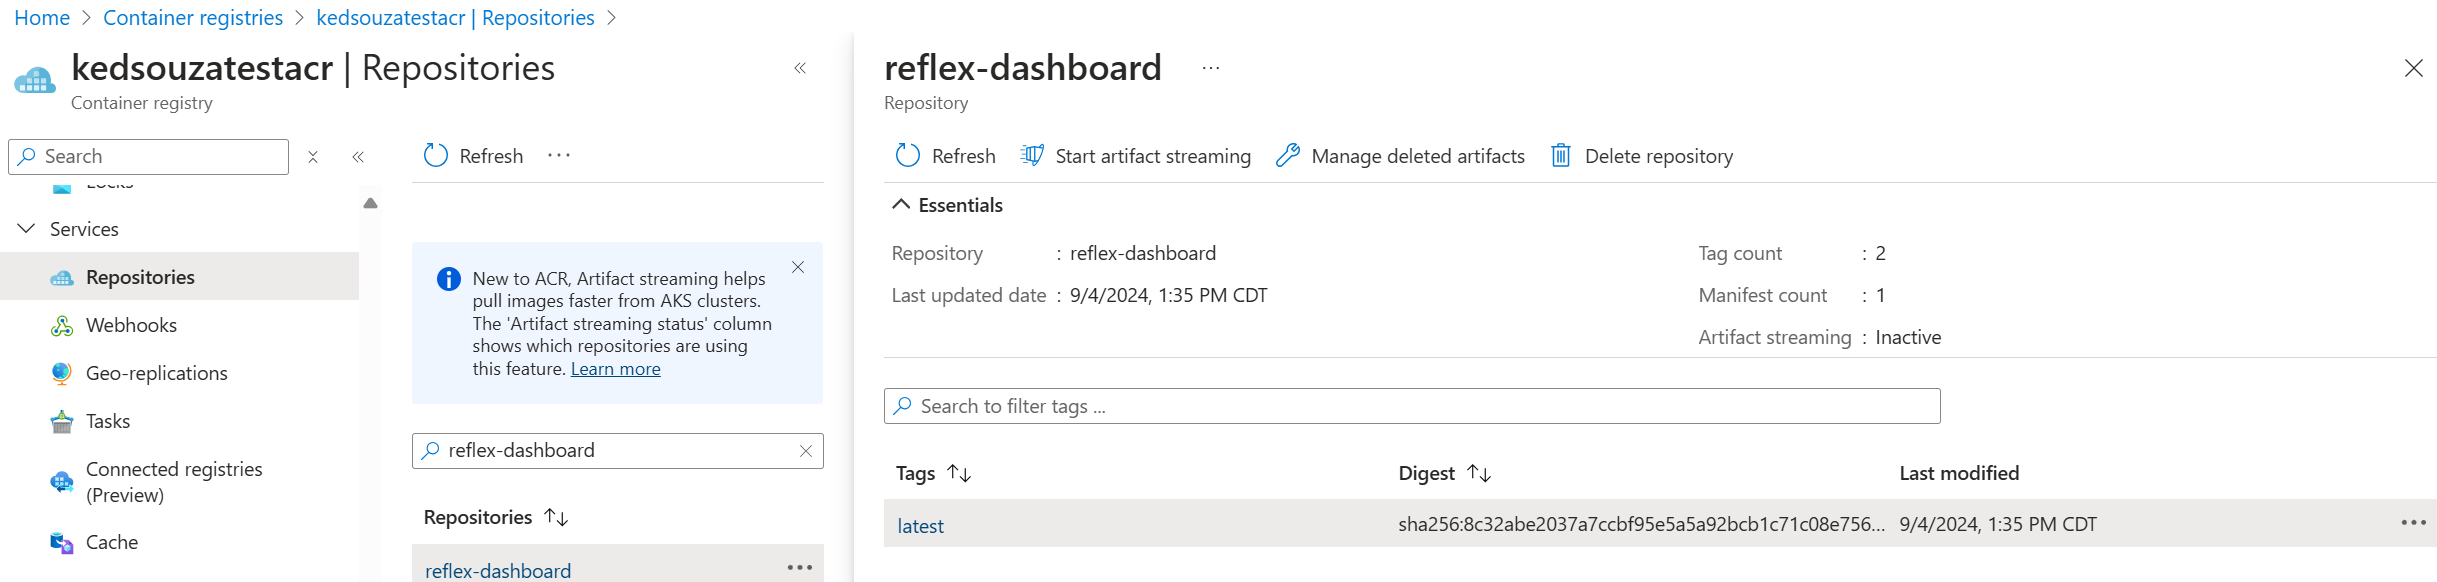
After the command is finished, validate your image is pushed onto your Azure Container Registry by navigating to your Azure Portal.
Your Azure Container Registry -> Repositories -> reflex-dashboard.
Deploy to Azure Container Apps
Create a new container app from the Azure Portal.
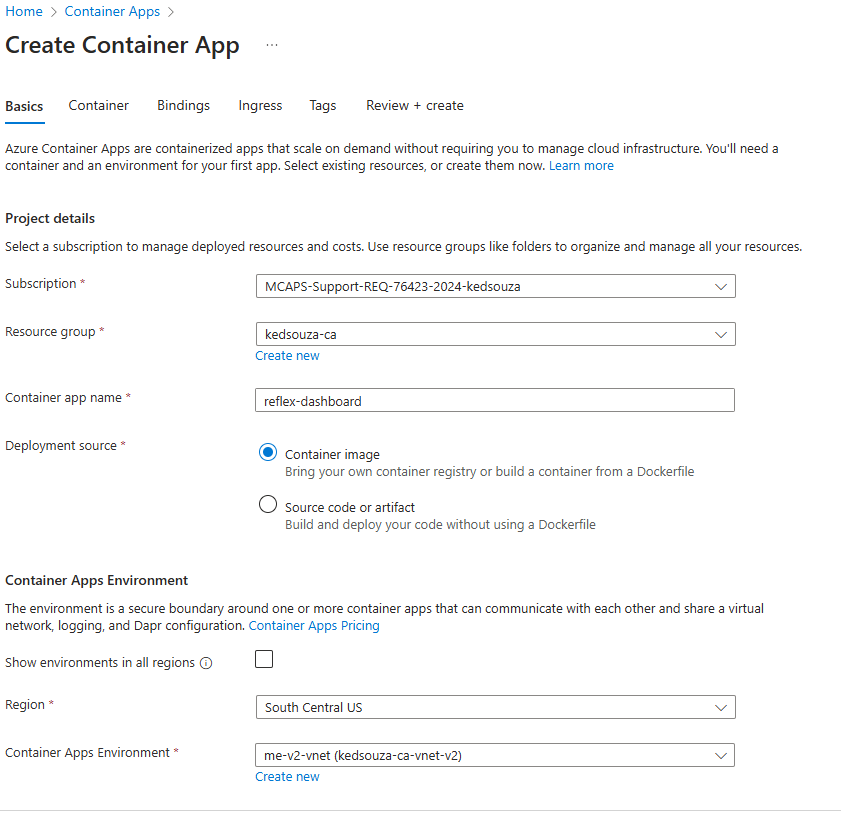
Under the Container tab select your Azure Container Registry and reflex-dashboard image we just built.
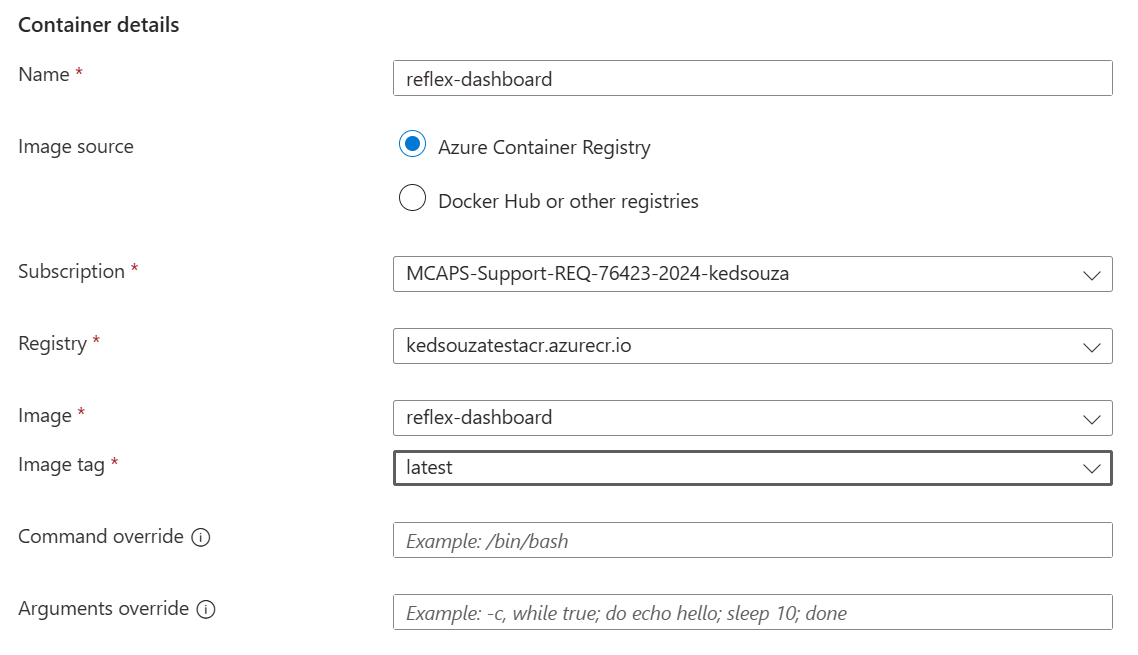
Under the Ingress tab enable ingress in the target port setting enter 8080 as that is the port the Dockerfile we used for this tutorial will listen on.

Select Review + Create.
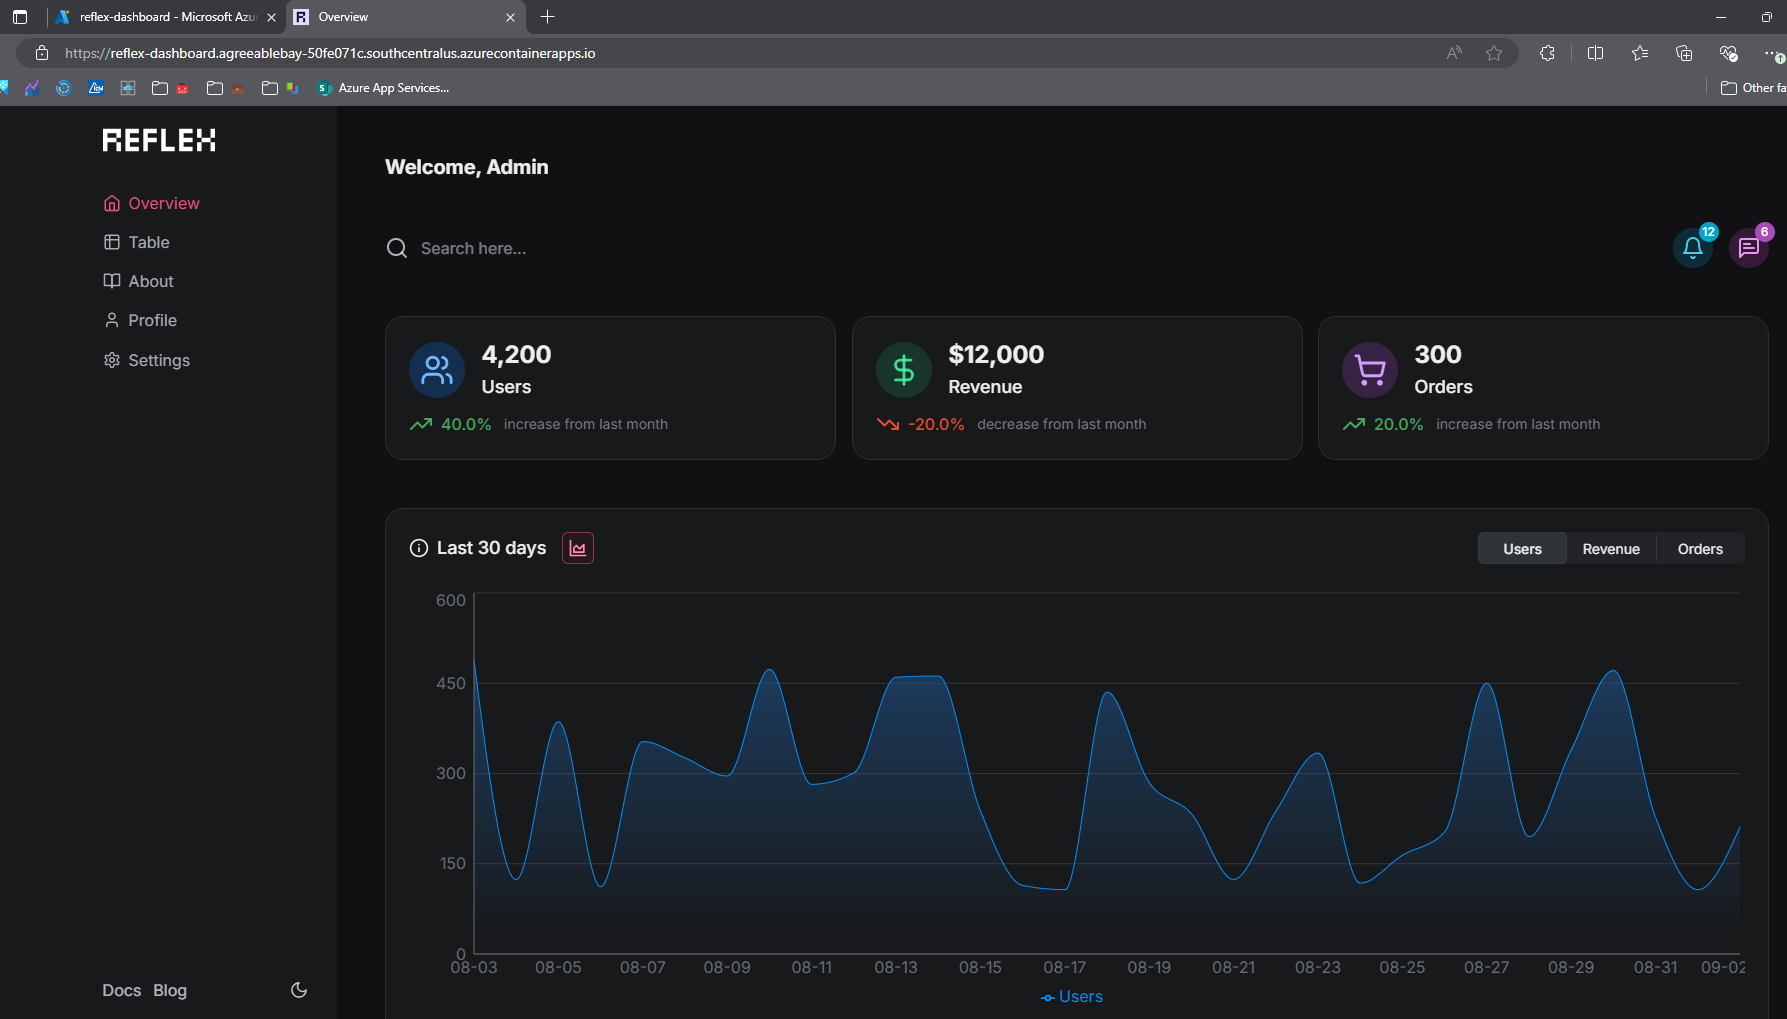
After deployed you should successfully be able to browse your Reflex application deployed to Azure Container Apps.