Migrating MySQL database from OS disk to Data disk on Azure Linux VM
NOTE: Please take a backup of your MySQL databases before attempting migration. Taking backups is always a good process before attempting to make changes. Migrating without taking backups can lead to serious issues including data loss. There are many cases where customer installs MySQL on OS disk without his knowledge. Most of MySQL installs put data directory in /var/lib/mysql. Putting MySQL data files on OS disk can have performance impact because of I/O contention. Particularly so if you are expecting higher performance from MySQL. How do you install MySQL:
- Ubuntu: sudo apt install mysql-server
- CentOS: sudo yum install mariadb-server
How to migrate Data from OS disk to Data Disk.
Attach Data Disks
- First attach data disks to your VM. Based on IOPS performance and storage requirements, attach disks accordingly. In this blog we will attach two data disks.
- Follow this article to attach 2 new empty disks. Procedure is same for both V1 (Classic)/V2 (ARM) VM. https://azure.microsoft.com/en-us/documentation/articles/virtual-machines-linux-attach-disk-portal/

-
If you see an error when adding disk like this:
A disk named ‘xyzabc-2016mmddetc’ already uses the same LUN: 0. This is because you added the disks in succession too fast.
Wait for some time and then retry. It will succeed.
- Once configured you should see 2 disks like below:


Create RAID Device
- Create a software raid device using the disks attached. Please note that all commands are run logged in as root in this blog. You can do the same or run from individual id’s with sudo.
-
Follow this article to achieve that: https://azure.microsoft.com/en-us/documentation/articles/virtual-machines-linux-configure-raid/. Below are a series of screenshots from my demo (on Ubuntu 14.04) to illustrate the steps performed to create a software raid device.


-
You may be prompted for a window to choose mail settings. You can safely choose No Configuration and click ok.


-
In below screenshot, i have used nobootwait. nobootwait works for ubuntu, but does not for CentOS. So you would need to replace **nobootwait** with **nofail** for CentOS.


- Once you followed above steps, you should see a directory /data mounted with raid device md127. You can check last image in above step. /dev/md127 is mounted as /data.


Moving MySQL Data
- Now we start the process of moving data for MySQL.
- First Stop MySQL Service:
- Ubuntu: service mysql stop
- CentOS: service mariadb stop
- Copy data from /var/lib/mysql to /data/mysql. For this cd to /data and run this command without doublequotes: “rsync -aux /var/lib/mysql .”. If you don’t find rsync, you can install rsync package. Then rename /var/lib/mysql folder to /var/lib/mysql_old. Then create a symlink to /data/mysql in /var/lib folder. This is the command from /var/lib directory: “ln -s /data/mysql mysql”

Start MySQL
- Now go ahead and start mysql. Let’s see if it starts. MySQL does not startup. This is because we need to make some more changes for different flavors of Linux.
For Ubuntu 14.04 or lower (Tested with 14.04).
- Change permissions on /var/lib/mysql. Command to run is: chown -R mysql:mysql /var/lib/mysql
- If AppArmor is not enabled you do not need to do below. But it is recommended to have AppArmor enabled for security. Follow below steps to allow mysql access through AppArmor:

- Add below two lines to allow access for mysqld process and save the file:

- Restart apparmor service issuing this command: service apparmor restart.
- Now fire up mysql service and you should see it will start up.


For Ubuntu 16.04
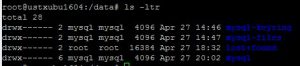
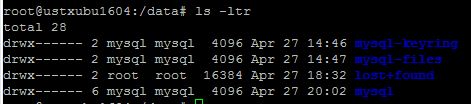
- Ubuntu 16.04 comes with MySQL 5.7.x. This introduces new folders for MySQL to handle under /var/lib. These are /var/lib/mysql-files which limits import/export operations and /var/lib/mysql-keyring for secure storage.
- So we need to create a folder under /data for mysql-files and mysql-keyring similar to mysql folder and create links similar to what we did in step 6 above.

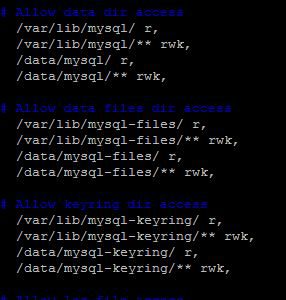
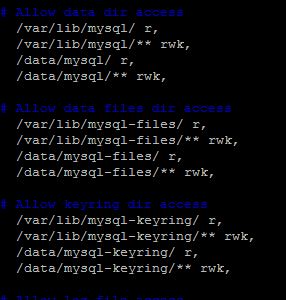
- Then we add these folders for apparmor restrictions into /etc/apparmor.d/usr.sbin.mysqld file.
- Now restart apparmor service and then restart mysql service.

For CentOS/Oracle Linux 7.x (Tested with CentOS 7.1 and Oracle Linux 7.0).
- If selinux is disabled you do not need to do below. It is not recommended, but if you want to disable selinux, you can just run “setenforce 0” and this will set selinux to permissive mode and MariaDB should startup fine without below changes. But it is recommended to have selinux enabled for security. Follow below steps to allow mysql access through selinux:
- First cd to /var/lib folder and change ownership on mysql symlink. It should be owned by mysql:mysql.

- Then run below commands to change selinux execution context for /var/lib/mysql and /data/mysql. If you see any error here, change directory to /root and try executing the semanage command again. Then run restore context, so that changes take immediate effect.


Conclusion
- This completes the steps to move MySQL data from OS disk to Data Disks.
- Once this has been completed, you can refer to my blog on how to performance tune your MySQL database.
**NOTE: Please take a backup of your MySQL databases before attempting migration. Taking backups is always a good process before attempting to make changes. Migrating without taking backups can lead to serious issues including data loss.**


