Configuring Key Vault with Java App Service Linux
In this blog post we’ll cover the process of integrating Key Vault in the Java Spring Boot app that runs on App Service Linux.
Overview
This section will cover the various ways of integrating the Key Vault with Spring Boot app for retrieving the sensitive information from the Key Vault rather than storing directly on the file system and keeping it unsafe. It is highly recommended in the production systems to protect the sensitive information such Database username, password etc.,
In my examples, I retrieve database credentails as that is the most sensitive information, which cannot be hardcoded in the files, rather kept in some secured place such as the Key Vault.
Local Development
Maven
- Go to Spring Initializr to create the base application with the required dependencies, if it is a first time setup. Otherwise skip this step, but make sure the dependencies are included in the
pom.xml:
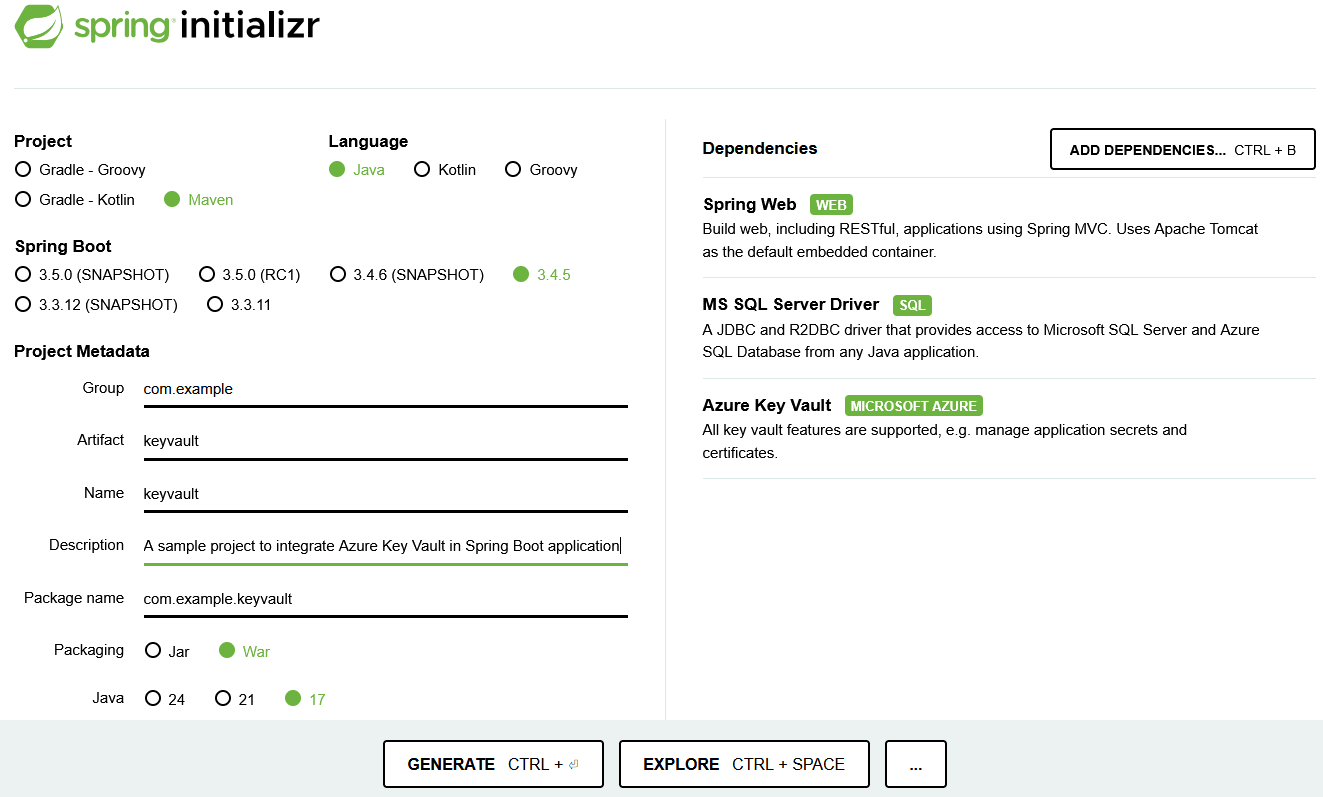
For Dependencies, go to Add Dependencies and choose Spring Web, MS SQL Server Driver and Azure Key Vault. Click Generate after this, which will download a zip.
- After downloading the zip, extract it on your local machine and cd into the folder with the source code.
- In a terminal, run either of the following:
- If Maven is on $PATH, run
mvn spring-boot:runrelative to thepom.xml. - If Maven is not on $PATH, run
./mvnw spring-boot:runrelative to thepom.xml
- If Maven is on $PATH, run
NOTE: This assumes you have Java 17 locally. Maven needs to point to a Java 17 installation as well. If you’re unsure to what Maven is using, use
mvn -v.
- Browsing to localhost:8080 should show a Whitelabel Error Page, which is expected, since we have no Controllers serving our root path.

Gradle
- Go to Spring Initializr to create the base application with the required dependencies, if it is a first time setup. Otherwise skip this step, but make sure the dependencies are included in the build.gradle:
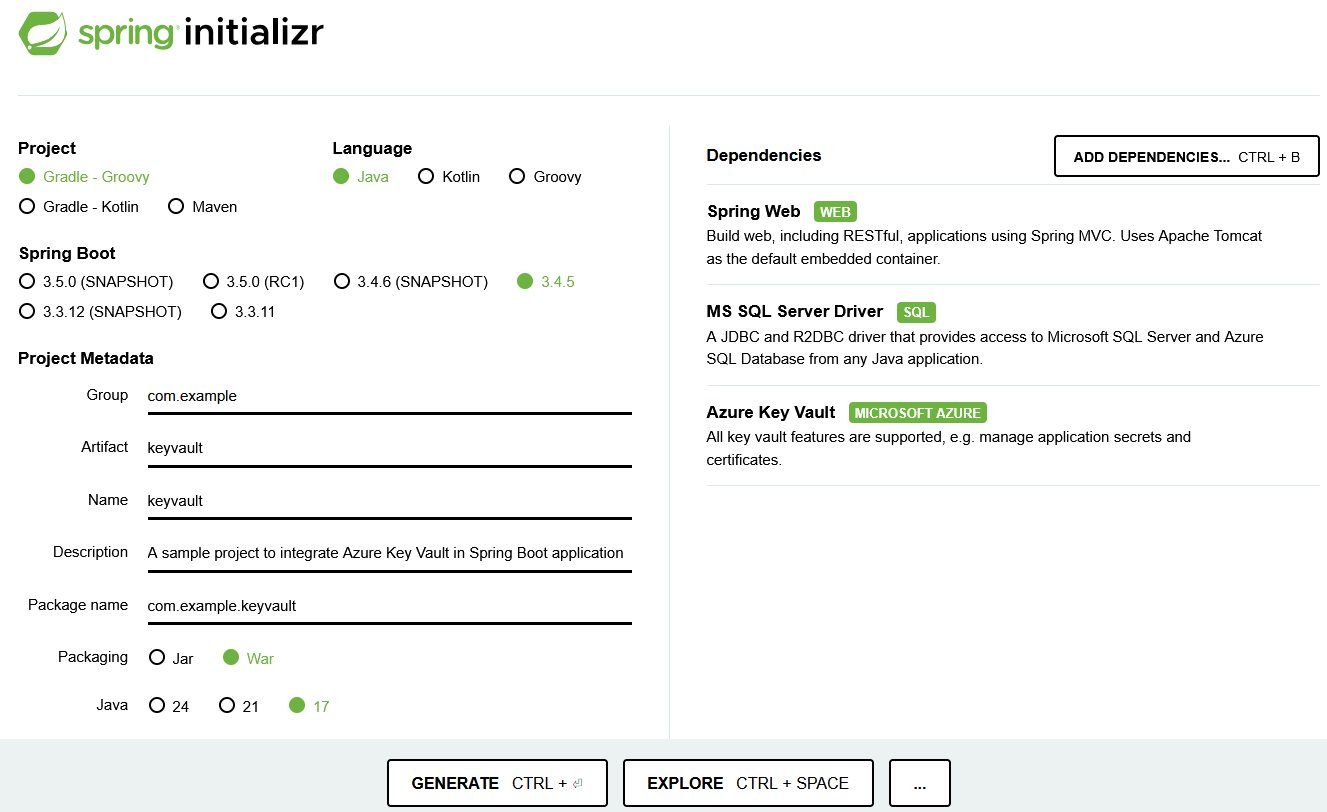
For Dependencies, go to Add Dependencies and choose Spring Web, MS SQL Server Driver and Azure Key Vault. Click Generate after this, which will download a zip.
- After downloading the zip, extract it on your local machine and cd into the folder with the source code.
- In a terminal, run
./gradlew bootRunto start the Spring Boot application. You should see the same output above as discussed in th Maven section. - Browsing to
localhost:8080should show a Whitelabel Error Page, which is expected, since we have no Controllers serving our root path.
Integration
Reference each secret separately
- Update the application.properties like below. In this example, I am using SQL Server, but you could use your own database based on your application need.
spring.application.name=<application-name>
spring.datasource.url=jdbc:sqlserver://127.0.0.1:1434;databaseName=<database-name>;encrypt=false
spring.datasource.username=
spring.datasource.password=

spring.datasource.driver-class-name=com.microsoft.sqlserver.jdbc.SQLServerDriver

spring.jpa.properties.hibernate.dialect=org.hibernate.dialect.SQLServerDialect
logging.level.org.hibernate=DEBUG
- Add environment variables with the values in the following format for both USERNAME and PASSWORD
@Microsoft.KeyVault(SecretUri=https://<key-vault-name>.vault.azure.net/secrets/<secret-name>)
SPRING_DATASOURCE_USERNAME => @Microsoft.KeyVault(SecretUri=https://<key-vault-name>.vault.azure.net/secrets/<secret-name>)
SPRING_DATASOURCE_PASSWORD => @Microsoft.KeyVault(SecretUri=https://<key-vault-name>.vault.azure.net/secrets/<secret-name>)
NOTE Here, the environment variable SPRING_DATASOURCE_USERNAME is mapped to spring.datasource.username and the environment variable SPRING_DATASOURCE_PASSWORD is mapped to spring.datasource.password
Green tick mark shows up in the Source column of Enviroment Variables, once the enviroment variables were added properly and as described above.

The following file is optional. The reason I created is to show you how to read the values into any Spring Boot controller.
package com.example.keyvault;

import org.springframework.beans.factory.annotation.Value;
import org.springframework.web.bind.annotation.GetMapping;
import org.springframework.web.bind.annotation.RestController;

@RestController
public class DatabaseController {
    @Value("${spring.datasource.username:default_value}")
    private String datasourceUsername;

    @Value("${spring.datasource.password:default_value}")
    private String datasourcePassword;

    @GetMapping("/debug/db-username")
    public String getDatasourceUsername() {
        return "Datasource Username: " + datasourceUsername;
    }

    @GetMapping("/debug/db-password")
    public String getDatasourcePassword() {
        return "Datasource Password: " + datasourcePassword;
    }
}
The reason I kept /debug in the path as the prefix is to separate these paths from the regular REST API paths.
Output from local machine, for the path: /debug/db-username

Output from local machine, for the path: /debug/db-password

Reference the Key Vault
Update the application.properties like below. In this example, I am using SQL Server, but you could use your own database based on your application need.
spring.application.name=<application-name>
spring.datasource.url=jdbc:sqlserver://127.0.0.1:1434;databaseName=<database-name>;encrypt=false
spring.datasource.username=
spring.datasource.password=
spring.cloud.azure.keyvault.secret.property-sources[0].endpoint=https://<keyvault-name>.vault.azure.net/

spring.datasource.driver-class-name=com.microsoft.sqlserver.jdbc.SQLServerDriver

spring.jpa.properties.hibernate.dialect=org.hibernate.dialect.SQLServerDialect
logging.level.org.hibernate=DEBUG
The following file is optional. The reason I created is to show how to read the values into any Spring Boot controller.
package com.example.keyvault;

import org.springframework.beans.factory.annotation.Value;
import org.springframework.web.bind.annotation.GetMapping;
import org.springframework.web.bind.annotation.RestController;

@RestController
public class DatabaseController {
    @Value("${spring.datasource.username:default_value}")
    private String datasourceUsername;

    @Value("${spring.datasource.password:default_value}")
    private String datasourcePassword;

    @GetMapping("/debug/db-username")
    public String getDatasourceUsername() {
        return "Datasource Username: " + datasourceUsername;
    }

    @GetMapping("/debug/db-password")
    public String getDatasourcePassword() {
        return "Datasource Password: " + datasourcePassword;
    }
}
The reason I kept /debug in the path as the prfix is to separate these paths from the regular REST API paths.
Output from local machine, for the path: /debug/db-username
Output from local machine, for the path: /debug/db-password
NOTE: In this example, you don’t have to add any Environment Variables in the App Service. You just need to add spring.cloud.azure.keyvault.secret.property-sources[0].endpoint in application.properties
Deploy through CLI
Prerequisites
- Enable Identity in the Azure App Service
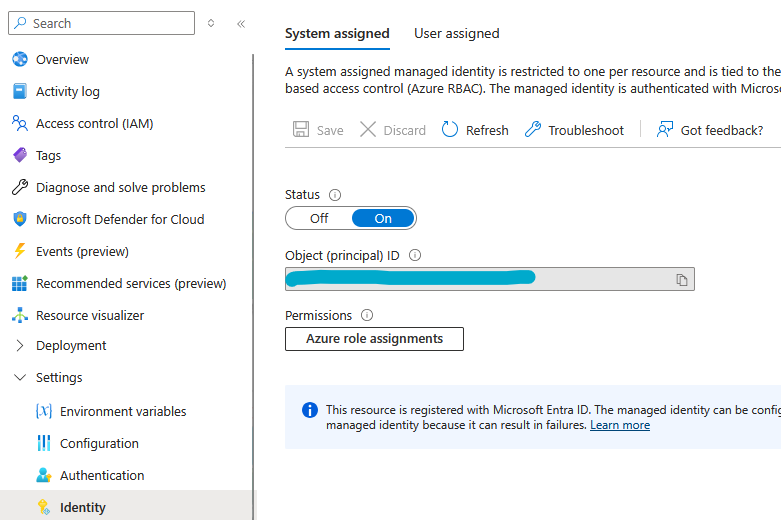
- Create an access policy by selecting the Identity created in the previous step, with
Getpermission. You could add the other permissions later, but not needed at this time.
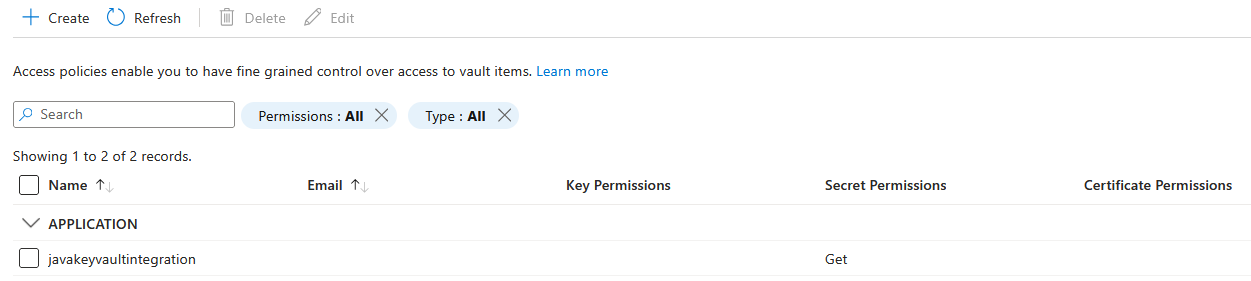
After creating the Access Policy, the Key Vault -> Access Policies UI should look like below.
Maven
If you don’t have GitHub Actions or Azure Devops, you may simply execute the following steps.
- Generate a war file using
mvn clean packageor.\mvnw clean package - Run the following CLI command to push the generated war file into Azure App Service.
az webapp deploy --resource-group <your-resource-group> --name <your-app-service-name> --src-path <path-to-your-war-file> --type war
NOTE: <path-to-your-war-file> points to target/app.war
You need to add <finalName>app</finalName> in the build section of pom.xml, to create a war name with app. This is not needed when you deploy the app using CLI as az webapp deploy, which creates a war file as app.war under /home/site/wwwroot in the App Service automatically.
After the change in pom.xml, <build> section will look like below.
<build>
    <plugins>
        <plugin>
            <groupId>org.springframework.boot</groupId>
            <artifactId>spring-boot-maven-plugin</artifactId>
        </plugin>
    </plugins>
    <finalName>app</finalName>
</build>
Upon the successful completion of the deployment, the output of the two paths, declared in DatabaseController.java can be accessed from the App Service created URLs.


Gradle
If you don’t have GitHub Actions or Azure Devops, you may simply execute the following steps.
- Generate a war file using
.\gradlew clean war - Run the following CLI command to push the generated war file into Azure App Service.
az webapp deploy --resource-group <your-resource-group> --name <your-app-service-name> --src-path <path-to-your-war-file> --type war
NOTE: <path-to-your-war-file> points to build/libs/app.war
You need to add the following json in build.gradle, to create a war name with app. This is not needed when you deploy the app using CLI as az webapp deploy, which creates a war file as app.war under /home/site/wwwroot in the App Service automatically.
After the change in build.gradle, war section will look below.
war {
	archiveFileName = "app.war"
}
Upon the successful completion of the deployment, the output of the two paths, declared in DatabaseController.java can be accessed from the App Service created URLs.
Troubleshooting
If a reference isn’t resolved propertly
You could leverage the detector called Key Vault Application Settings Diagnostics from App Service -> Diagnose and solve problems -> Availability and Performance > Web app down
The complete details are available at the following documentation. Troubleshoot Key Vault References
403 - Forbidden - Public network access is disabled
Status Code: 403
Code: Forbidden
Message: Public network access is disabled and request is not from a trusted service nor via an approved private link.
In your local machine, if you get this error, it means either you are in a network that is not allowed to access the Key vault or your IP was not whitelisted in the Key Vault or public access was disabled at the Key Vault Networking level.
On Azure app service, if you get this error, it means the App Service outbound IP address / network was not whitelisted in the Key Vault.
In either case, you need to go to Azure portal -> Key Vault -> Networking -> Firewall and virtual networks to make the required changes to allow the app to access the Key Vault.
403 - Forbidden - Missing Secret list permission on key vault
Status Code: 403
Code: Forbidden
Message: The user, group or application ‘appid=xxx-xxx-xx’ does not have secrets list permission on key vault ‘keyvault-name;location=keyvault-location’
The required permission needs to be set, as discussed here. Assign permissions for the Secrets


