First steps with Bitnami WordPress in Azure VM
If you choose Bitnami WordPress VM from Azure Market, you need to take the following considerations:
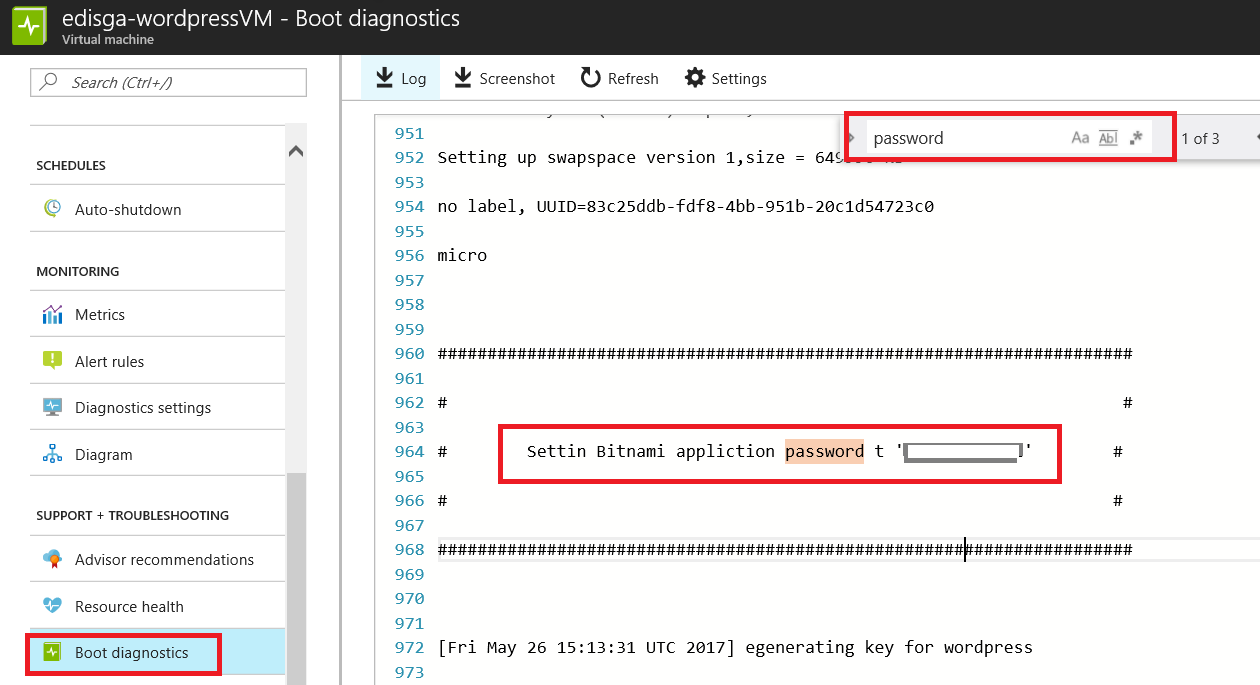
1. Review the username & password for WordPress Application
In the installation step. For example, the username is “user”

The password will be shown in the Boot Diagnostics the first time after creating the VM, you need to save this password. You will use this password for logging into WordPress administration portal.
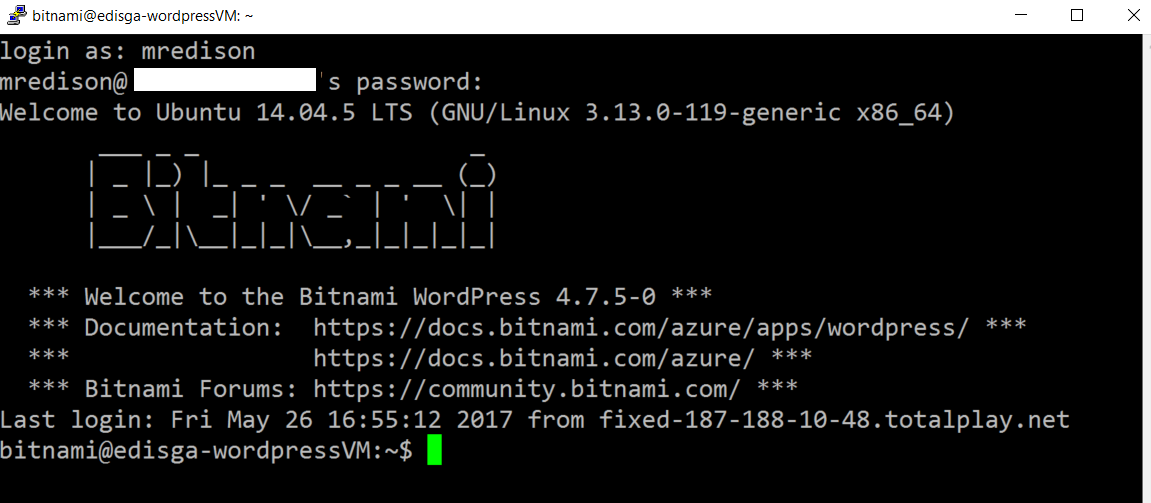
2. Know how to connect to Bitnami VM and check structure folder
You can use SSH terminal to connect to Bitnami VM.
For Windows you can use PuTTY or terminal for Linux or Mac, you will find all the information here: https://docs.bitnami.com/azure/faq/#how-to-access-a-server-using-an-ssh-tunnel
I will use PuTTY for this blog.
You can find the application installed by Bitnami using the following path: /opt/bitnami/apps

For services you need to use the following path: /opt/bitnami
In this case you can find apache2/, mysql/, php/
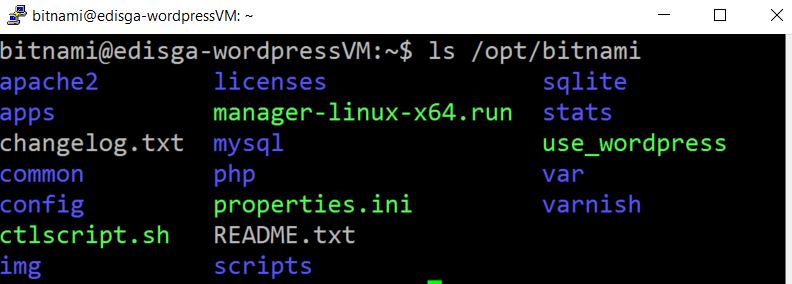
You can find more information about this directory structure here: https://docs.bitnami.com/azure/faq/#what-is-the-directory-structure
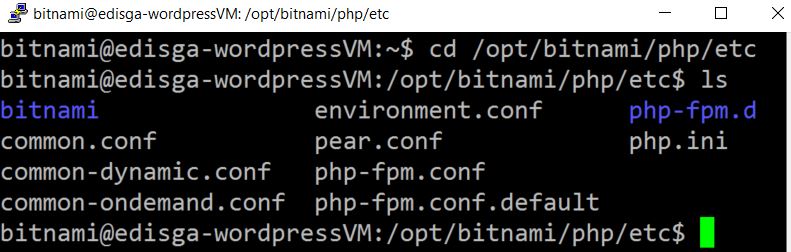
3. How to modify php.ini in Bitnami
You will find php.ini in this directory: /opt/bitnami/php/etc/php.ini
4. To start or stop services in Bitnami
You need to use the following commands:
a) To review the status of the services: sudo /opt/bitnami/ctlscript.sh status
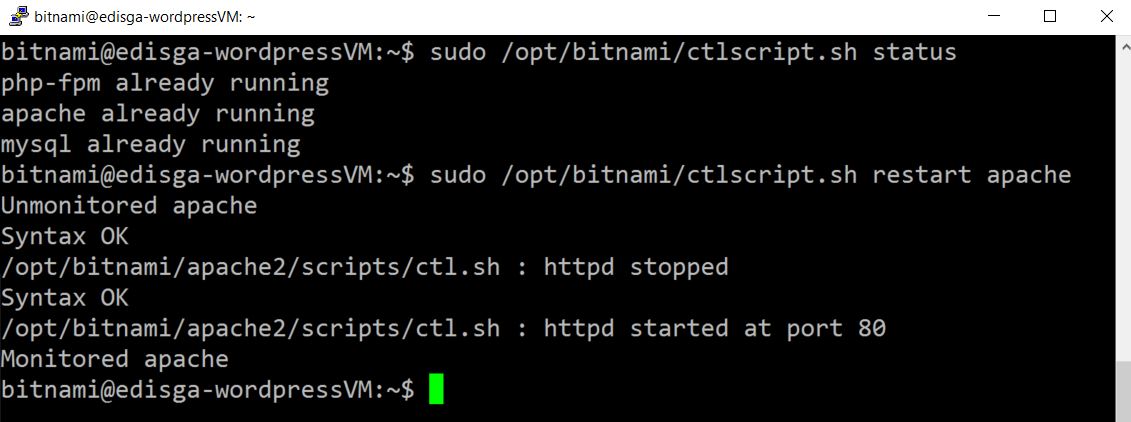
b) To start/stop/restart these services you can use: sudo /opt/bitnami/ctlscript.sh restart apache
You can find more information in the following reference: https://docs.bitnami.com/azure/faq/#how-to-start-or-stop-the-services
5. How to enter to phpmyadmin
By default phpmyadmin is for just 127.0.0.1, if you try to browse you will get this message:
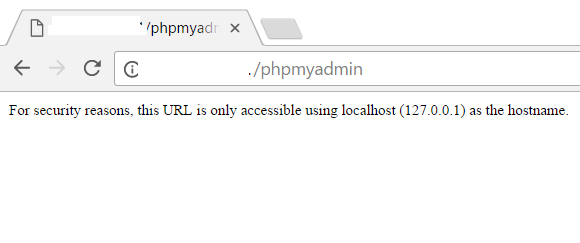
In this situation you need to create a SSH tunnel.
You will find all the steps described here: https://docs.bitnami.com/azure/components/phpmyadmin/
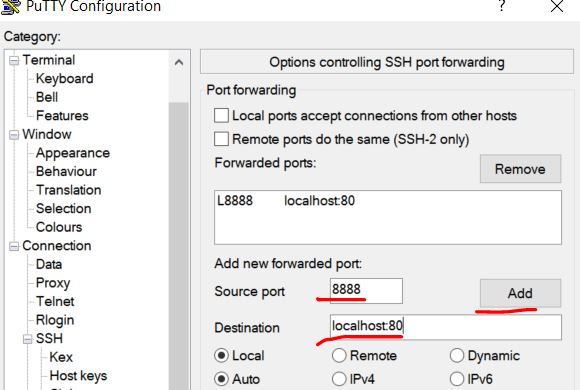
If you are using PuTTY, you need to create a tunnel that will redirect from 80 to 8888
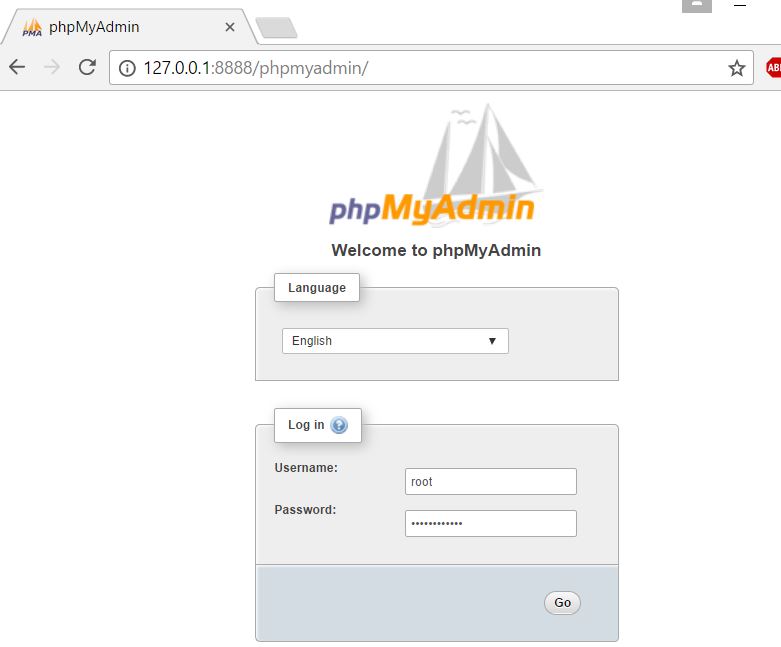
After creating this tunnel, you can browse phpmyadmin using http://127.0.0.1:8888/phpmyadmin and you need to set “root” user and password is the same of the application password that you saved in the boot diagnostics.
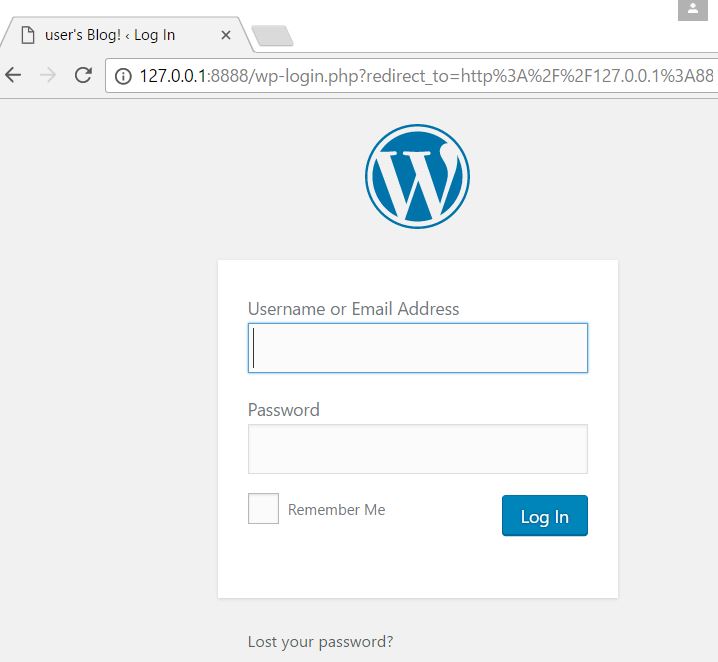
6. Logging into WordPress admin and how to find WordPress files in directory
To can use 127.0.0.1 with port 8888 http://127.0.0.1:8888/wp-admin or use the public ip address that azure assigned or custom domain you have already configured. The first time you need to use “user” and password “generated from boot diagnostics”
Then you can add or change this password in WordPress Administration or phpMyAdmin, but remember that you need to change the same in root for MySQL as well.
You will find WordPress files in the following location: /opt/bitnami/apps/wordpress/htdocs

You can find user/password for database in wp-config.php file.
7. How to connect by sftp to Bitnami
You can use SSH to connect to Bitnami with port 22 and ssh username and password defined in azure portal and the same that you use for ssh.

Or using VsFTPd with the following reference: https://docs.bitnami.com/azure/components/vsftpd/
If you want more information about azure and Bitnami you can find it in the following reference: https://docs.bitnami.com/azure/faq/


