WordPress Migration Plan to Azure App Services
Looking to move your WordPress site to Azure App Services? Follow these steps to get started with your migration.
Before we begin
You will need the following for this migration plan:
- Azure Subscription
- FTP Client
- MySQL Client
- Info from old hosting provider/cloud solution:
- FTP credentials
- MySQL DB credentials
Backup Steps
Backup Your WordPress Content
If you occasionally take backups of your site, you could use your latest backup for the migration. However, if you haven’t taken a backup recently or you don’t take regular backups, take a look at the following steps to gather a backup of your WordPress content.
You will need to know your FTP credentials and an FTP client in order to complete these steps.
Using your FTP client, connect to your site with your FTP credentials. You may need to navigate around to locate your WordPress content if you have multiple sites that use the same FTP credentials.
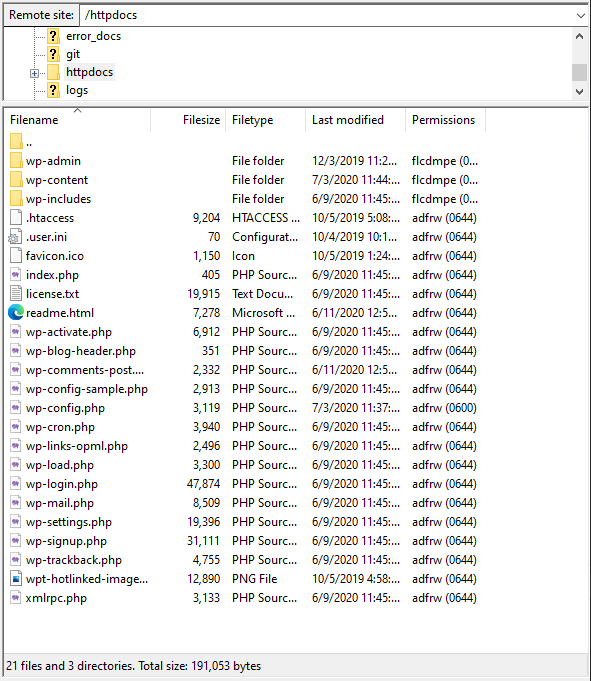
The example above is connected via FTP into the folder /httpdocs where the WordPress content is located.
Download all the WordPress content to your local machine for uploading later to your Azure App Service.
Backup Your WordPress Database
If you occasionally take backups of your site, you could use your latest backup of your database. However, if you haven’t taken a backup recently or you don’t take regular backups, take a look at the following steps to gather a backup of your WordPress database.
The following information will be needed:
- MySQL DB Hostname (DBHOST)
- MySQL DB User (DBUSER)
- MySQL DB Password (DBPASS)
- MySQL DB Name (DBNAME)
Backup - Using MySQL Workbench
In these steps we will be using MySQL Workbench to create a backup of your WordPress database. If you do not have MySQL Workbench installed, you could download it from here: https://dev.mysql.com/downloads/workbench/
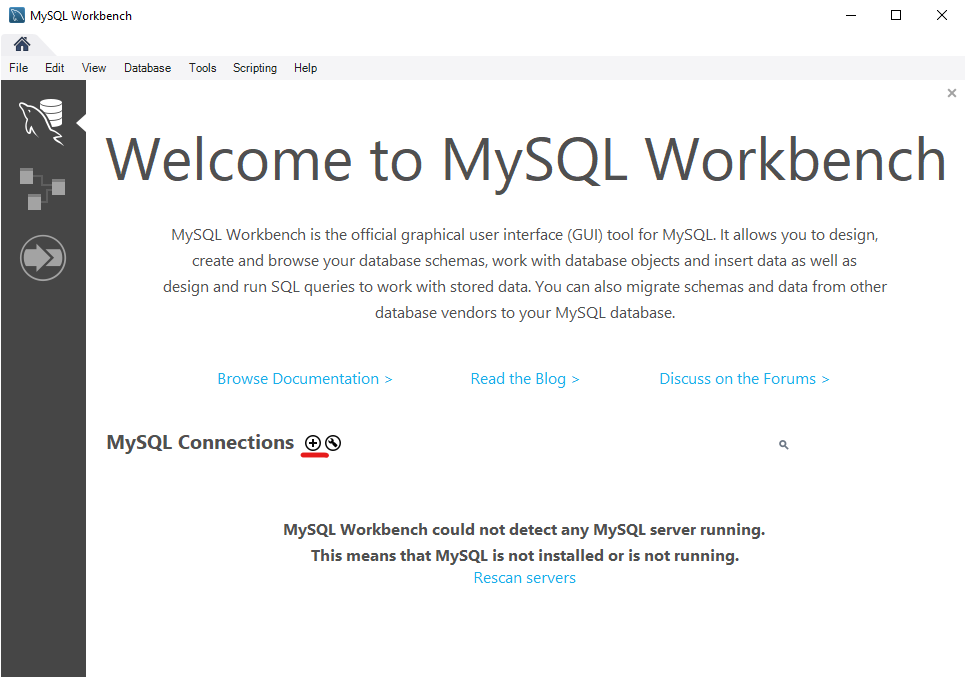
Open MySQL Workbench. To add a new connection, click on the plus sign + icon next to the section called MySQL Connections.
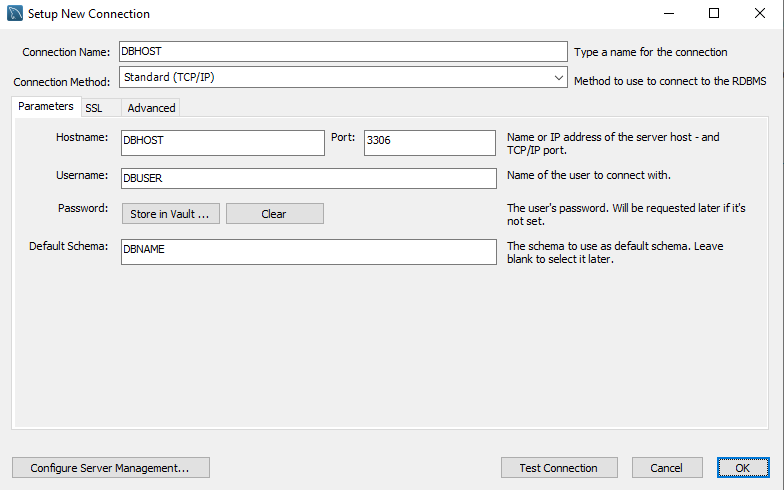
Enter your MySQL connection information into the following fields shown:
- Connection Name: DBHOST
- Hostname: DBHOST
- Username: DBUSER
- Password: DBPASS
- Default Schema: DBNAME
Click on the Test Connection and enter your MySQL password. You should receive a successful connection. If you do not, ensure your credentials for MySQL are correct.
Click OK and OK on the Setup New Connection window.
Double click on the newly created connection box to open this MySQL connection.
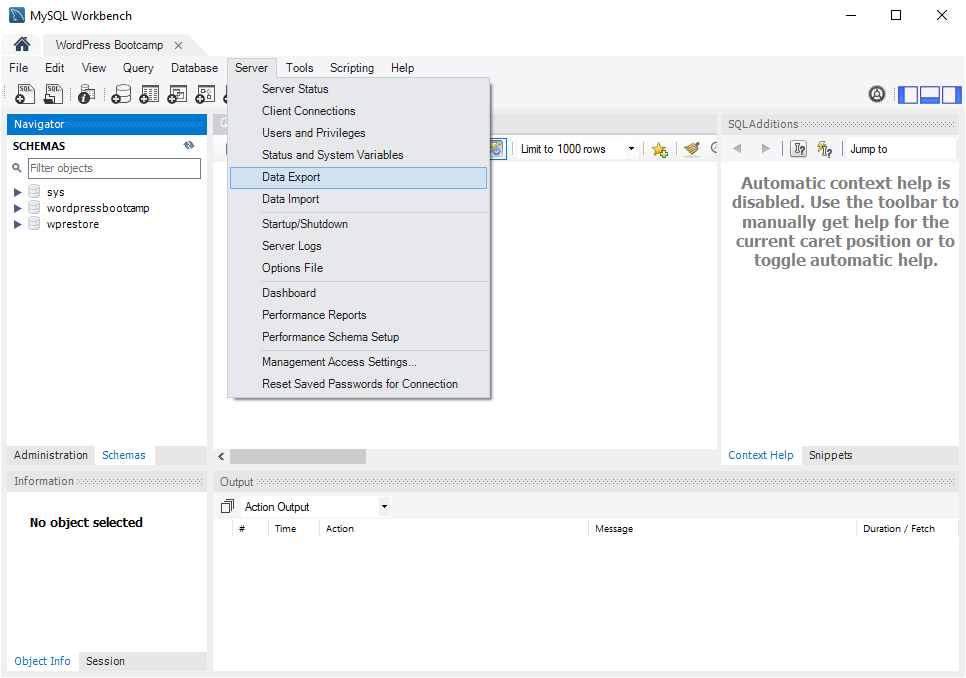
To export you database, navigate to Server > Data Export.
In the Data Export window that opens, ensure you have selected your database you want to export as well as exporting to a Self-Contained File.
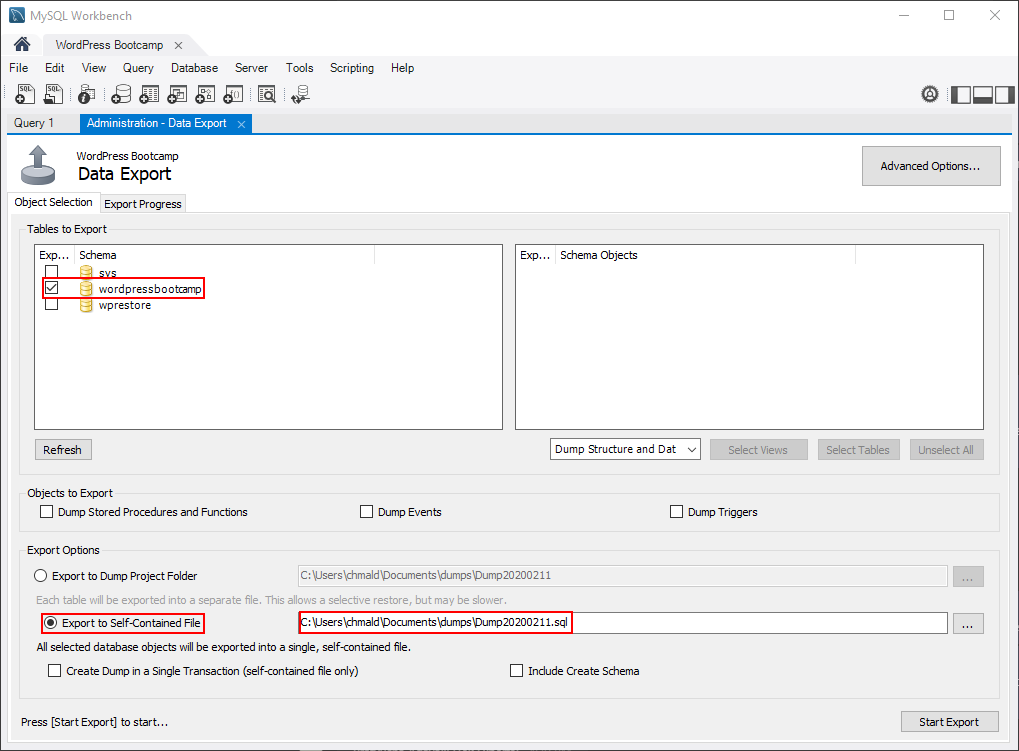
Click Start Export to start the export/backup process.
NOTE: If you are note able to see the Start Export button, click over to the Export Progress screen at the top and you will have a Start Export button visible to click.
Depending on the version of MySQL Server and the version of MySQL Workbench you are using, you may get a mysqldump version mismatch warning. You can select Continue Anyway on the prompt as this should not impact the data being exported. For production environments, it is always a good idea to verify the data that was exported as well.
Once the export has completed, you should get an Export Complete status on the Export Progress screen.
Backup - Using MySQL Command Line
If you have the MySQL command line installed, you could use this option as it will provide for an easy way to dump your MySQL content.
Run the following command to gather a dump of your MySQL content:
mysqldump --user=DBUSER --password=DBPASS --host=DBHOST --port=3306 DBNAME > backupdb.sql
Creating your Azure App Service
Log into your Azure Portal https://portal.azure.com/.
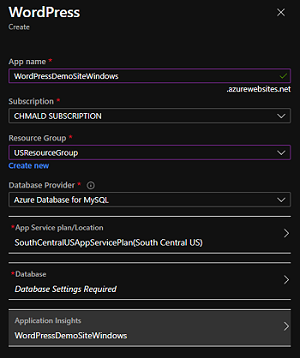
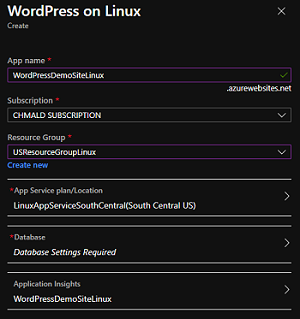
Once you have logged in, click Create a resource and search for WordPress. You can choose WordPress or WordPress on Linux.
Click Create to start creating the new WordPress resource.
Populate the required fields for your application that will fit your needs. For Windows (WordPress), ensure you are selecting Azure Database for MySQL for your Database Provider.
Once your resources have successfully deployed, navigate to your Azure DB for MySQL resource. If you are unable to locate the resource, use the search bar at the top to search by name or resource type (Azure Database for MySQL Servers).
Navigate to the Connection security blade, ensure that the following settings are set accordingly:
- Allow access to Azure services: Yes
- Firewall rules. Add the following:
- AllowAll - 0.0.0.0 - 255.255.255.255
- Enforce SSL connection: false
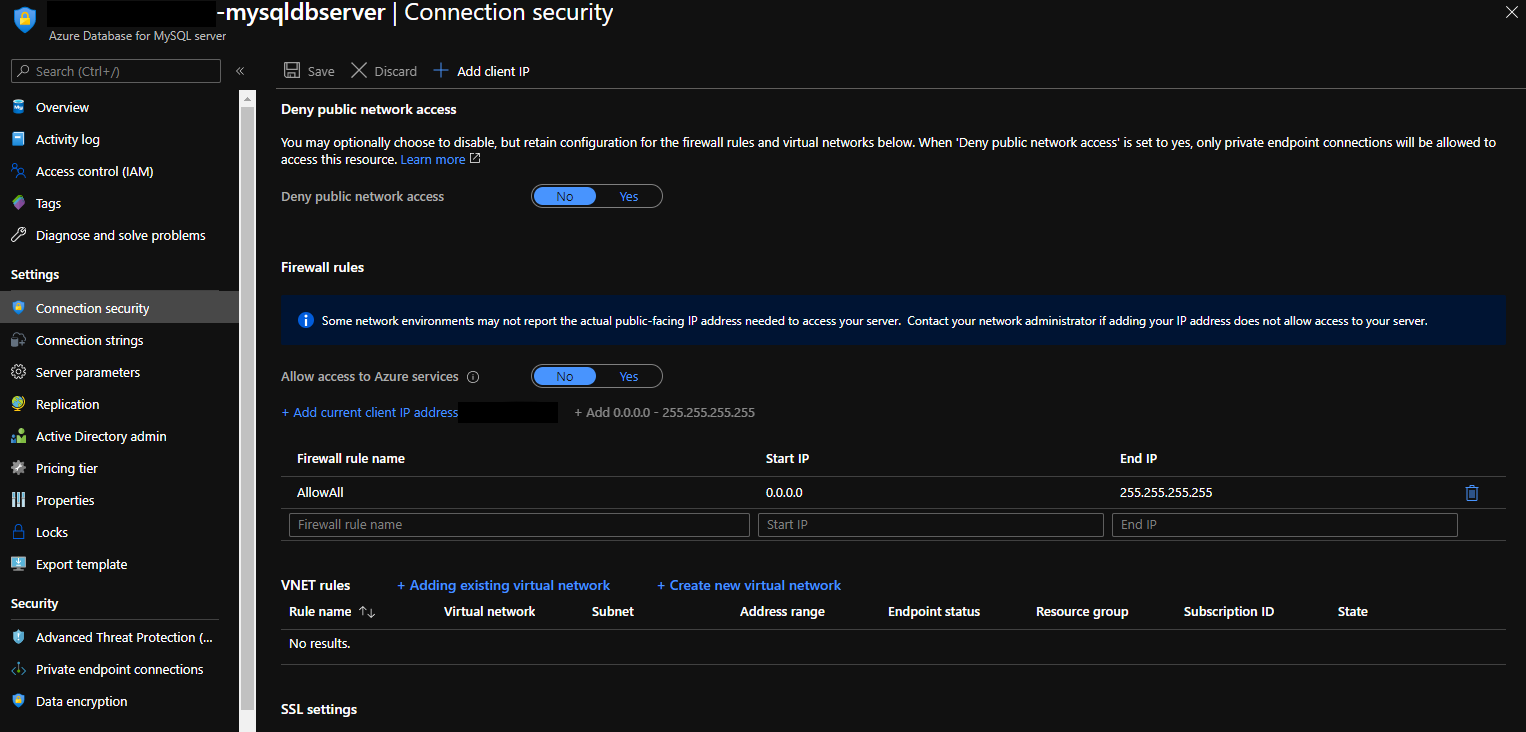
These settings will ensure you are able to connect to the MySQL server from your client with no issue. You can always come back and modify these settings to be production ready.
Restore Steps
Restore Your WordPress Database
You will need the following information for your Azure DB for MySQL server:
- MySQL DB Hostname (DBHOST)
- MySQL DB User (DBUSER)
- MySQL DB Password (DBPASS)
- MySQL DB Name (DBNAME)
If you do not remember these setting from the previous step of creating the resource, you can find them by going to the Azure Portal and opening the Azure DB for MySQL resource. In the Overview blade, you will have the Server name and Server admin login name.
If you have forgotten your password, you can select Reset password at the top of the Overview blade.
Restore - Using MySQL Workbench
Open MySQL Workbench. To add a new connection, click on the plus sign + icon next to the section called MySQL Connections.
Enter your Azure DB for MySQL connection information into the following fields shown:
- Connection Name: DBHOST
- Hostname: DBHOST
- Username: DBUSER
- Password: DBPASS
- Default Schema: DBNAME
Click on the Test Connection and enter your Azure DB for MySQL password. You should receive a successful connection. If you do not, ensure your Azure DB for MySQL credentials are correct.
Click OK and OK on the Setup New Connection window.
Double click on the newly created connection box for your Azure DB for MySQL to open the MySQL connection.
To import your database, navigate to Server > Data Import.
In the Data Import window that opens, ensure you select Import from Self-Contained File. If the database has not been created on the Azure DB for MySQL, you could select New from the Default Schema to be Imported To. Otherwise, select the Default Target Schema.
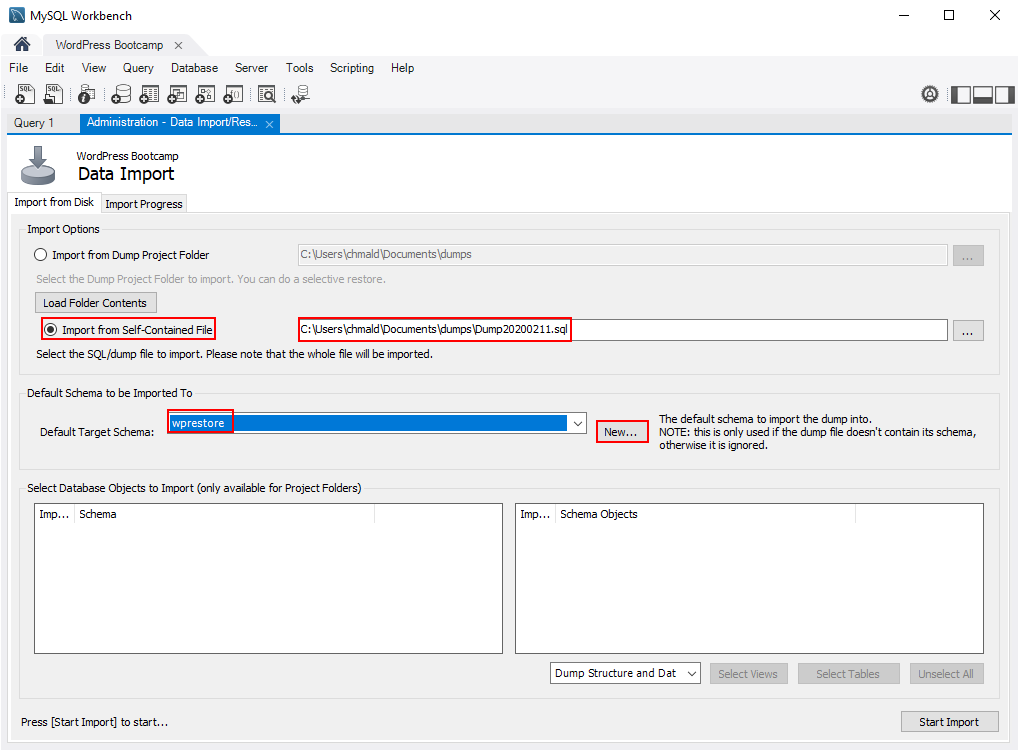
Click Start Import to start the import process.
Restore - Using MySQL Command Line
Run the following command to import your MySQL dump into your MySQL database:
mysql --user=DBUSER --password=DBPASS --host=DBHOST --port=3306 DBNAME < backupdb.sql
Restore Your WordPress Content
Gather your FTP information for your App Service by going to the Properties blade for your App Service in the Azure Portal. Here you will be able to gather your FTP host name and FTP/deployment user. If you do not have a deployment user or know what the password is for the user, go back to the Overview Blade and select Get publish profile. This will download a XML file with your apps credentials. Locate a publishMethod with the value of FTP. Use the userName and userPWD fields for your FTP credentials.
Using your FTP client, enter your FTP host name, FTP username, and FTP user password. This example is using FileZilla.

Once you have connected to your App Service via FTP, navigate to site/wwwroot.
Copy over all your content from your backup gathered earlier, except for the wp-config.php file. If you have specific define() inside your wp-config.php, modify and add them to the already existing wp-config.php file.
In our wp-config.php file that gets deployed in Azure, the MySQL database info is stored in the Azure Portal. This will help keep your site secured as no hardcoded database information is stored on the site content.
Final Steps
Once all our content and database information has been restored on Azure App Services, we now need to tie it all together.
Navigate to your App Service on the Azure Portal. Open the Configuration blade.
If you selected WordPress on Linux, you will need to add the following application settings:
- NAME - VALUE
- DATABASE_HOST - DBHOST
- DATABASE_NAME - DBNAME
- DATABASE_USERNAME - DBUSER
- DATABASE_PASSWORD - DBPASS
If you selected WordPress, you will need to add the following connection string:
- NAME - VALUE - TYPE
- MySQLServer - MYCONNECTIONSTRING - MySQL
All the italicized values will need to updated with your MySQL Server info. You can find the connection string for MySQL by going to the Azure DB for MySQL resource in the Azure Portal. It will be in the Connection strings blade for Web App.


