Deploying React.js application to Azure App Service with Azure DevOps
Steps to publish your React Single Page Application into Azure App Service using Azure DevOps
Intro
This blog would help setting up your Azure DevOps project creation, repository management, configuring the build and release pipeline, and CI/CD enablement.
Steps
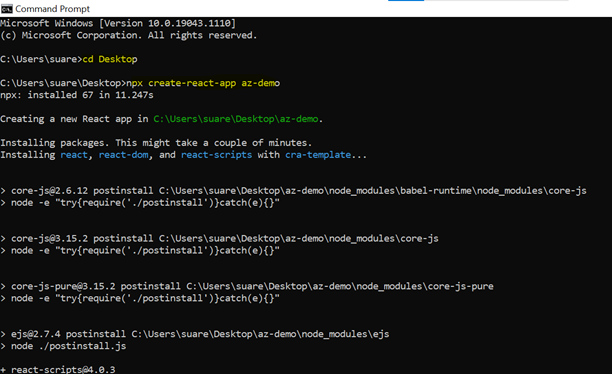
Let’s get started by creating a new React project using the CLI (command line interface), you can navigate to a directory of your choice and run the following command:
npx create-react-app az-demo
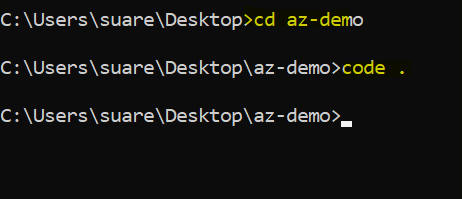
Once the project gets created, let’s navigate to the project (cd az-demo) from the command line and open it with Visual Studio Code
code .
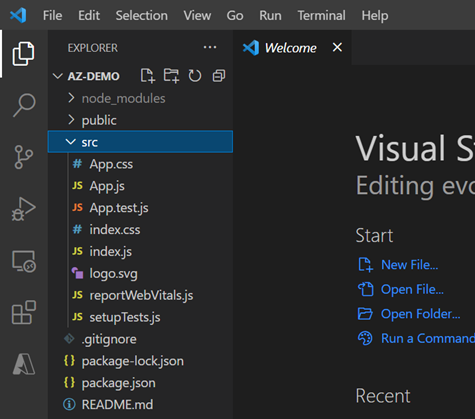
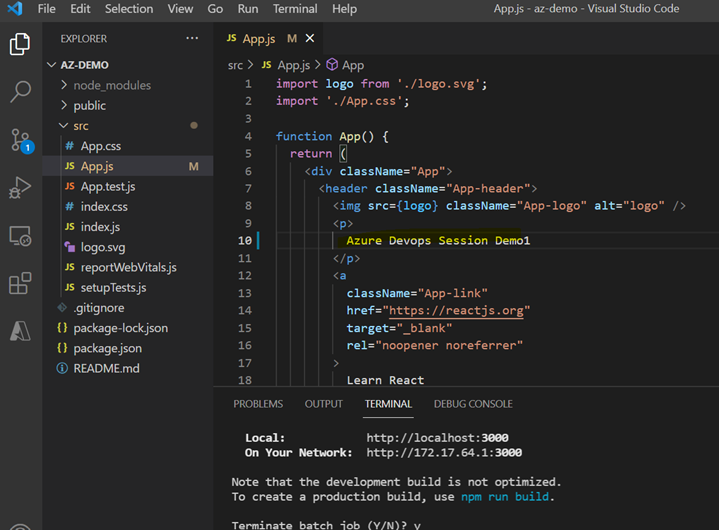
The structure of your project should look something like this:
There is a starter script inside our package.json which will build and run our application. From the command line run the following command:
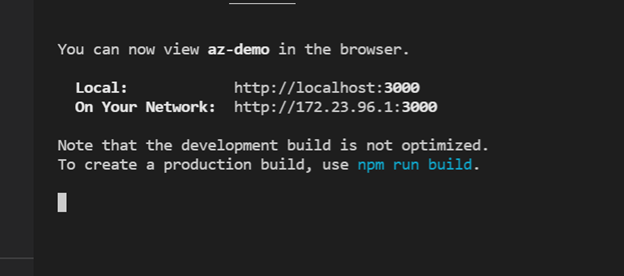
npm start
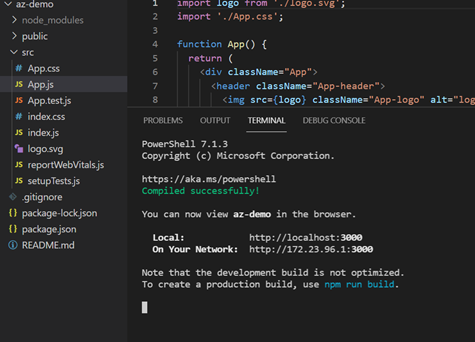
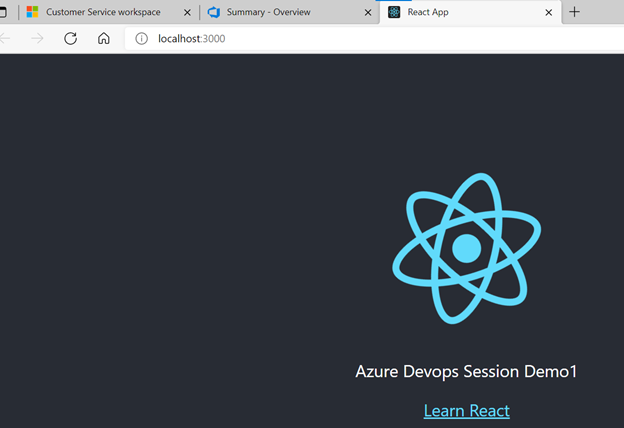
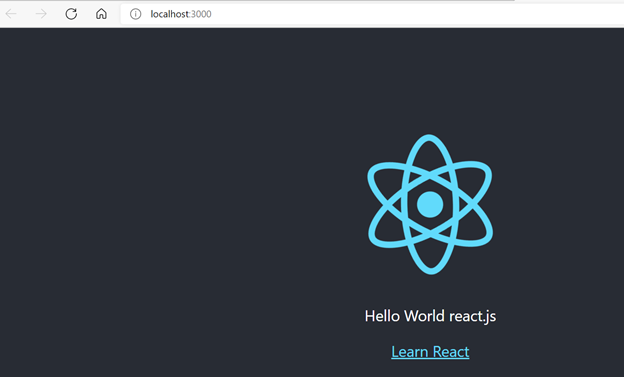
Open your browser and access the application via localhost:3000

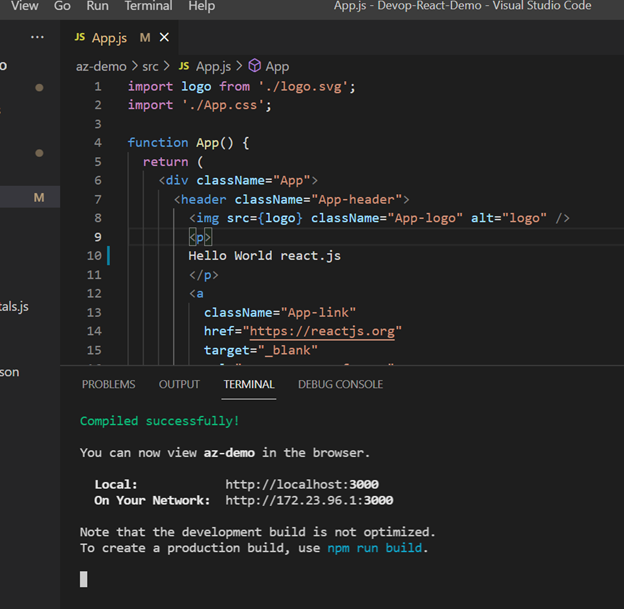
Let’s open the App.js file and then modify Devops Demo like below and finally save to reload
Run npm start and then you should see that the application is running
Reload the browser and access the application again to view the modified content via localhost:3000
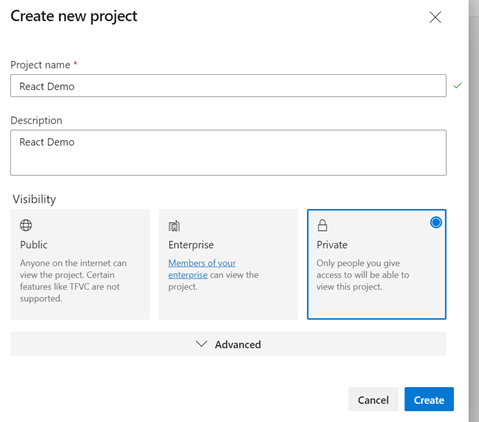
Navigate to https://dev.azure.com/ and create a new project in your Azure DevOps organization. I’ve named it “React Demo”.
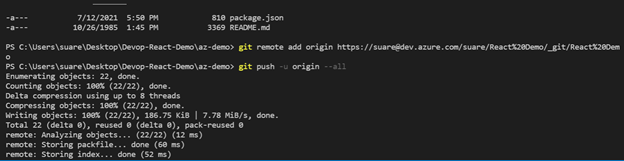
Click on the repo’s tab to navigate to the repo. Once there let’s use the link provided to push our react project.
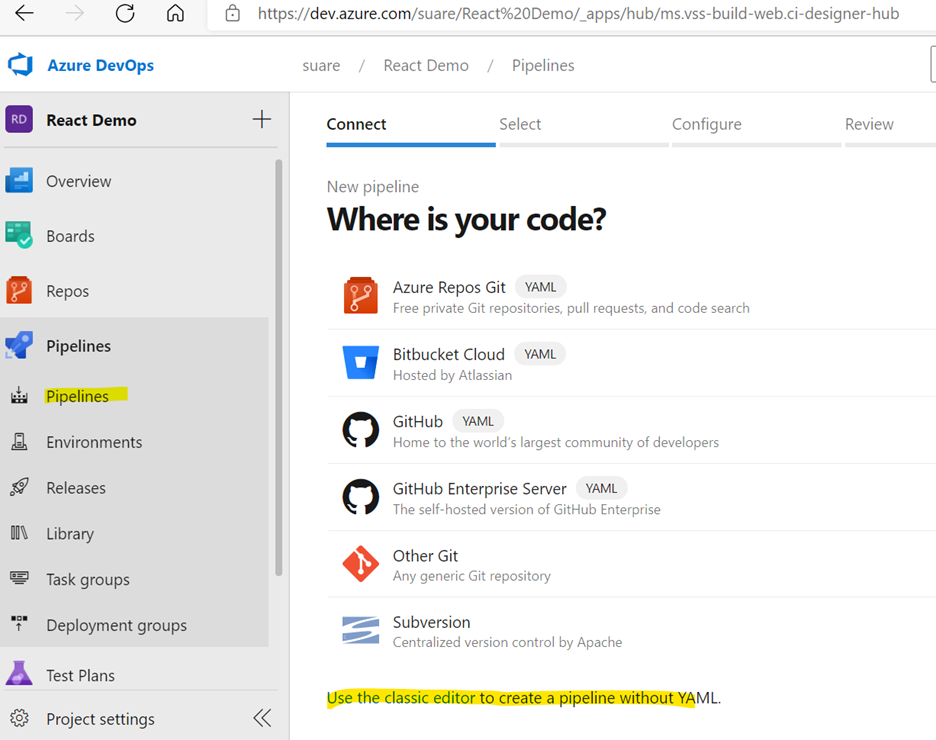
Navigate to pipeline
Let’s click on “create a pipeline” and choose “use the classic editor”
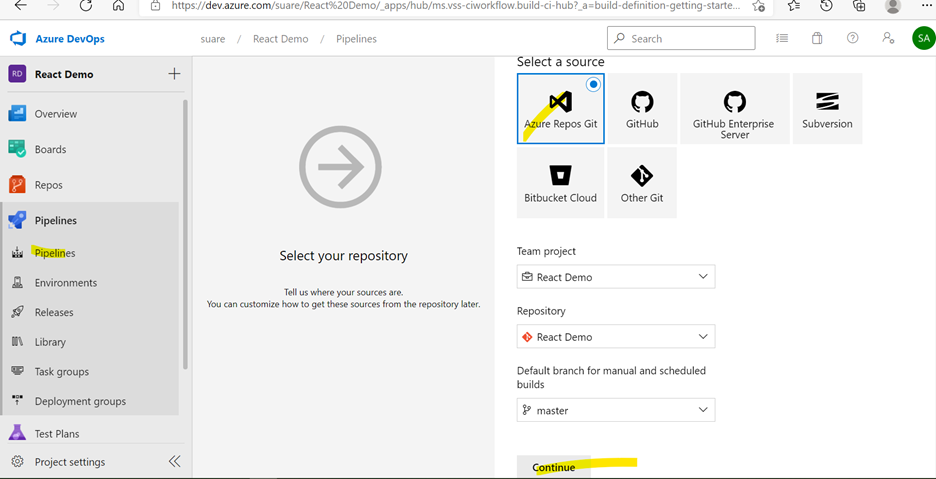
Select the Azure Repos Git option and then click on continue
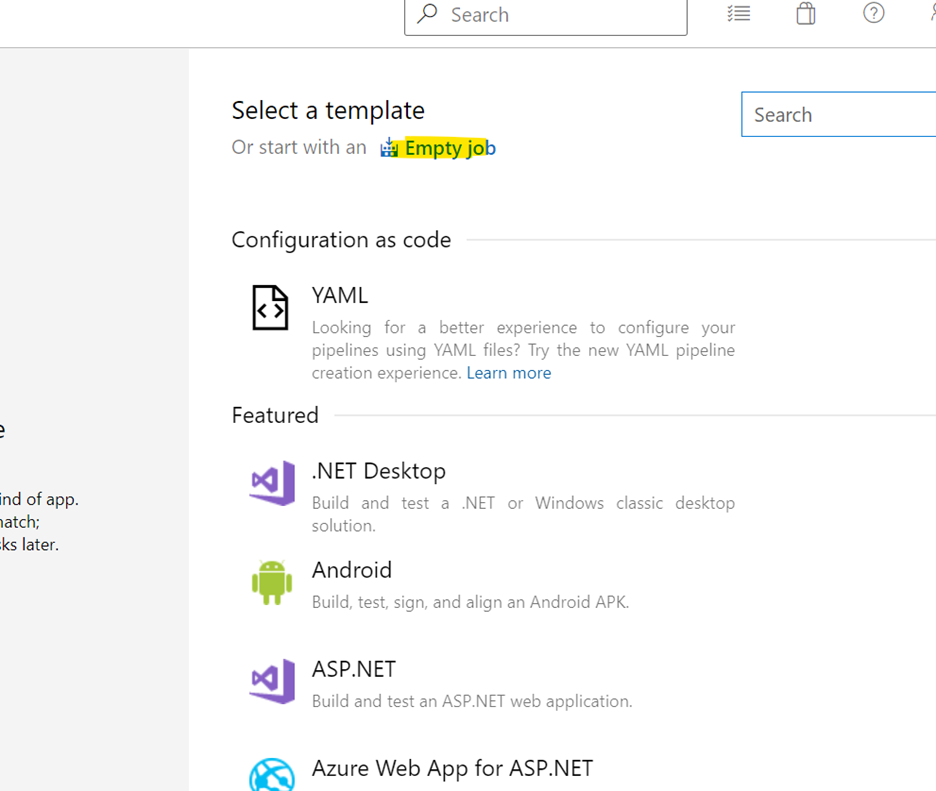
Select start with an “empty job” option
Click on the Agent job 1 and let’s add two npm tasks and one publish artifacts task.
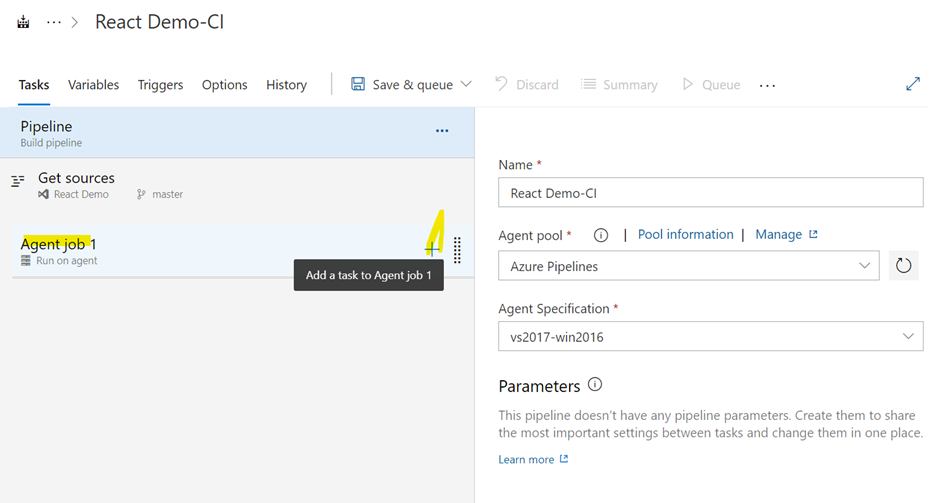
Create all the required tasks and then Save each task added to the pipeline
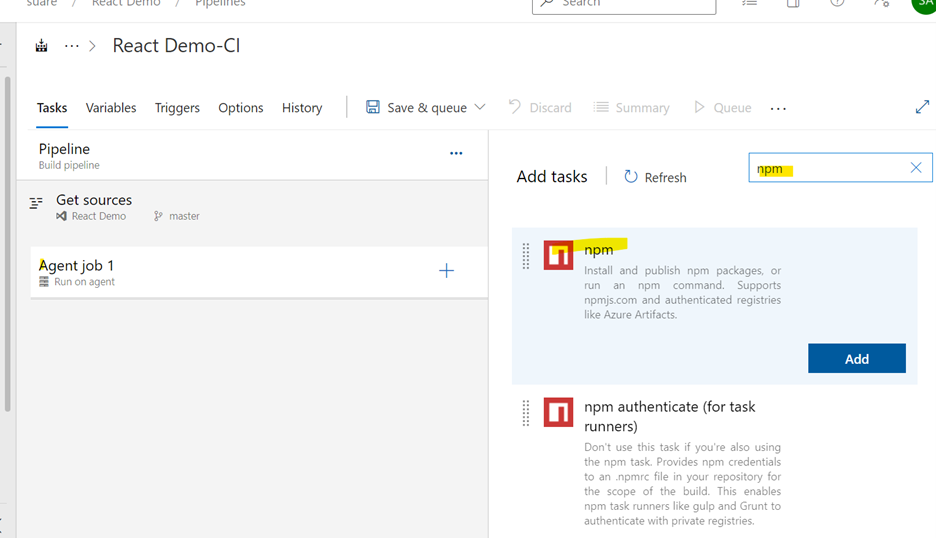
a. npm install: This will install all the react library (dependencies)
We can leave the npm install task as it is
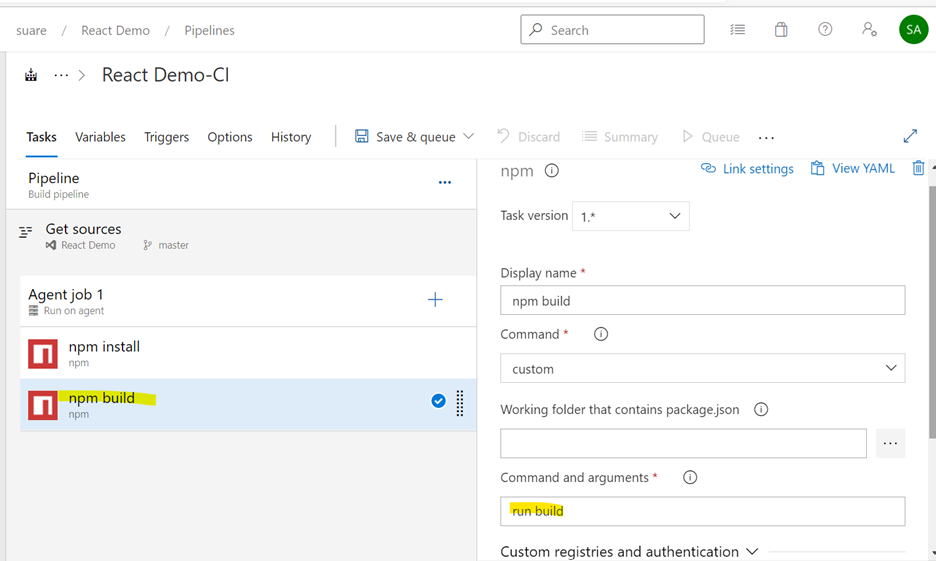
b. npm run build: This will create a build folder that we will then use to publish our application.
Let’s rename the second task to “npm build”. Under command choose “custom” from the dropdown and enter “run build” under “Command and arguments”.
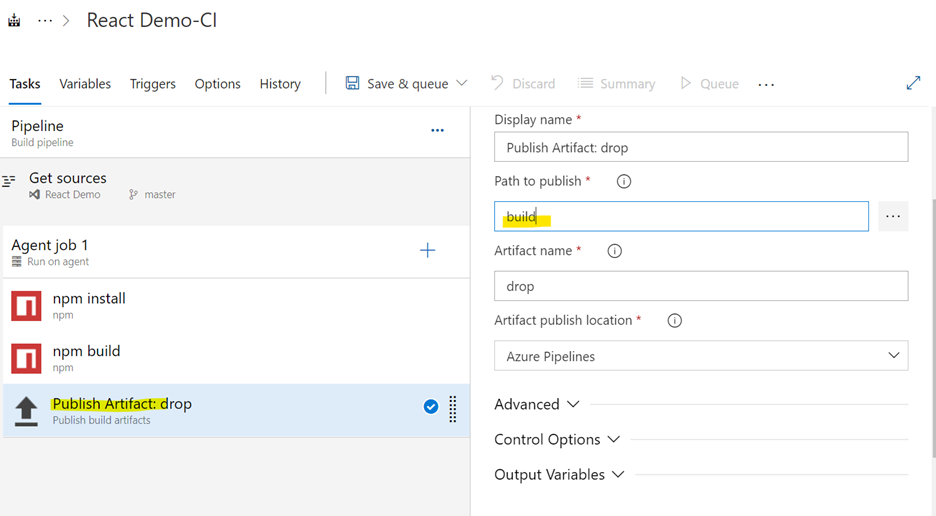
c. Publish Artifact: Click on the publish task
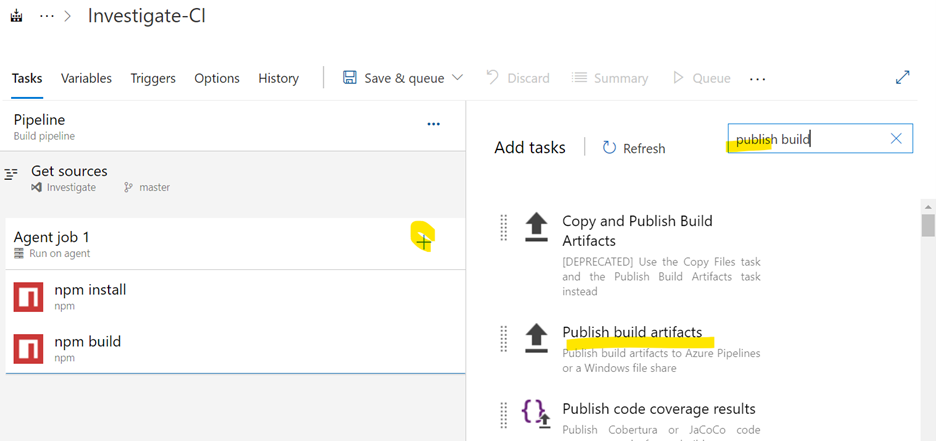
Set the “Path to publish” to build, so that our release pipeline will have access to the generated build.
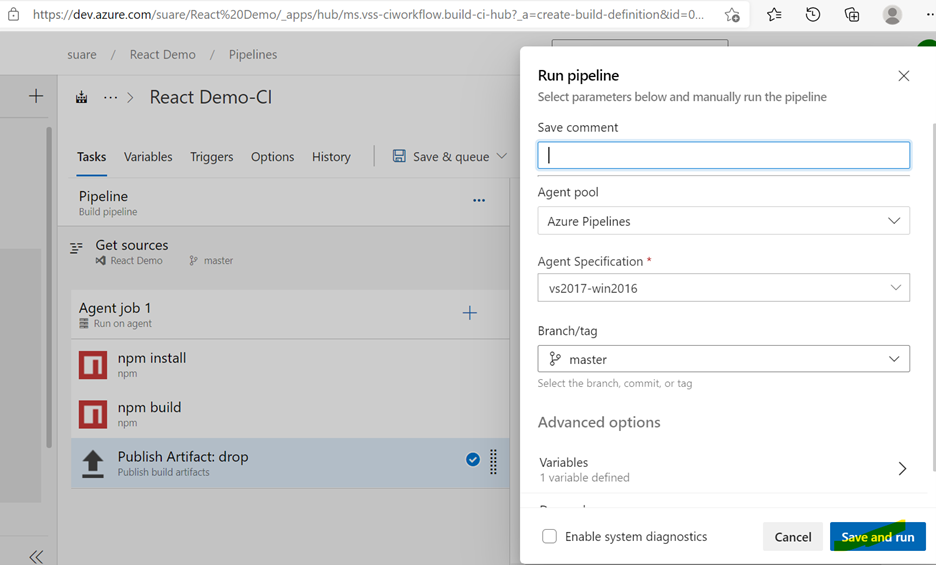
Click on the Run pipeline option. This should create a build archive at the end. Next let’s Save and Run to test it out.
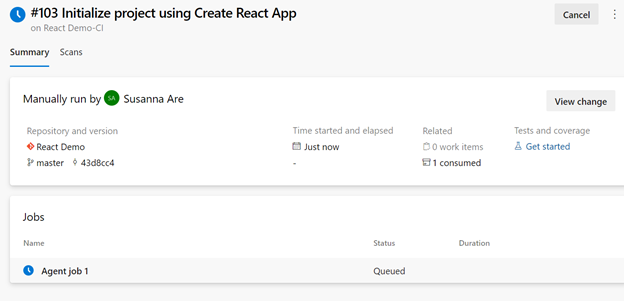
You should now see the newly created pipeline and its status as queued to be run.
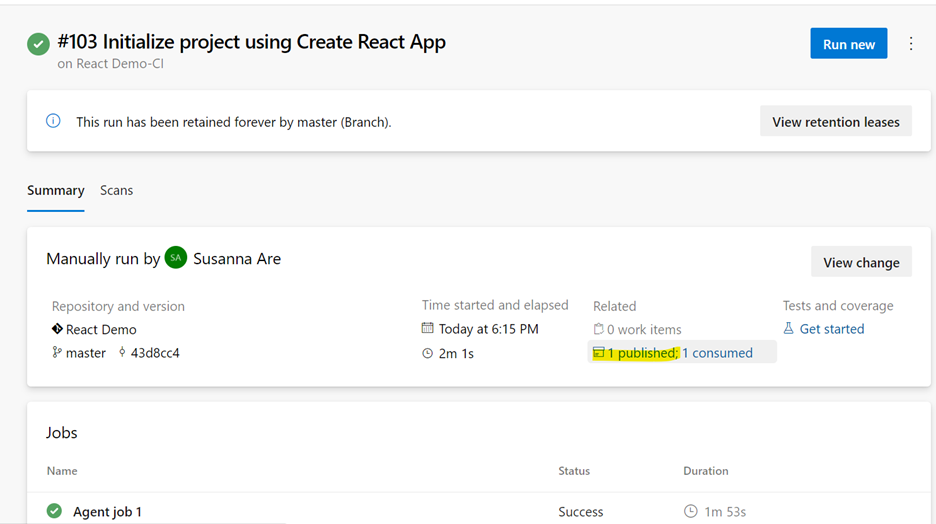
Now that the build pipeline has succeeded, we should be able to see the published artifact.
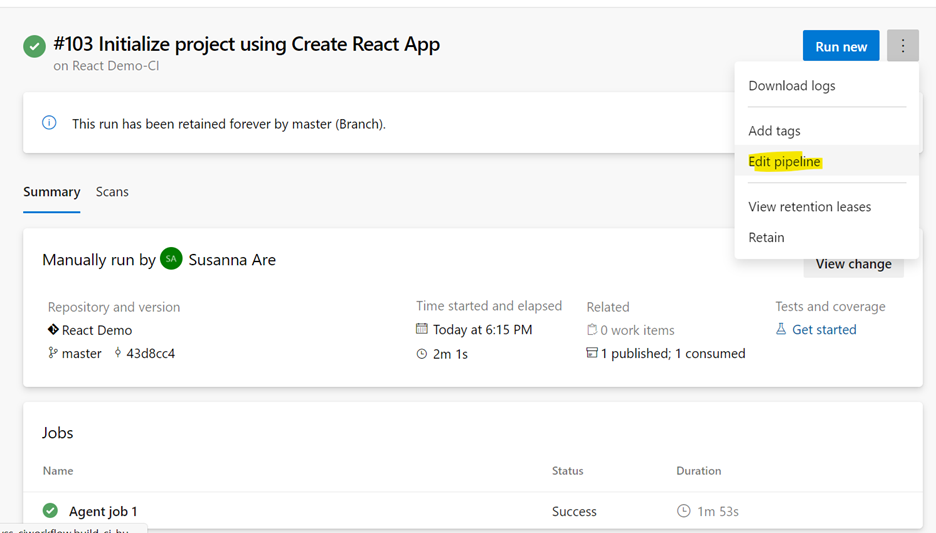
Click on Edit pipeline option
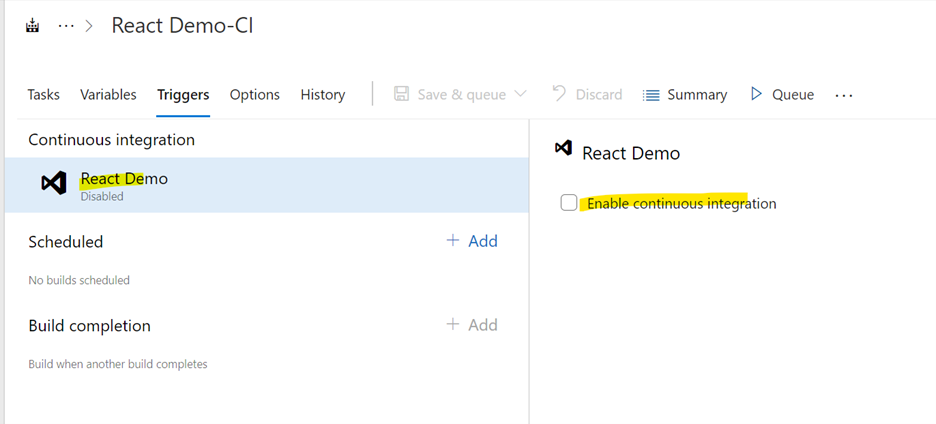
Let’s enable Continuous Integration for this pipeline.
And then click on Save & queue

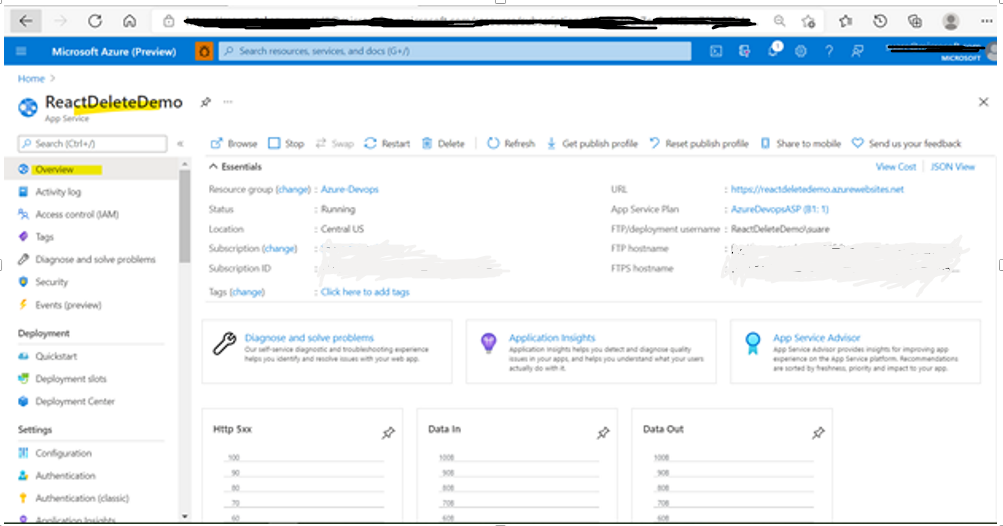
I have also created an app service ReactDeleteDemo
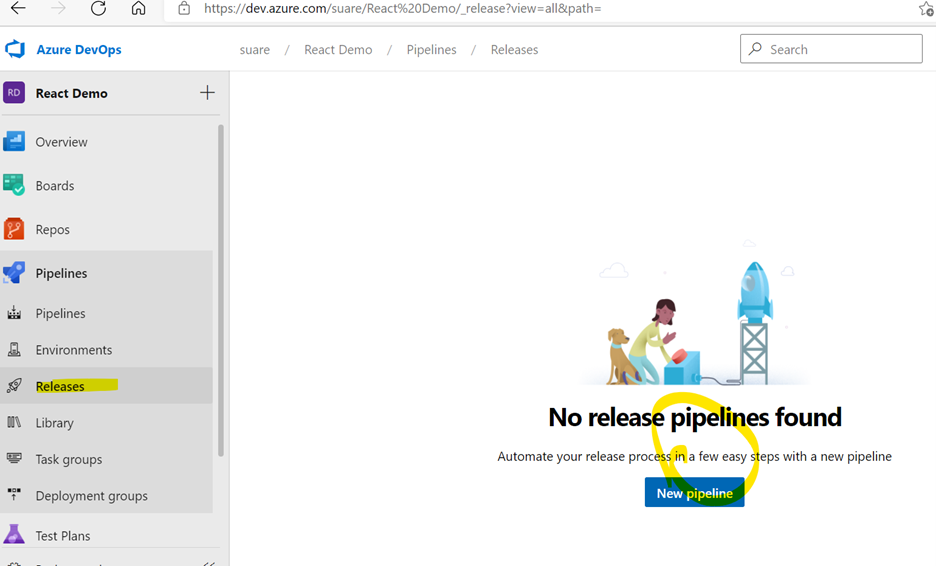
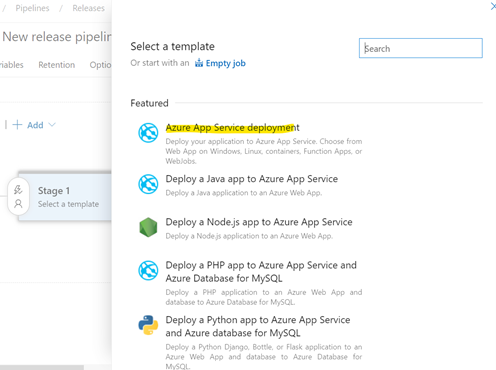
Navigate back to your Azure DevOps Pipelines and create a new Release
Select the “Azure App Service Deployment” template
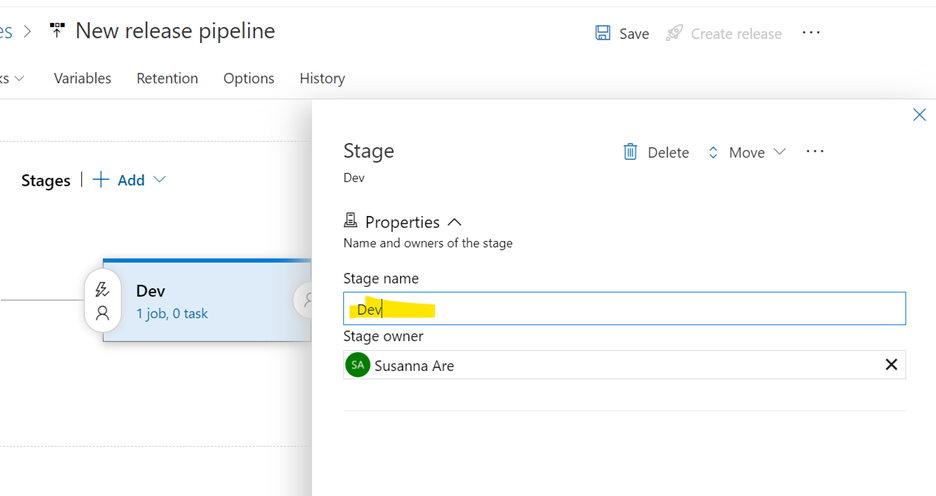
You can then give your stage a name. I’ve named mine as “Dev”.
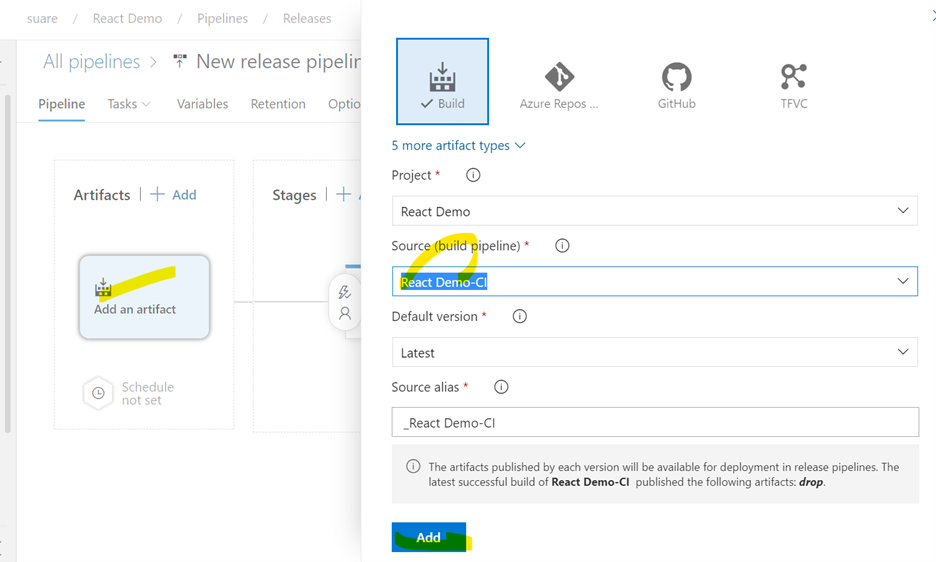
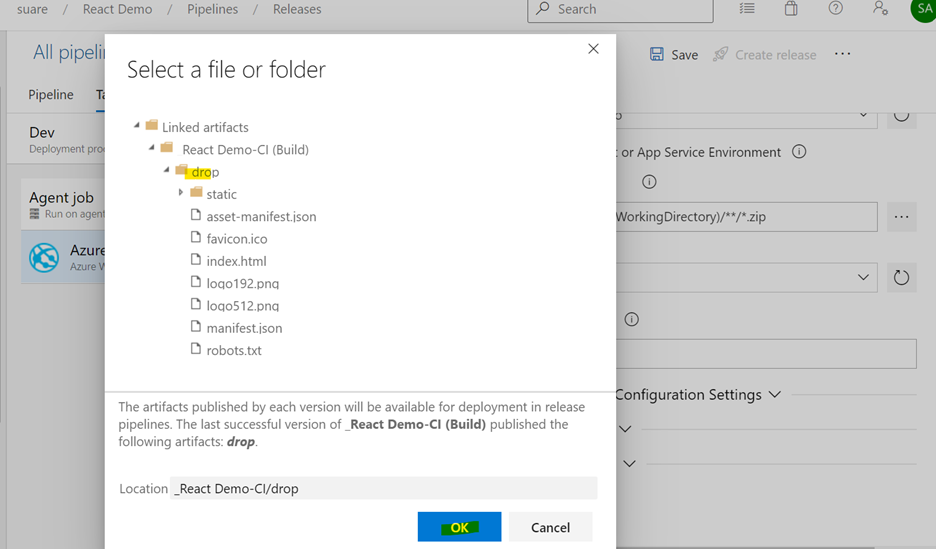
Let’s click on “Add an artifact”. Then choose your pipeline and the artifact that was generated when you ran the pipeline. Once you select the artifact, click the “Add” button
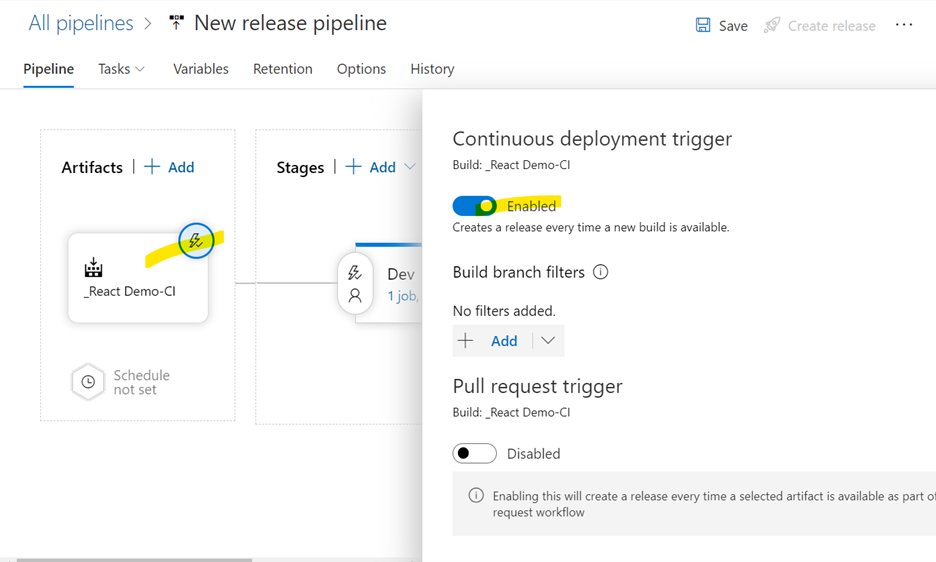
Double-check to see if CI/CD is enabled properly.
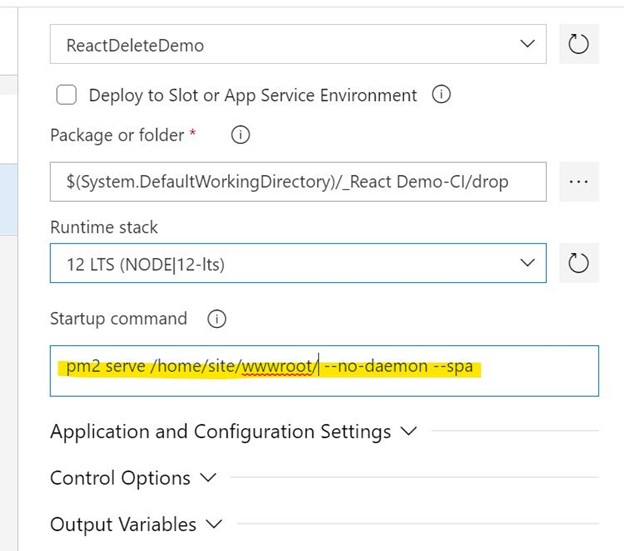
Now, click on the “1 job, 1 task” option under your stage and select the “Azure App Service Deploy” task
Select the appropriate Azure Subscription, Resource Group, App Service Name and required startup commands.
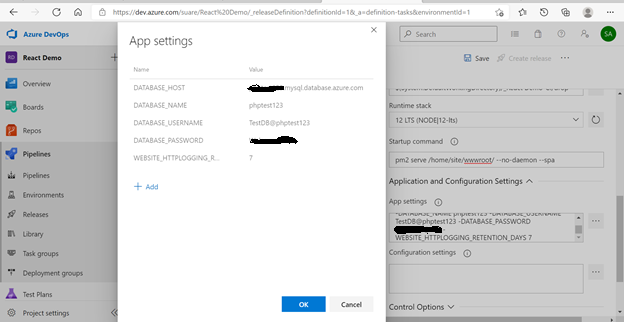
You could also add any App Settings as required
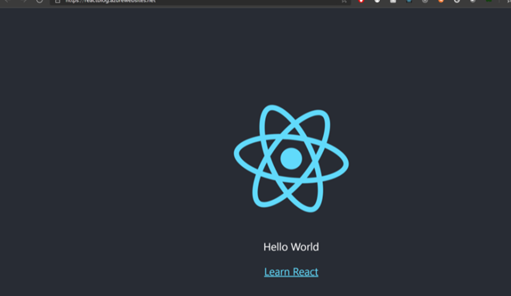
Go ahead and create a release from the pipeline created. If you visit the Azure WebApp URL, you should now see your website!!
Test CI/CD by changing the code
Modify your source code by adding some more text and run npm start
Verify the results on your local browser
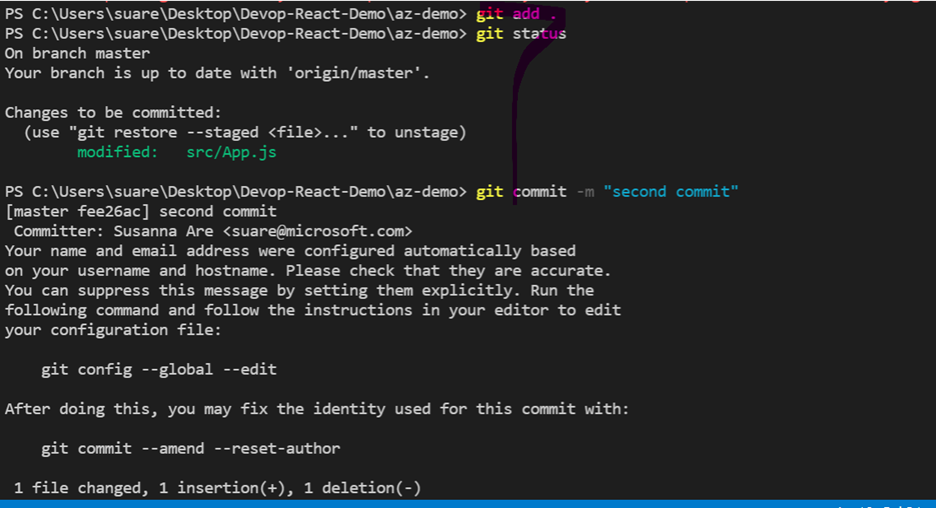
To commit the changes to the repository, please run the below commands
git add .
git status
git commit -m “second commit”
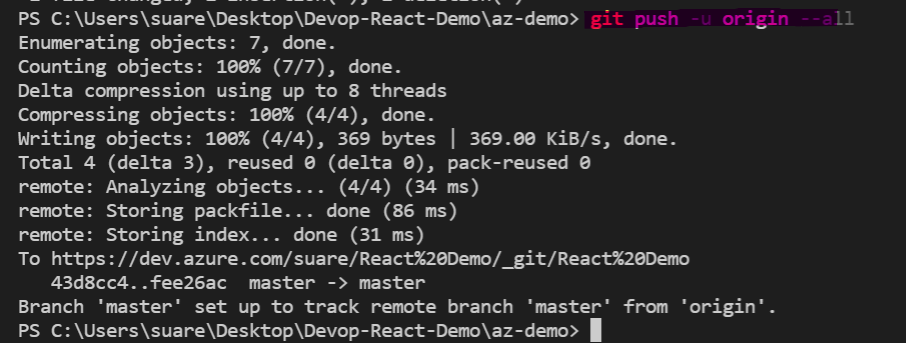
git push -u origin –all
The last command will push the source code to the repository
Upon the push to the repository, we should see the CI/CD has triggered
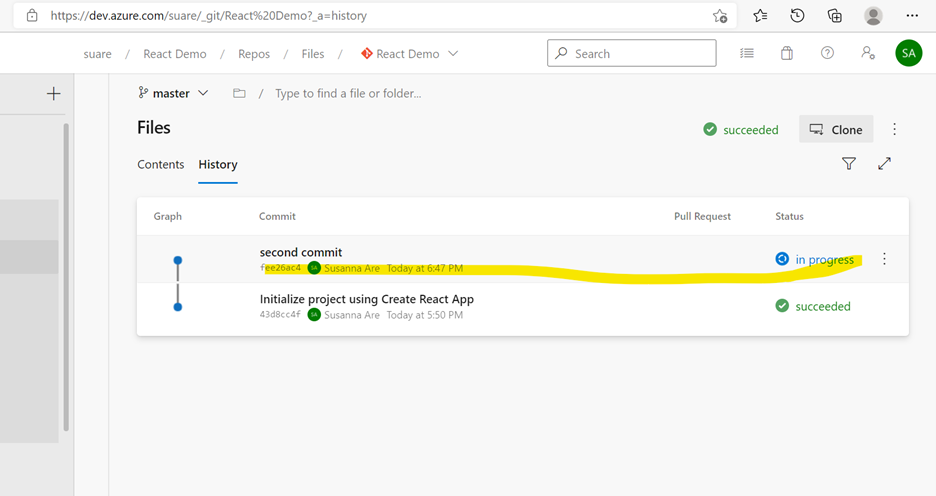
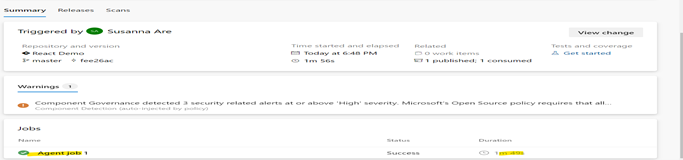
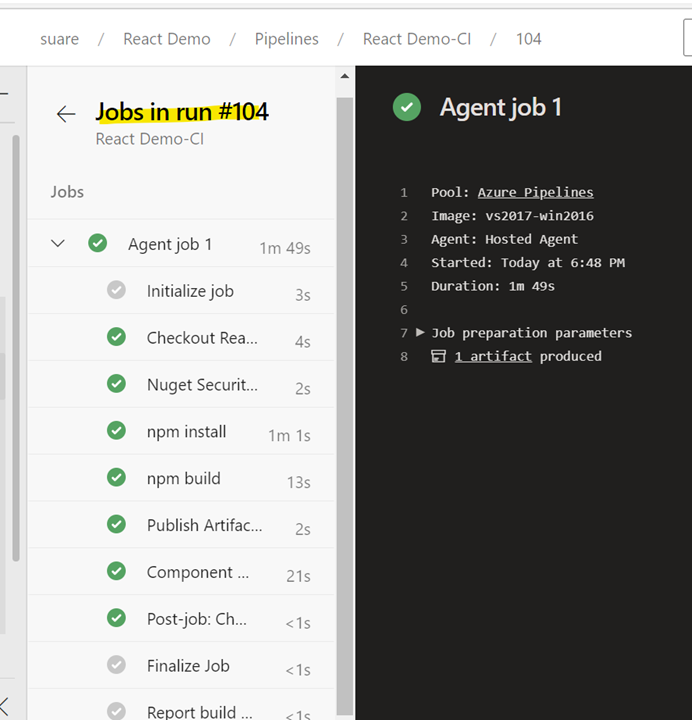
We should then see that the Build pipeline has succeeded
The release pipeline should automatically be triggered.
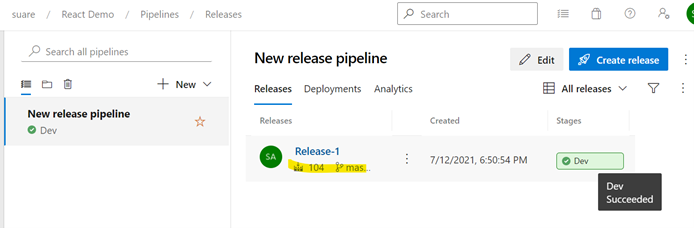
The deployment should complete successfully like below
Happy Learning!!


