React deployment on App Service Windows
This blog post will cover deploying a React application to Azure App Service on Windows
Local Development
Create a React app
-
Create a new React project with
create-react-appandnpx:npx create-react-app myapp -
Once the creation is done, cd into the myapp folder and then start the server using:
npm startNOTE: you can use either
npmoryarn, just make sure to deleteyarn.lockand reinstall packages with npm to create apackage-lock.jsonif using npmThis will start the development server:
Compiled successfully! You can now view myapp in the browser. Local: http://localhost:3000 On Your Network: http://192.168.86.49:3000 Note that the development build is not optimized. To create a production build, use npm run build. webpack compiled successfully -
Browse the site with
http://localhost:3000to get the default page.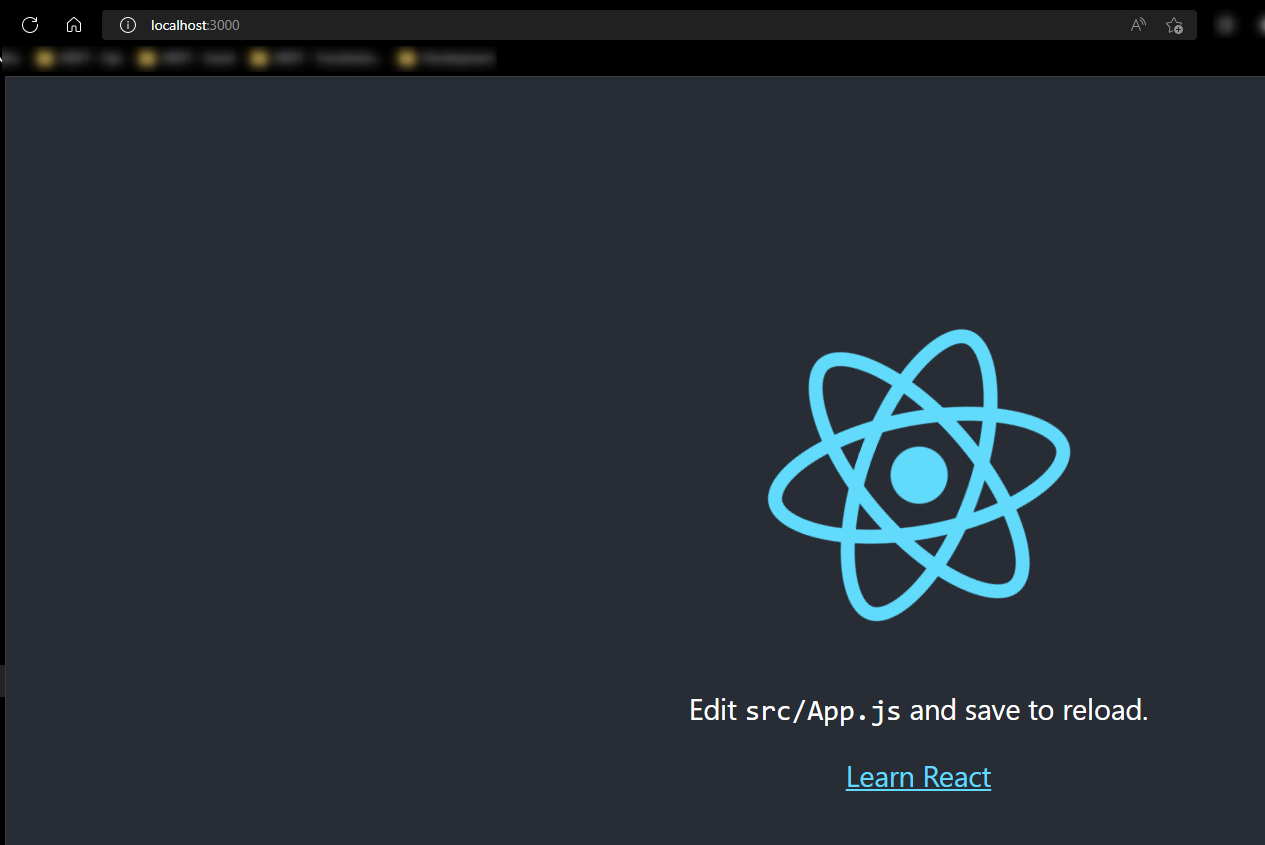
-
To create a production build you can run:
npm run buildThis will create a
buildfolder with all javascript and static files. This is the recommended way of serving a React site in production environments. View more here.If you want to test this production build on your local environment you can use serve, pm2 or http-server, amongst others. Here is an example using serve:
     npm install -g serve
     serve -s build
Or
npx serve -s build/
Deployment Options
There are multiple deployment options in App Service Linux as Continuous Deployment (GitHub/GitHub Actions, Bitbucket, Azure Repos, External Git, Local Git), ZipDeploy, Run from Package, FTP, etc.
Prerequisites
IMPORTANT: Prior to doing any of the below methods, you should know about these three items:
- Make sure the application generates a production build. Which is explained above.
- You may need to set your Physical Path to point to the build folder. This build folder is what contains your site content bundled for production.
- If you are using client-side routing, review this section first.
How to set Physical Path on Windows Web Apps
-
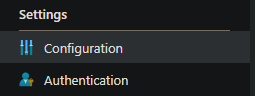
Go to Configuration in the Azure Portal for the Web App
-
Next, Go to Path Mappings - click the Edit button:
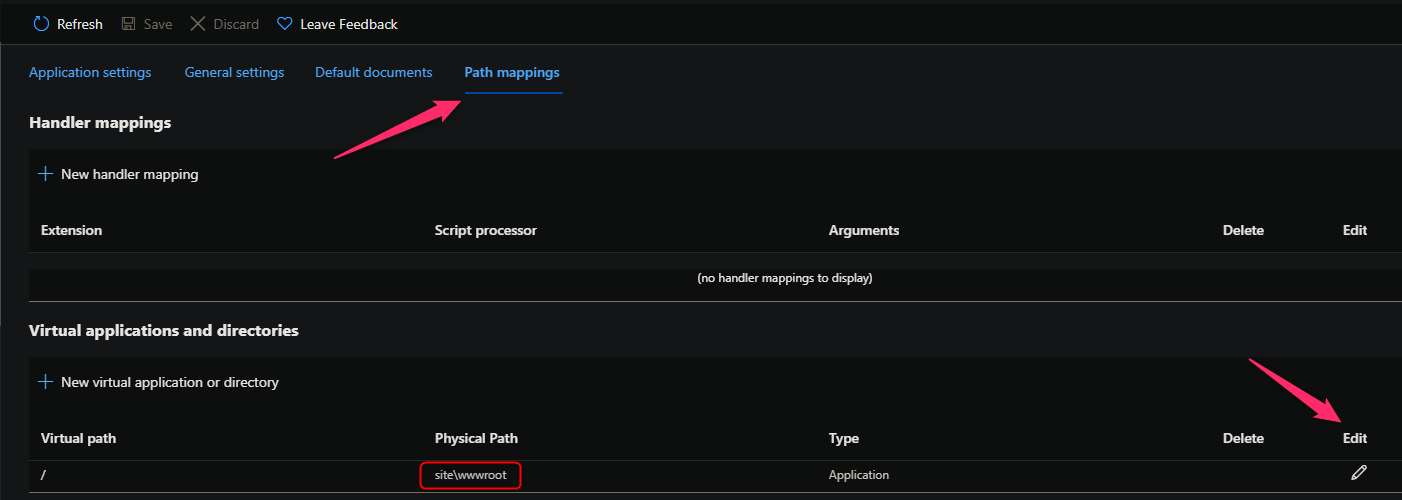
-
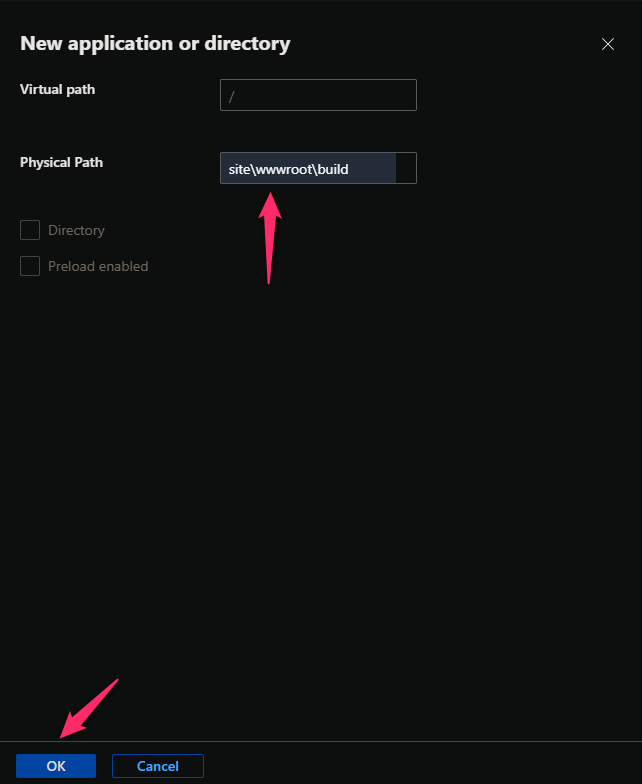
Lastly, update the Physical Path to site\wwwroot\build
Why is this needed
This is to point the site content path to the build folder of our application. This may not be required and also depends on how you’re deploying (see below methods). For example, it’s easier with GitHub Actions or DevOps to deploy only the \build folder contents, therefor the Physical Path doesn’t need to be changed. Compared to Local Git, where it may be easier to change it to point to the \build folder.
NOTE: This is not applicable to Linux App Service
Local Git
Set up
To setup Local Git as a deployment option, follow these steps:
-
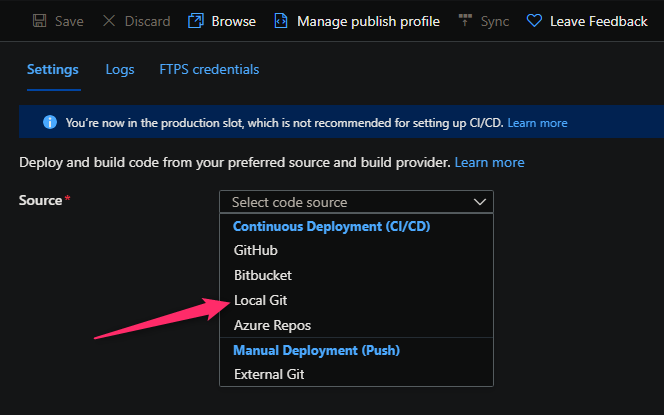
Navigate to your web app and select Deployment Center -> Local Git and then click on Save.
-
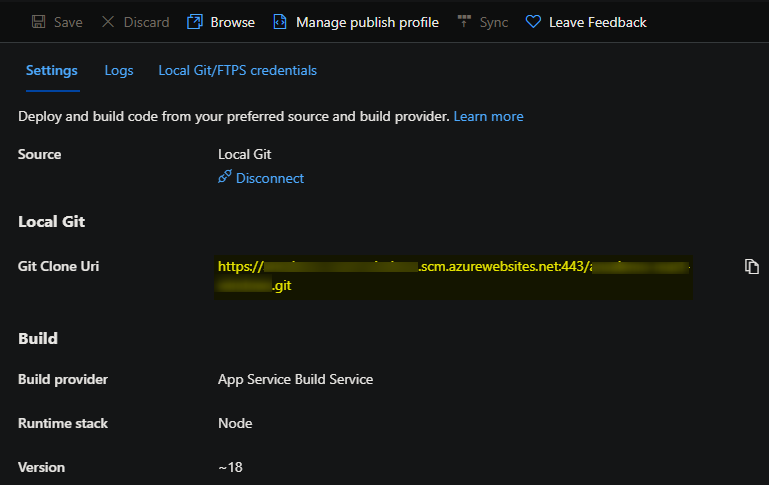
Copy the remote git repository from Azure Portal.
- In your local terminal run the following commands in order:
git add . git commit -m "Initial Commit" git remote add azure https://<sitename>.scm.azurewebsites.net:443/<sitename>.git - The remote repository has now been added to deploy to.
When using Local Git, you are using App Service Build Service. Local Git with Windows does NOT run npm run build/yarn run build for Node applications, the logic behind this only uses runs an install command.
This means your production build folder will not be automatically built.
Therefor, there are two general deployment methods that can be done when using Local Git to get around this.
Including the build folder
When creating a React application, the .gitignore will contain the build folder in it, to avoid pushing it to the repository. In this case, we need to include this. The .gitignore will include this line:
# production
/build
We need to delete this line from out .gitignore, or comment it out.
After deleting this (or commenting out), push to the site. Make sure to run npm run build / yarn run build locally first if any changes were made.
Push to the site with the following:
git push azure master
You should see something like the below:
[master 378fedc] pushing the build folder
 16 files changed, 96 insertions(+), 1 deletion(-)
 create mode 100644 build/asset-manifest.json
 create mode 100644 build/favicon.ico
 create mode 100644 build/index.html
 create mode 100644 build/logo192.png
 create mode 100644 build/logo512.png
 create mode 100644 build/manifest.json
 create mode 100644 build/robots.txt
 create mode 100644 build/static/css/main.073c9b0a.css
 create mode 100644 build/static/css/main.073c9b0a.css.map
 create mode 100644 build/static/js/787.d3befce1.chunk.js
 create mode 100644 build/static/js/787.d3befce1.chunk.js.map
 create mode 100644 build/static/js/main.804bfd1f.js
 create mode 100644 build/static/js/main.804bfd1f.js.LICENSE.txt
 create mode 100644 build/static/js/main.804bfd1f.js.map
 create mode 100644 build/static/media/logo.6ce24c58023cc2f8fd88fe9d219db6c6.svg
Enumerating objects: 25, done.
Counting objects: 100% (25/25), done.
Delta compression using up to 8 threads
Compressing objects: 100% (23/23), done.
Writing objects: 100% (23/23), 183.94 KiB | 3.54 MiB/s, done.
Total 23 (delta 2), reused 0 (delta 0), pack-reused 0
remote: Updating branch 'master'.
remote: Updating submodules.
remote: Preparing deployment for commit id '378fedc1bc'.
remote: Generating deployment script.
remote: Running deployment command...
remote: Handling node.js deployment.
remote: Creating app_offline.htm
remote: KuduSync.NET from: 'C:\home\site\repository' to: 'C:\home\site\wwwroot'
remote: Copying file: '.gitignore'
remote: Copying file: 'package-lock.json'
remote: Copying file: 'build\asset-manifest.json'
remote: Copying file: 'build\favicon.ico'
remote: Copying file: 'build\index.html'
remote: Copying file: 'build\logo192.png'
remote: Copying file: 'build\logo512.png'
remote: Copying file: 'build\manifest.json'
remote: Copying file: 'build\robots.txt'
remote: Copying file: 'build\static\css\main.073c9b0a.css'
remote: Copying file: 'build\static\css\main.073c9b0a.css.map'
remote: Copying file: 'build\static\js\787.d3befce1.chunk.js'
remote: Copying file: 'build\static\js\787.d3befce1.chunk.js.map'
remote: Copying file: 'build\static\js\main.804bfd1f.js'
remote: Copying file: 'build\static\js\main.804bfd1f.js.LICENSE.txt'
remote: Copying file: 'build\static\js\main.804bfd1f.js.map'
remote: Copying file: 'build\static\media\logo.6ce24c58023cc2f8fd88fe9d219db6c6.svg'
remote: Deleting app_offline.htm
remote: AppInsightsAgent: ETW could not be loaded
remote: Application Insights was started
remote: Invalid start-up command "react-scripts start" in package.json. Please use the format "node <script relative path>".
remote: Looking for app.js/server.js under site root.
remote: Missing server.js/app.js files, web.config is not generated
remote: The package.json file does not specify node.js engine version constraints.
remote: The node.js application will run with the default node.js version 18.3.0.
remote: Selected npm version 8.11.0
remote: AppInsightsAgent: ETW could not be loaded
remote: Application Insights was started
remote: npm WARN config production Use `--omit=dev` instead.
remote: .................................................................................................................
remote:
remote: up to date, audited 1475 packages in 2m
remote:
remote: 225 packages are looking for funding
remote:   run `npm fund` for details
remote:
remote: 6 high severity vulnerabilities
remote:
remote: To address all issues (including breaking changes), run:
remote:   npm audit fix --force
remote:
remote: Run `npm audit` for details.
remote: Finished successfully.
remote: Running post deployment command(s)...
remote: Triggering recycle (preview mode disabled).
remote: Deployment successful.
For this case, make sure your Physical Path Under General -> Path Mappings is set to point to site\wwwroot\build.
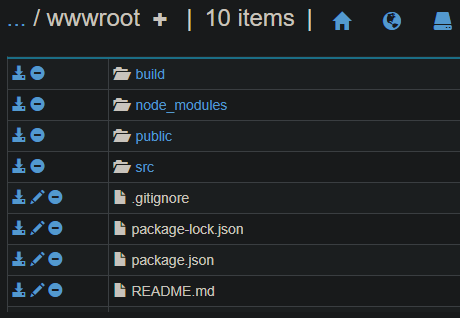
Browsing the application should now should the show the default React page. The actual site contents deployed should look like the following for a quickstart React application:
Custom Deployment Script
To automate the process of rebuilding the build folder, a custom deployment script can be used.
A quick way to do this is use kuduscript to generate one. This can be found on npm.
Run the following locally after installation. This will generate a deploy.cmd and .deployment file:
$ kuduscript -y --node
Generating deployment script for node.js Web Site
Generated deployment script files
Your project should now look like this:
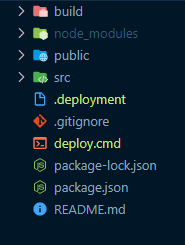
Don’t edit the .deployment file. Any changes we make will be in the deploy.cmd file. When deploying with Local Git, and having the .deployment file - it will automatically detect that we’re using a custom deployment script and execute what we have here instead.
Use the following script in this repo - with some changes from the default script. Copy this into the deploy.cmd that was generated in your project and redeploy to the site.
Push to the site again with git push azure master, you should see output resembling the below:
remote: Updating branch 'master'.
remote: Updating submodules.
remote: Preparing deployment for commit id '57c473d240'.
remote: Running custom deployment command...
remote: Running deployment command...
remote: Handling node.js deployment.
remote: Creating app_offline.htm
remote: KuduSync.NET from: 'C:\home\site\repository' to: 'C:\home\site\wwwroot'
<redacting some lines>
remote: Running npm install --production..
remote: .................................................................................................
remote:
remote: up to date, audited 1475 packages in 2m
remote:
remote: 225 packages are looking for funding
remote:   run `npm fund` for details
remote:
remote: 6 high severity vulnerabilities
remote:
remote: To address all issues (including breaking changes), run:
remote:   npm audit fix --force
remote:
remote: Run `npm audit` for details.
remote: Creating a production build, running npm run build..
remote: AppInsightsAgent: ETW could not be loaded
remote: Application Insights was started
remote:
remote: > myapp@0.1.0 build
remote: > react-scripts build
remote:
remote: AppInsightsAgent: ETW could not be loaded
remote: Application Insights was started
remote: AppInsightsAgent: ETW could not be loaded
remote: Application Insights was started
remote: .......................................
remote: Creating an optimized production build...
remote: ..............................................................................................
remote: Compiled successfully.
remote:
remote: File sizes after gzip:
remote:
remote:   46.6 kB (-7 B)  build\static\js\main.804bfd1f.js
remote:   1.78 kB (-2 B)  build\static\js\787.d3befce1.chunk.js
remote:   541 B (-2 B)    build\static\css\main.073c9b0a.css
remote:
remote: The project was built assuming it is hosted at /.
remote: You can control this with the homepage field in your package.json.
remote:
remote: The build folder is ready to be deployed.
remote: You may serve it with a static server:
remote:
remote:   npm install -g serve
remote:   serve -s build
remote:
remote: Find out more about deployment here:
remote:
remote:   https://cra.link/deployment
remote:
remote: .........................................................................................................................................................................................
remote: Finished successfully.
remote: Running post deployment command(s)...
remote: Triggering recycle (preview mode disabled).
remote: Deployment successful.
Ensure your Physical Path Under General -> Path Mappings is set to point to site\wwwroot\build.
This will now rebuild the production bundle each time on deployment without the need for including the build folder in your repository. You can test this works but making a change locally and redeploying. You should see the update change be reflected on the site.
NOTE: If using this approach, you can add the
buildfolder back into.gitignore, as talked about in the Including the build folder section.GitHub Actions
You can quickly get started with GitHub Actions by using the App Service Deployment Center. This will automatically generate a workflow file based on your application stack and commit it to your GitHub repository in the correct directory. You can deploy a workflow manually using deployment credentials.
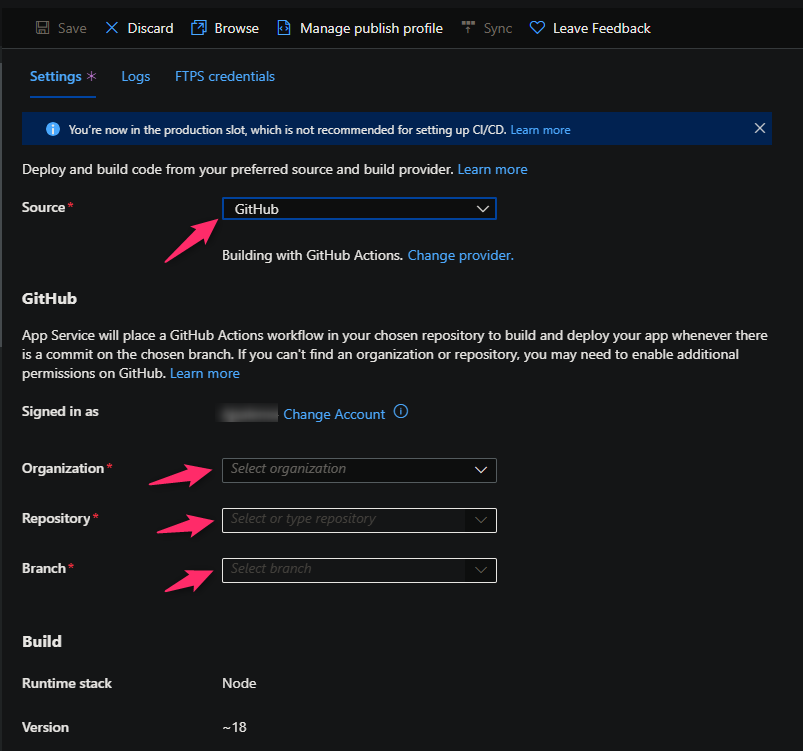
You can find more details about these steps documented here:
For React deployments it is recommended to modify the default template with the following recommendations - this is due to the time it takes overwise to copy over files between deployment stages (eg., actions/upload-artifact@v2) - without these changes, it may take 15 minutes to easily over an hour(s) since node_modules contains thousands of files, or more, depending on the project.
Including only the Build folder contents
-
Just upload the production build folder.
- name: Upload artifact for deployment job uses: actions/upload-artifact@v2 with: name: node-app path: build/ - If possible, remove
npm run test. -
Validate current nodejs version.
- name: Set up Node.js version uses: actions/setup-node@v1 with: node-version: '18.x' - Use yarn or npm.
- name: yarn install, build run: | yarn install yarn run build --if-present -
Implement cache for Npm or Yarn. This can improve in some scenarios the deployment time.
Note: It is not recommended to cache node_modules, as it can break across Node versions and won’t work with npm ci
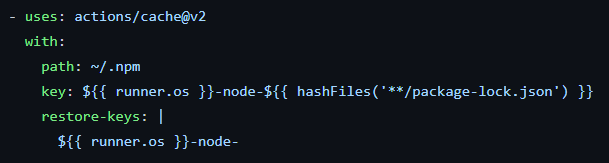
Here is an example with recommendations:
name: Build and deploy Node.js app to Azure Web App - sitename

on:
  push:
    branches:
      - master
  workflow_dispatch:

jobs:
  build:
    runs-on: windows-latest

    steps:
      - uses: actions/checkout@v2

      - name: Set up Node.js version
        uses: actions/setup-node@v1
        with:
            node-version: '18.x'

      - name: npm install, build
        run: |
          npm install
          npm run build --if-present

      - name: Upload artifact for deployment job
        uses: actions/upload-artifact@v2
        with:
          name: node-app
          path: build/

  deploy:
    runs-on: windows-latest
    needs: build
    environment:
      name: 'Production'
      url: $

    steps:
      - name: Download artifact from build job
        uses: actions/download-artifact@v2
        with:
          name: node-app

      - name: 'Deploy to Azure Web App'
        id: deploy-to-webapp
        uses: azure/webapps-deploy@v2
        with:
          app-name: 'sitename'
          slot-name: 'Production'
          publish-profile: $
          package: .
This approach does not need to change the Physical Path as explained earlier and can remain to site\wwwroot.
Including all project contents
To include all contents in the repository (and not just \build) - you must first ensure your Physical Path Under General -> Path Mappings is set to point to site\wwwroot\build.
Next, we can use this approach - which zips the content before changing deployment stages which significantly can decrease deployment time.
name: Build and deploy Node.js app to Azure Web App - sitename

on:
  push:
    branches:
      - master
  workflow_dispatch:

jobs:
  build:
    runs-on: windows-latest

    steps:
      - uses: actions/checkout@v2

      - name: Set up Node.js version
        uses: actions/setup-node@v1
        with:
            node-version: '18.x'

      - name: npm install, build
        run: |
          npm install
          npm run build --if-present

      - name: Zip all files for upload between jobs
        run: Compress-Archive -Path .\* -DestinationPath react.zip

      - name: Upload artifact for deployment job
        uses: actions/upload-artifact@v2
        with:
          name: node-app
          path: react.zip

  deploy:
    runs-on: windows-latest
    needs: build
    environment:
      name: 'Production'
      url: $

    steps:
      - name: Download artifact from build job
        uses: actions/download-artifact@v2
        with:
          name: node-app

      - name: 'Deploy to Azure Web App'
        id: deploy-to-webapp
        uses: azure/webapps-deploy@v2
        with:
          app-name: 'sitename'
          slot-name: 'Production'
          publish-profile: $
          package: react.zip

      - name: Delete zip file
        run: rm react.zip
Azure DevOps
You can use Azure Pipelines to build your React application. For React apps, you can use npm or yarn to install application dependencies. You can review more details here: Implement JavaScript frameworks.
The below will be creating a pipeline through .yaml based creation.
Including only the Build folder contents
- Go to
Pipelinesand createNew pipeline. - Select where your repository is stored (GitHub, Azure Repos, etc.)
- Select your code repository.
- Create an empty template template. To make it easier to authenticate for deployment, when adding the below tasks, use the “Tasks Assistant” on the right-hand side. This will give an option in the UI for the deployment task to Authorize the Service Connection needed for deployment.
Here is an example with recommendations:
trigger:
- main

variables:
  # Agent VM image name
  vmImageName: 'windows-latest'
  environmentName: 'appname'

stages:
- stage: Build
  displayName: Build stage
  jobs:
  - job: Build
    displayName: Build
    pool:
      vmImage: $(vmImageName)

    steps:
    - task: NodeTool@0
      inputs:
        versionSpec: '18.x'
      displayName: 'Install Node.js'

    - script: |
        npm install
      displayName: 'npm install'

    - script: |
        npm run build
      displayName: 'npm run build'

    - task: ArchiveFiles@2
      inputs:
        rootFolderOrFile: '$(System.DefaultWorkingDirectory)/build/'
        includeRootFolder: false
        archiveType: 'zip'
        archiveFile: '$(Build.ArtifactStagingDirectory)/$(Build.BuildId).zip'
        replaceExistingArchive: true

    - task: PublishBuildArtifacts@1
      inputs:
        PathtoPublish: '$(Build.ArtifactStagingDirectory)/$(Build.BuildId).zip'
        ArtifactName: 'drop'

- stage: Deploy
  displayName: Deploy stage
  dependsOn: Build
  condition: succeeded()
  jobs:
  - deployment: Deploy
    displayName: Deploy
    environment: $(environmentName)
    pool:
      vmImage: $(vmImageName)
    strategy:
      runOnce:
        deploy:
          steps:
          - task: AzureWebApp@1
            inputs:
              azureSubscription: 'subscriptionName(00000000-0000-0000-0000-000000000000)'
              appType: 'webApp'
              appName: 'appname'
              package: '$(Pipeline.Workspace)/drop/$(Build.BuildId).zip'
Including all project contents
To deploy all content and not only the \build folder, just change the ArchiveFiles@2 rootFolderOrFile property to the below:
- task: ArchiveFiles@2
  inputs:
    rootFolderOrFile: '$(System.DefaultWorkingDirectory)'
    includeRootFolder: false
    archiveType: 'zip'
    archiveFile: '$(Build.ArtifactStagingDirectory)/$(Build.BuildId).zip'
    replaceExistingArchive: true
Physical Path Under General -> Path Mappings must now be set to point to site\wwwroot\build.
NOTE: You may see this message, which will show the Deploy stage as “pending”. Click the “View” button to authorize deployment. This is a one-time occurence.

Troubleshooting
Routes are giving 404 or showing “You do not have permission to view this directory or page”
For routes other than “/” (aka., the root path), you may see You do not have permission to view this directory or page or The resource you are looking for has been removed, had its name changed, or is temporarily unavailable.. This is different than the below section where this will appear even on the root path.
This may also happen if you navigate to these paths through client-side routers (for example, using the Link API in react-router-dom) and then refreshing the page on that route. This will reload on the current route but show You do not have permission to view this directory or page. Additionally, if trying to access the route URI directly through the address bar - this may occur as well.
Resolution:
Most real-world React applications use client-side routing. We need to add a web.config in our project to send all requests back to “/” so client-side routing can take over. This is happening because without this web.config for client side routes, the browser is trying to look up an actual corresponding html page from the server.
Add the below web.config to the root of your project - we redirect this back to our index.html which is contained in our \build folder. This example assumes this web.config is placed relative to your index.html (generated in the production build folder):
<?xml version="1.0"?>
<configuration>
<system.webServer>
  <rewrite>
    <rules>
      <rule name="React Routes" stopProcessing="true">
        <match url=".*" />
        <conditions logicalGrouping="MatchAll">
          <add input="{REQUEST_FILENAME}" matchType="IsFile" negate="true" />
          <add input="{REQUEST_FILENAME}" matchType="IsDirectory" negate="true" />
        </conditions>
        <action type="Rewrite" url="/index.html" />
      </rule>
    </rules>
  </rewrite>
</system.webServer>
</configuration>
You do not have permission to view this directory or page.
You may see You do not have permission to view this directory or page. when browsing the application. This is normally due to deploying the full project contents (including the \build folder) but not updating the Physical Path to point to this.
This can also happen for client-side routing (see above, as the solution is different)
Resolution:
Update the Physical Path to point to site\wwwroot\build.
Environment variables are missing after deployment
If the application does not have access to the environment variables during build time or if the environment variable is not prefixed with REACT_APP_ they will appear as undefined.
Resolution:
- Syntax: Ensure the variable is prefixed with
REACT_APP_. Such asREACT_APP_MY_ENV_VARand not justMY_ENV_VAR. The variable can be accessed usingprocess.env.REACT_APP_MY_ENV_VAR. TheREACT_APP_prefix is specific to React. - Remote Build: If building the application against Kudu make sure to add the AppSetting for the environment variable first. This will make sure the environment variable is available during the build. If the application is deployed first without adding the AppSetting, add the AppSetting and then redeploy the application.
-
GitHub Actions: All the of build process will happen on the GitHub Agent, so the environment variables will need to be added in the workflow.
You can add custom environment variables in the first level before jobs:
  name: Build and deploy Node.js app to Azure Web App - myapp

  on:
    push:
      branches:
        - master
    workflow_dispatch:

  env:
    REACT_APP_MYVAR: $

  jobs:
    build:
      runs-on: windows-latest
And then add these secrets in GitHub. This can be done going to your project -> Settings -> Secrets -> Actions.
Note: Since the build is done on the GitHub agent with the variables scoped to the Agent you do not need to re-add those AppSettings in the Azure Web App Portal.
-
Azure DevOps: Since the build will happen on the DevOps Agent, the environment variables will need to be added in the pipeline.
This can be done by going to Pipeline -> Click on the Pipeline again -> Edit -> Variables.
After adding the needed environment variables in the pipeline trigger a build. The variables will now be replaced during the build.
Note: Since the build is done on the DevOps agent with the variables scoped to the Agent you do not need to re-add those AppSettings in the Azure Web App Portal.
Note: For more information on how React uses and expects environment variables click here.


