Running Puppeteer on Azure App Service Linux
This post will cover getting set up to run Puppeteer on Azure App Service Linux.
Overview
Puppeteer is a Node.js library which lets you access Chrome/Chromium through exposed API’s. This lets you handle web scraping, screenshots, automated browser interaction, and others. This can be ran in headless and “headfull” mode.
Source code for the below examples can be found here.
Quickstart
Azure App Service on Linux is a HTTP-based application platform. Therefor we need this application which uses Puppeteer to handle incoming HTTP requests, if we don’t configure this to do so (or do so incorrectly), our application will never start - more on this can be read here - Troubleshooting ‘Container didnt respond to HTTP pings on port, failing site start’
IMPORTANT: This example is intended to run in headless mode.
Project creation
We’ll be integrating this example of Puppeteer here into an Express.js application to act as our server to handle HTTP requests and responses, since Puppeteer isn’t configured to do so in this manner.
- Run
npm init(oryarn init) to initialize and create yourpackage.json. Follow the prompts.
2 Next, in your project folder, install both puppeteer and express. Run the following:
npm i puppeteer express
Our project structure will look like this:
| - `controllers/`
|    | - `indexController.js`
|    | - `scrapeController.js`
| - `server.js`
| - `.puppeteerrc.cjs`
| - `package.json`
| - `package-lock.json`
| - `node_modules/`
indexController
import * as express from "express";

const router = express.Router()

export const homeController = router.get("/", (_req, res) => {
    res.json({ msg: "azure-webapps-linux-node-puppeteer" })
})
scrapeController:
This is pulled from the official Puppeteer example which “searches blog posts with text ‘automate beyond recorder’, click on the first result and print the full title of the blog post”.
import * as express from "express";
import puppeteer from 'puppeteer';

const router = express.Router()

export const scrapeController = router.get("/", async (_req, res) => {
    // NOTE: --no-sandbox is important for later
    const browser = await puppeteer.launch({ headless: 'new', args: ['--no-sandbox'] });

    const page = await browser.newPage();

    await page.goto('https://developer.chrome.com/');

    // Set screen size
    await page.setViewport({width: 1080, height: 1024});

    // Type into search box
    await page.type('.search-box__input', 'automate beyond recorder');

    // Wait and click on first result
    const searchResultSelector = '.search-box__link';
    await page.waitForSelector(searchResultSelector);
    await page.click(searchResultSelector);

    // Locate the full title with a unique string
    const textSelector = await page.waitForSelector(
    'text/Customize and automate'
    );
    const fullTitle = await textSelector.evaluate(el => el.textContent);

    // Print the full title
    console.log('The title of this blog post is "%s".', fullTitle);
    await browser.close();
    res.json({ msg: fullTitle })
})
server.js:
import express from "express"
import { homeController } from "./controllers/indexController.js"
import { scrapeController } from "./controllers/scrapeController.js"

const port = process.env.PORT || 3000;

const app = express()
app.use("/", homeController)
app.use("/api/scrape", scrapeController)

app.listen(port, () => console.log(`Express and Puppeteer listening on port ${port}`))
.puppeteerrc.cjs:
const { join } = require("path");
/**
 * @type {import("puppeteer").Configuration}
 */
module.exports = {
  // Changes the cache location for Puppeteer.
  cacheDirectory: join(__dirname, ".cache", "puppeteer"),
};
package.json
{
  "name": "azure-webapps-linux-node-puppeteer",
  "version": "1.0.0",
  "description": "",
  "main": "index.js",
  "scripts": {
    "test": "echo \"Error: no test specified\" && exit 1",
    "start": "node server.js"
  },
  "author": "",
  "license": "ISC",
  "dependencies": {
    "express": "^4.18.2",
    "puppeteer": "^20.1.0"
  },
  "type": "module"
}
Important notes
A few things here:
- This code is set to use ES6 syntax and modules, but you can revert this behavior - this is not a requirement
- We create a
.puppeteerrc.cjs- however, you can use any of the other configuration methods here.- We do this because otherwise this error will be encountered:
Error: Could not find Chrome (ver. 113.0.5672.63). This can occur if either 1. you did not perform an installation before running the script (e.g. `npm install`) or 2. your cache path is incorrectly configured (which is: /root/.cache/puppeteer).- The default cache location on Azure App Service Linux is set to
/root/.cache/puppeteer. This causes two problems:- If the application is restarted, this cache will be lost since it’s outside of
/home - The Oryx build process (with the Kudu container and node_modules compression with Oryx build) may introduce this behavior given the location changes during build and application startup.
- The Puppetteer documentation for “Changing the default cache directory” calls these behaviors out, which resolves the issue here.
- If the application is restarted, this cache will be lost since it’s outside of
- If you encounter this error locally after adding the
.cjsfile, reinstall Puppetteer througnnpmand try running the project again. However, thisrcconfiguration file will need to be used on App Service Linux to change the path.
Running locally
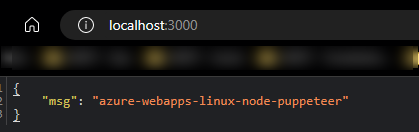
After setting up the above project, the application should run and show the following:
Terminal:
$ node server.js
Express and Puppeteer listening on port 3000
Root path:
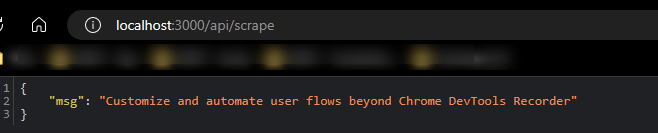
/api/scrape:
Blessed Image
Create the application
This example will be using a Node 16 runtime. Follow this Quickstart: Create a Node.js web app on how to create the App Service.
Deployment
To deploy this example, you can use any supported method for Node and App Service, such as:
- Local Git
- GitHub Actions
- Azure DevOps
- ZipDeploy
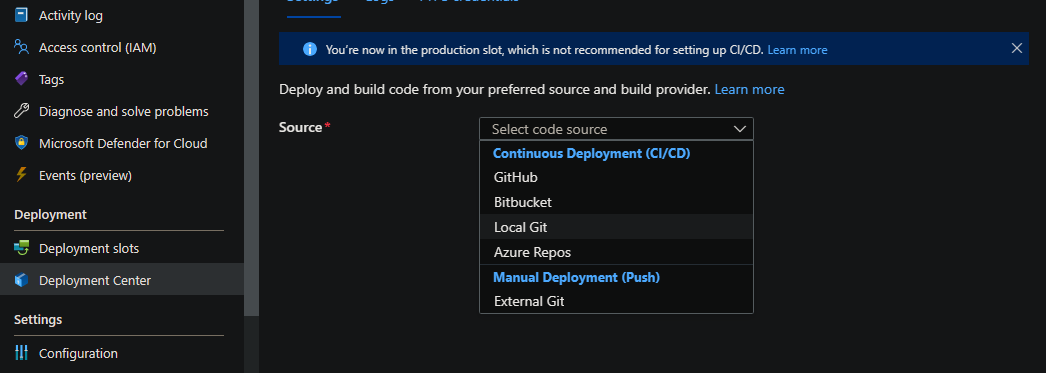
In this case, we’ll use Local Git:
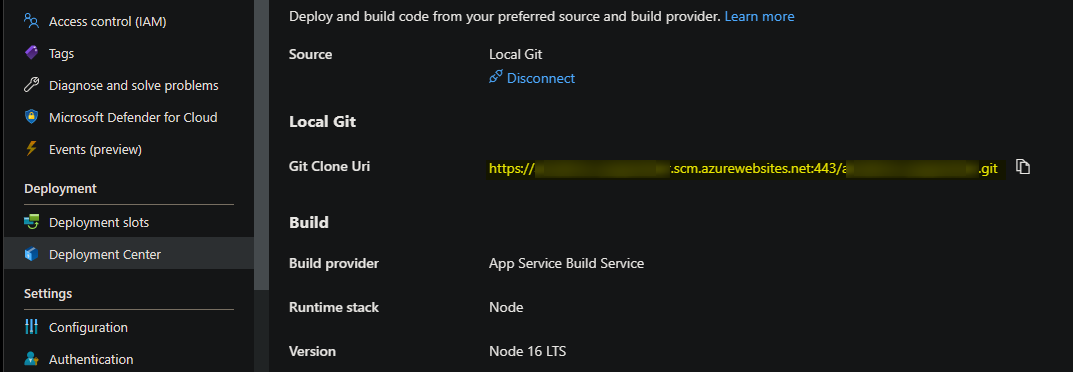
- Go To Deployment Center and select your Source as Local Git
- Copy the Git Clone URI into your terminal and run the following commands:
git init
git remote add azure https://yoursite.scm.azurewebsites.net:443/yoursite.git
git add .
git commit -m "initial commit"
git push azure master
NOTE: Make sure
node_modulesis in your.gitignore
- You should now see a successful deployment:
remote: Deploy Async
remote: Updating branch 'master'.
remote: Updating submodules.
remote: Preparing deployment for commit id '62d431ba00'.
remote: PreDeployment: context.CleanOutputPath False
remote: PreDeployment: context.OutputPath /home/site/wwwroot
remote: Repository path is /home/site/repository
remote: Running oryx build...
remote: Operation performed by Microsoft Oryx, https://github.com/Microsoft/Oryx
remote: You can report issues at https://github.com/Microsoft/Oryx/issues
[.. truncating ..]
remote: Downloading and extracting 'nodejs' version '16.20.0' to '/tmp/oryx/platforms/nodejs/16.20.0'...
remote: Detected image debian flavor: buster.
remote: Downloaded in 0 sec(s).
remote: Verifying checksum...
remote: Extracting contents...
remote: performing sha512 checksum for: nodejs...
remote: Done in 2 sec(s).
remote: Removing existing manifest file
remote: Creating directory for command manifest file if it does not exist
remote: Creating a manifest file...
remote: Node Build Command Manifest file created.
remote: Using Node version:
remote: v16.20.0
remote: Using Npm version:
remote: 8.19.4
remote: Running 'npm install'...
[.. truncating ..]
remote: Zipping existing node_modules folder...
remote: Done in 2 sec(s).
remote: Preparing output...
remote: Build Summary :
remote: ===============
remote: Errors (0)
remote: Warnings (0)
remote: Triggering recycle (preview mode disabled).
remote: Deployment successful. deployer =  deploymentPath
Add your Startup script
A Startup Command/Script will be required to successfully run this on a “Blessed Image”. You can try to use one of the two below methods.
Chromium download method
You can opt to download through Debian with the chromium package. This will install the needed Shared Libraries for runtime.
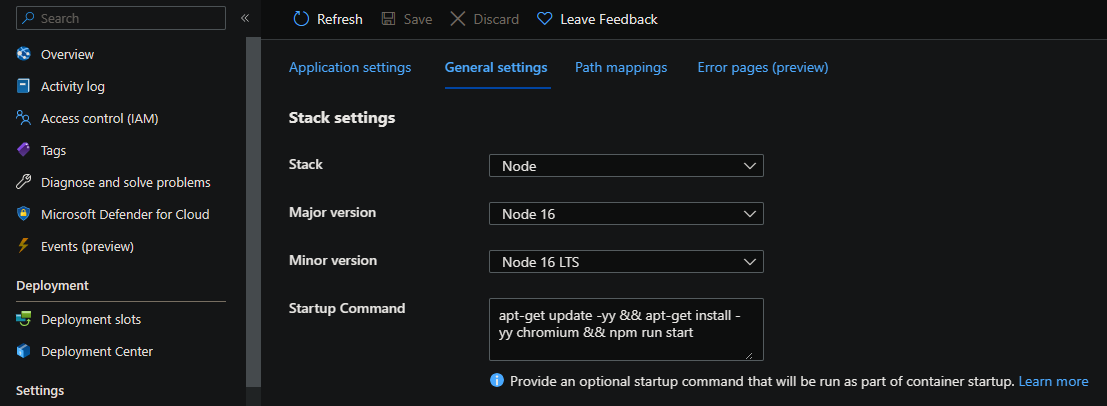
Add the following into the Startup Command of your App Service under Configuration -> General Settings:
apt-get update -yy && apt-get install -yy chromium && npm run start
You’ll see this package now being downloaded on startup.
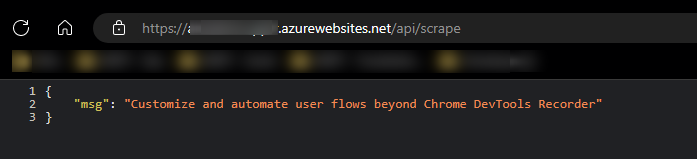
When invoking your web scraping route (/api/scrape), you should see the below - which is the response we expect, which indicates Puppeteer is working as expected:
Shared Library method
If for some reason you cannot use the Chromium download method, you may encounter the following error at runtime:
/home/site/wwwroot/.cache/puppeteer/chrome/linux-113.0.5672.63/chrome-linux64/chrome: error while loading shared libraries: libgobject-2.0.so.0: cannot open shared object file: No such file or directory
Which would be due to the shared library libgobject-2.0.so.0 not being available in the container runtime.
You can use apt-get update -yy && apt-get install ibgobject, however, you’ll eventually see a myriad of further missing shared libraries, when adding the missing one into the startup script, others may pop up - such as:
error while loading shared libraries: libatk-bridge-2.0.so.0error while loading shared libraries: libatk-1.0.so.0error while loading shared libraries: libcups.so.2
To resolve this - add the following into the Startup Command of your App Service under Configuration -> General Settings:
apt-get update -yy && apt-get install -yy libnss3-dev libgdk-pixbuf2.0-dev libgtk-3-dev libxss-dev libasound2 && npm run start

You’ll see these packages are installed at startup.
NOTE: If you’re on a smaller SKU, such as Basic, the container may time out on startup due to number of packages that need to be installed now. Scale up to a large sku, like Premium, or, add the App Setting
WEBSITES_CONTAINER_START_TIME_LIMIT- values default to 230 - with a max of 1800 - in seconds.
Custom Image
An alternative to using a Blessed Image is instead use a custom Docker Image. This can potentially help performance on application start up, since if there are events such as restarts or instance movement - these Shared Libraries that were required in the Startup Command section will be installed each time.
This can add extra time to application initialization, and more-so on smaller SKUs.
With a custom Docker Image, you can build the image with these required Shared Libraries already.
The below example uses a Node and Alpine based image, where we explicitly install Chromium:
FROM node:16.4.2-alpine3.14

WORKDIR /app/
COPY package.json /app/

RUN npm i --production && \
    npm i -g pm2

COPY . /app/

# Start and enable SSH - install Chromium
RUN apk add openssh chromium \
     && echo "root:Docker!" | chpasswd \
     && chmod +x /app/init_container.sh \
     && cd /etc/ssh/ \
     && ssh-keygen -A

COPY sshd_config /etc/ssh/

EXPOSE 3000 2222
ENTRYPOINT [ "/app/init_container.sh" ]
We then reference that installation for proper Puppeteer instantiation:
const browser = await puppeteer.launch({
    headless: 'new',
    args: ['--no-sandbox'],
    // This is where Chromium is downloaded to on our container filesystem
    executablePath: '/usr/bin/chromium-browser'
});
Troubleshooting
Missing Shared Libraries
You may see various missing Shared Libraries as called out earlier, such as:
error while loading shared libraries: libatk-bridge-2.0.so.0error while loading shared libraries: libatk-1.0.so.0error while loading shared libraries: libcups.so.2
If the chromium package is not used to download. A resolution in this case would be to either:
- Use the
chromiumpackage in your Startup Command (explained above) - Install missing required Shared Libraries
- Note: This may cause the application startup time to become rather long, incase many libraries are needed to be brought up one-by-one
- Use a custom Docker Image
Running as root without –no-sandbox is not supported
When starting Puppetteer without the --no-sandbox args in the code above, you may see this message:
ERROR:zygote_host_impl_linux.cc(90)]
Running as root without --no-sandbox is not supported.
This can be resolved by changing your Puppetteer launch method to the following:
puppetteer.launch({
   headless: 'new',
   // This is important
   args: ['--no-sandbox']
})
This GitHub thread has more information on the behavior - GitHub Issues - 3698
Slow start ups or container is timing out
If you’re using the “Blessed Image” option of hosting Puppeeter - it was discussed in the above sections that there will be additional shared libraries needed. Due to this, we need to install multiple Linux packages - since this pulls in additional dependencies, the startup time will be increased as these packages are downloaded, up until it completes.
It won’t be up until these packages are installed and the application returns an HTTP response that the initial request after startup will complete.
If you’re on a SKU that is a lower tier, such as Free, Basic, or Standard - and/or possibly hosting with other applications that may be intensive, you may see performance issues and/or slow startup performance due to the combination of this.
Error: Could not find Chrome (ver. [some_version])
This post aims to try and avoid this occurring after deployment for both custom images and “Blessed Images” by changing the default .cache path and placing it under wwwroot for persistance.
However, if changes are made to the Puppeteer configuration file, or the .cache is removed, you may see this error:
Error: Could not find Chrome (ver. 113.0.5672.63). This can occur if either
    1. you did not perform an installation before running the script (e.g. `npm install`) or
    2. your cache path is incorrectly configured (which is: /home/site/wwwroot/.cache/puppeteer)
This will possibly also happen if the puppeteer configuration file does not point to the current working directory with your node_modules and application content.
As we can see, our .cache is set to /home/site/wwwroot, but in this example, it was deleted and recreated. A typical restart may not help. If this is the case, redeploy the application.


