Deploying Angular SSR (Universal) to App Service Windows
This post will cover deploying a Angular SSR (Universal) application to App Service Windows.
Overview
Angular SSR (previously Universal) is a server-side rendered implemenation of Angular that uses Express.js.
As opposed to the “original” implementation which is a single page application - Angular SSR is ran from a .mjs file when built for production (previously a .js file in older Universal projects) like a typical node-based server side project.
Where as with a SPA you can serve static files directly, typically by serving the index.html directly with it’s production built client-side .js files, Angular SSR deployments will be slightly different comapred to SPA’s.
This post will cover deploying these kinds of projects.
Prerequisites
App Service Logs
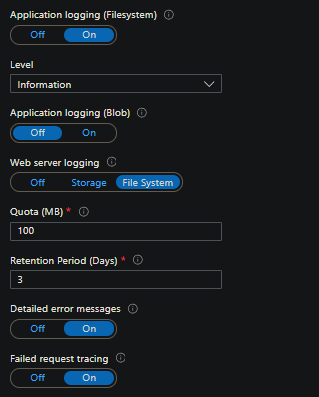
Ensure App Service Logs are enabled for your App Service (Windows) application.
“Application logging (Filesystem)” turns off after 24 hours on Windows applications, by design. Ensure this is kept on while going through this post.
Without these logs enabled, post-deployment/runtime troubleshooting will make it much harder or almost impossible to diagnose problems.
You can view/retrieve these logs directly from the Kudu site or FTP. Below is an example of what it would look like when these logs are enabled.
Angular CLI
If you don’t have the Angular CLI (ng) run npm install -g @angular/cli. This is required for build commands within the Angular project iself.
Quickstart
This will follow Angulars SSR quickstart for a net-new project.
-
Create a Angular SSR project with the Angular CLI by running
ng new --ssr. This command will prompt for the name of the project, which can be arbitrary. This will then create a new directory with the name projectThis will also ask what kind of style formatting to use. The below project used here is named
angularssrwithscssfor styling.
After this, the project will be scaffolded.
-
cdinto the new project folder and runnpm run start: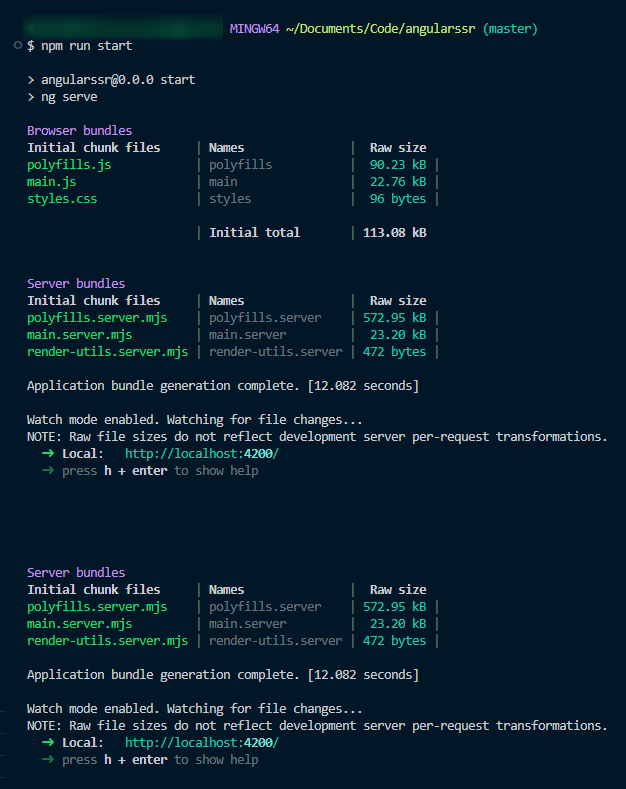
-
You should now be able to browse the application on
localhost:4200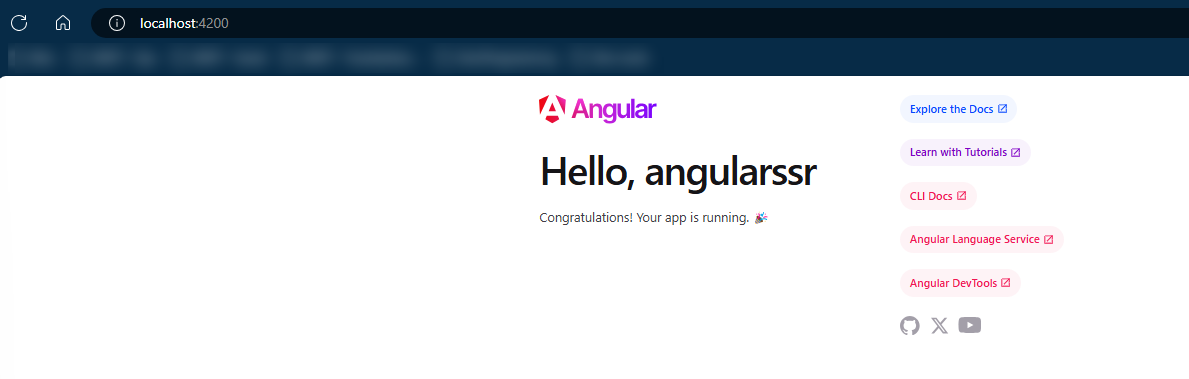
Deployment
Requirements for deployment
There are 3 very important concepts/requisites for any deployment of Angular SSR/Universal onto Windows App Service.
-
You need to generate a production build. You can do this locally prior to deployment, through a custom deployment script, or with CI/CD. With Angular, in general, this will create a folder named
/distat the top level of your project root. This folder contains our entrypoint to the application, which will be ran on App Service later on.If
/distdoesn’t already exist, you can generate this by runningnpm run build. Prior to each deployment, regardless where it’s occurring, you want to ensure thatnpm run buildis being ran to reflect any changed application content during development.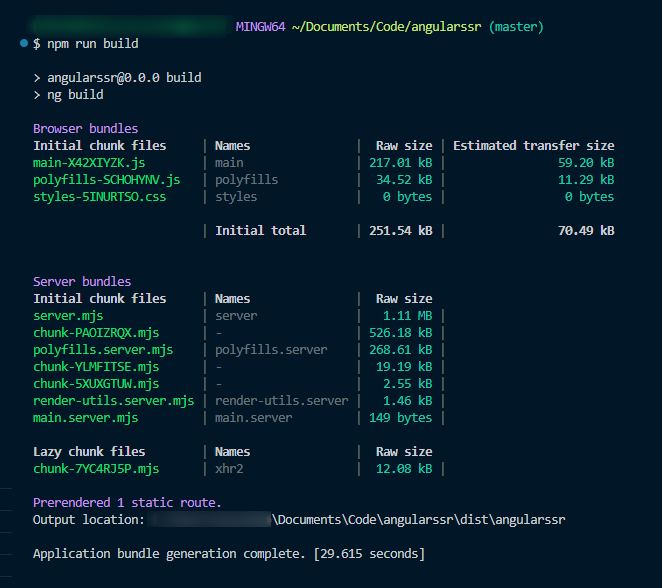
The entrypoint to the application would then be
dist/[projectname]/server/server.mjs -
web.config- This is required. This is only relevant on Windows App Service and Node since it uses IIS.Note, by default, a
web.configwill not be automatically generated with the way thepackage.jsonis configured since it looks for an existingstartscript pointing to an existing entrypoint file."scripts": { "ng": "ng", "start": "ng serve", "build": "ng build", "watch": "ng build --watch --configuration development", "test": "ng test", "serve:ssr:angularssr": "node dist/angularssr/server/server.mjs" },ng serveis the value ofstartand is invalid (in Kudu deployment engines case). But this is okay, as we can manually create one.Use the below
web.config- create this file in the root of your project, note theserver.jsreference, keep this and read the next point 3)<?xml version="1.0" encoding="utf-8"?> <!-- This configuration file is required if iisnode is used to run node processes behind IIS or IIS Express. For more information, visit: https://github.com/tjanczuk/iisnode/blob/master/src/samples/configuration/web.config --> <configuration> <system.webServer> <!-- Visit http://blogs.msdn.com/b/windowsazure/archive/2013/11/14/introduction-to-websockets-on-windows-azure-web-sites.aspx for more information on WebSocket support --> <webSocket enabled="false" /> <handlers> <!-- Indicates that the server.js file is a node.js site to be handled by the iisnode module --> <add name="iisnode" path="server.js" verb="*" modules="iisnode"/> </handlers> <rewrite> <rules> <!-- Do not interfere with requests for node-inspector debugging --> <rule name="NodeInspector" patternSyntax="ECMAScript" stopProcessing="true"> <match url="^server.js\/debug[\/]?" /> </rule> <!-- First we consider whether the incoming URL matches a physical file in the /public folder --> <rule name="StaticContent"> <action type="Rewrite" url="public{REQUEST_URI}"/> </rule> <!-- All other URLs are mapped to the node.js site entry point --> <rule name="DynamicContent"> <conditions> <add input="{REQUEST_FILENAME}" matchType="IsFile" negate="True"/> </conditions> <action type="Rewrite" url="server.js"/> </rule> </rules> </rewrite> <!-- 'bin' directory has no special meaning in node.js and apps can be placed in it --> <security> <requestFiltering> <hiddenSegments> <remove segment="bin"/> </hiddenSegments> </requestFiltering> </security> <!-- Make sure error responses are left untouched --> <httpErrors existingResponse="PassThrough" /> <!-- You can control how Node is hosted within IIS using the following options: * watchedFiles: semi-colon separated list of files that will be watched for changes to restart the server * node_env: will be propagated to node as NODE_ENV environment variable * debuggingEnabled - controls whether the built-in debugger is enabled See https://github.com/tjanczuk/iisnode/blob/master/src/samples/configuration/web.config for a full list of options --> <!--<iisnode watchedFiles="web.config;*.js"/>--> </system.webServer> </configuration> -
iisNodeis the default handler for Node applications on App Service Windows. However,iisNodedoesn’t support es6 modules. Because of, this needs to be followed to get our application to work - Supporting ES6 import on Windows App Service (Node.js/IISNode)In our Angular SSR project, create a file named
server.jsin the project root.Add the following contents, where
[project_name]is the project name of the application you created. You can navigate down into/distto find your full path name to theserver.mjsfile.(server.js)
import("./dist/[project_name]/server/server.mjs");In this blog example, we’d set our
server.jscontents toimport("./dist/angularssr/server/server.mjs");to match our structure below: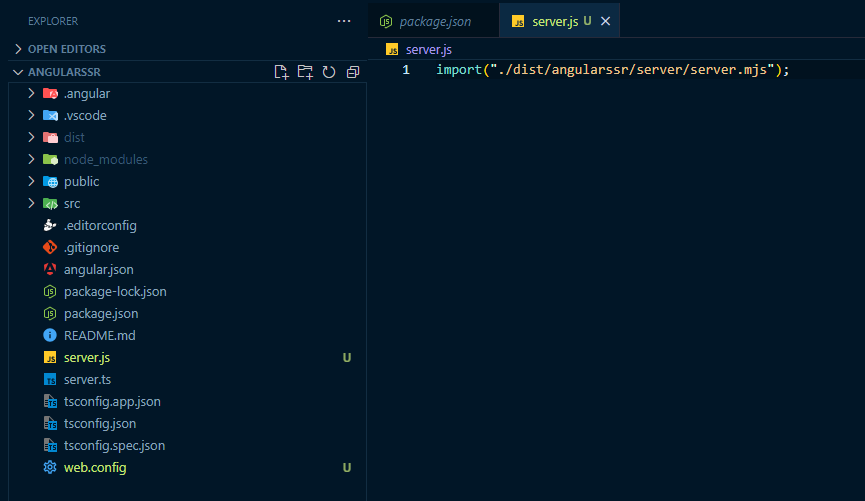
-
For sites that require some degree of build automation (
npm install) ensure the App SettingSCM_DO_BUILD_DURING_DEPLOYMENTis set totrue. More on this is explained here -
This section only applies to Angular v19 - if you’re using a ssr template generated from a version prior to this, you do notneed to do this
Starting with Angular v19, a change in the
ng --ssrtemplate was introduced which added a logic check prior to starting the server. This is now located insrc/server.ts(instead of top levelserver.ts). It now includes this following logic:/** * Start the server if this module is the main entry point. * The server listens on the port defined by the `PORT` environment variable, or defaults to 4000. */ if (isMainModule(import.meta.url)) { const port = process.env['PORT'] || 4000; app.listen(port, () => { console.log(`Node Express server listening on http://localhost:${port}`); }); }This can and will introduce an issue when deployed to App Service on Windows, since we need to specify a different entrypoint to get around iisnode’s es6 limitations, this causes
isMainModule(), which returns aboolean, to returnfalse. This function checksprocess.argv[1], and with that being the case, would cause the following if left as is:import.meta.url = file:///C:/home/site/wwwroot/dist/angularssr/server/server.mjs process.argv[1] = C:\home\site\wwwroot\server.jsThis is where the mismatch comes in. To get around this, you can remove the if statement, or if desiring to keep this, alter this as need be. See GitHub issues - 28993 as an example. For simplicity and the sake of this post, we’ll just use the following, which simply just removes the
if/elsecheck.const port = process.env['PORT'] || 4000; app.listen(port, () => { console.log(`Node Express server listening on http://localhost:${port}`); });
Recap:
- Generate a production build. Either manually or automatically depending on how you’re deploying.
- Create a
web.configin your project root. This is a requirement. Use the above one. - Create a new
.jsfile to act as your entrypoint since es6 is not supported with iisNode - Enable build automation, if needed. This is only going to apply for
npm install, notnpm run build. Be mindful of this.
Local Git / VSCode
For setting up local git credentials - follow Local Git deployment to Azure App Service first.
-
Navigate to your App Service and select
Deployment Centerand then click onLocal Gitand then click onSave.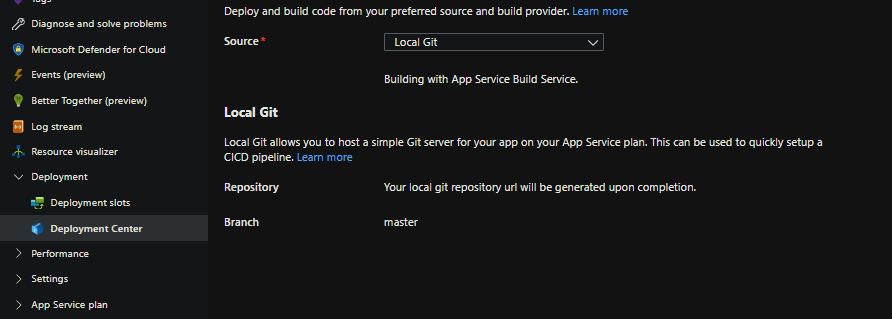
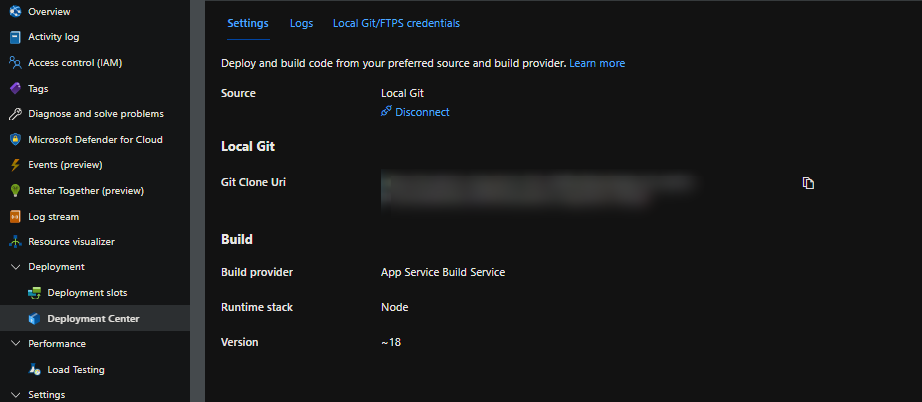
-
Copy the remote git repository from Azure Portal.
-
IMPORTANT:
npm run buildis not going to automatically be ran against our project with build automation, howevernpm installwould. Obviously, this would not create a production build. So we have two options:a. Manually run
npm run buildfirst to generate/dist. On each deployment, if there is a code change, this needs to be manually done before deployment.Also, Remove /dist from.gitignoreor else this directory won’t be pushed.b. Or, use the custom deployment script here as an example to regenerate the production build on each deployment. This method would let you retain
/distwithin.gitignore. If you go with this option, you need to ensuredeploy.cmdand.deploymentis in the root of your project.- You can also utilize the kuduScript NPM package which would automatically create these two files for you.
- Note,
.deploymentneeds to contain:
[config] command = deploy.cmd - In your local terminal run the following commands in order:
git add . git commit -m "Initial Commit" git remote add azure https://<sitename>.scm.azurewebsites.net:443/<sitename>.git git push azure master -
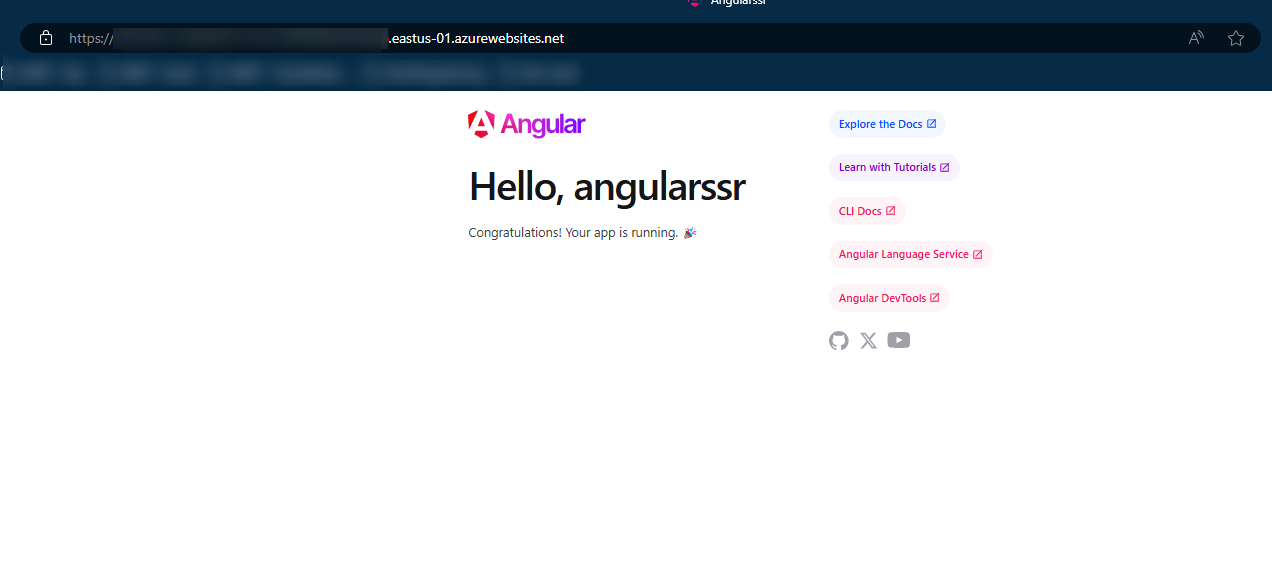
Assuming that the section Requirements for deployment was followed above, you should see the below site contents with an accessible site.

VSCode You can deploy to applications on App Service by following Deploy a Node.js web app in Azure. More importantly, you’ll need to install the Azure App Service for Visual Studio Code extension. Sign into your Azure account afterwards.
This method follows the same concept as Local Git. You can either prebuild for /dist or use a custom deployment script as well. A web.config is required in all scenarios, regardless of deployment method.
AZ CLI
You can deploy your application with the Azure CLI. This example will use the az webapp deploy command.
We’ll need to zip our content. On Windows, you can highlight all project files and right click to Compress to ZIP file in File Explorer. On WSL2/Linux - you can install the zip package and zip the project with sudo zip app.zip ./*.
Using this method, you have an option for a much simpler deployment - as well as a few general options:
- Recommended: Only include
server.js,/dist, andweb.configin your zip - Alternatively, you can still include everything (including
node_modules) and deploy that zip as a whole. However, this is a bit redundant. If doing this, setSCM_DO_BUILD_DURING_DEPLOYMENT=false - You can also include your source code, except
node_modules- but if doing this, you need to setSCM_DO_BUILD_DURING_DEPLOYMENT=true
npm run build will not automatically be ran - so we need to run this ourselves prior to deployment, even when SCM_DO_BUILD_DURING_DEPLOYMENT = true.
- Run the command
npm run buildto regenerate our production build/dist -
Zip up
dist,server.jsandweb.config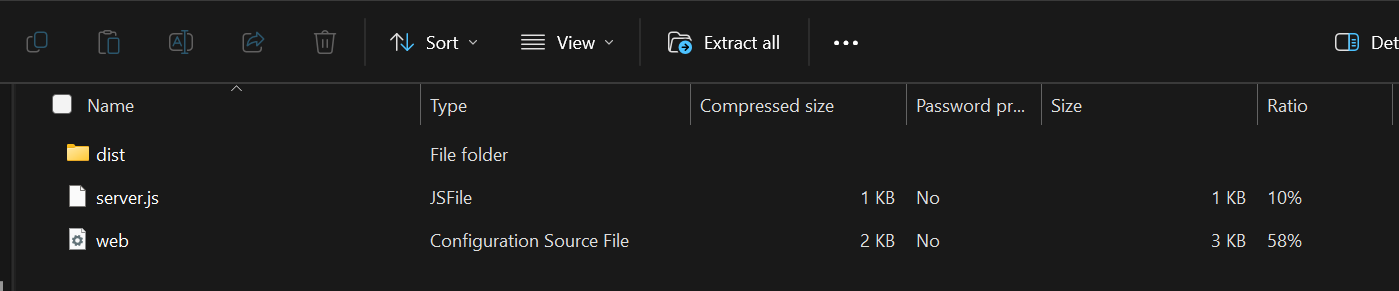
-
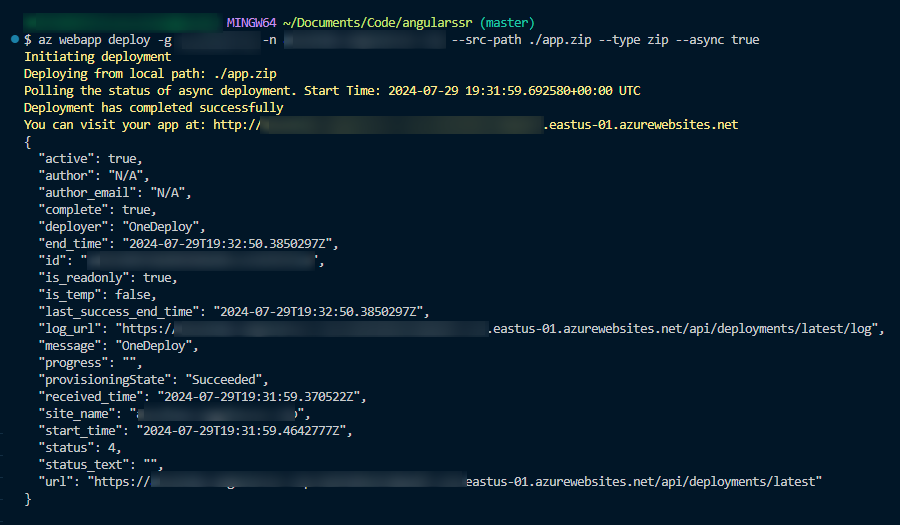
Deploy the site with the following command:
az webapp deploy -g somerg -n someapp --src-path ./app.zip --type zip --async true
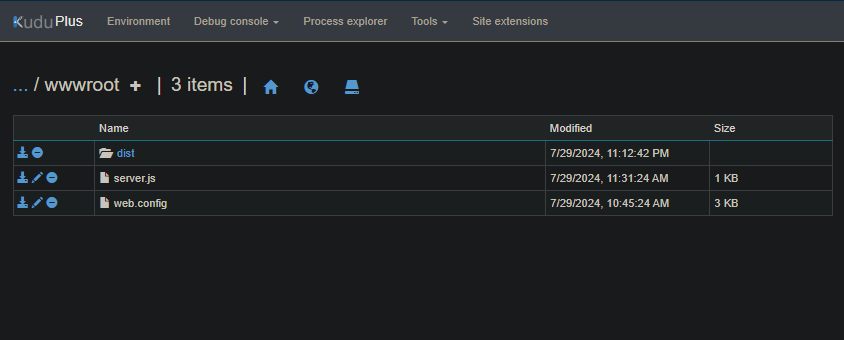
A successful deployment output would show the following in your terminal. If you go to your Kudu site - you should also see that node_modules has been recreated since npm install was implicitly ran:
If you look at the file system, you’ll see just dist, server.js and web.config. You should still have a functional app in this case since dist contains the production .js files and other assets.
GitHub Actions
You can use CI/CD like GitHub Actions to deploy your Angular SSR/Universal application.
Ensure your web.config already exists in your project root. Or create it on the site’s filesystem after the fact. This pipeline will not auto-generate one, neither will App Service Build Server (explained earlier)
Note, using this method, the typical approach is to keep the installation/production building of your application within the pipeline. Avoid setting SCM_DO_BUILD_DURING_DEPLOYMENT = true. Assuming you’re using the workflow generated from the portal - this would end up running npm install on the pipeline - and then again on Kudu, which is redundant and cause build descrenpencies in some cases.
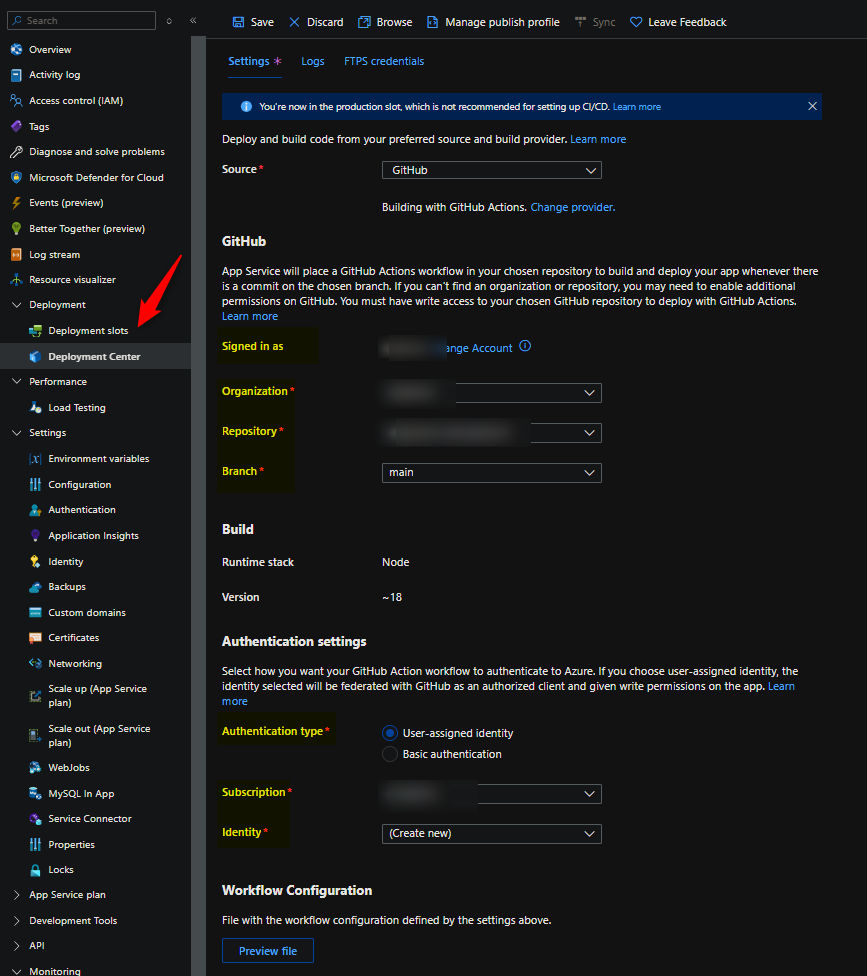
- Go to Deployment Center and select GitHub
- Fill out the required fields:
- “Signed in as”
- Organization
- Repository
- Branch
- Authentication type
- Subscription
- Identity
This example uses User Assigned Identity as the authentication type for the deployment task in the pipeline
You can select “Preview file” to see what the file looks like before saving. Once saved, it’ll commit and create a .github/workflows/[branchname_apname].yml file to the repository and kick off an Actions run
The below is the generated file as of this blog post:
# Docs for the Azure Web Apps Deploy action: https://github.com/Azure/webapps-deploy
# More GitHub Actions for Azure: https://github.com/Azure/actions

name: Build and deploy Node.js app to Azure Web App - someapp

on:
  push:
    branches:
      - main
  workflow_dispatch:

jobs:
  build:
    runs-on: windows-latest

    steps:
      - uses: actions/checkout@v4

      - name: Set up Node.js version
        uses: actions/setup-node@v3
        with:
          node-version: '18.x'

      - name: npm install, build, and test
        run: |
          npm install
          npm run build --if-present
          npm run test --if-present

      - name: Upload artifact for deployment job
        uses: actions/upload-artifact@v4
        with:
          name: node-app
          path: .

  deploy:
    runs-on: ubuntu-latest
    needs: build
    environment:
      name: 'Production'
      url: $
    permissions:
      id-token: write #This is required for requesting the JWT

    steps:
      - name: Download artifact from build job
        uses: actions/download-artifact@v4
        with:
          name: node-app

      - name: Login to Azure
        uses: azure/login@v2
        with:
          client-id: $
          tenant-id: $
          subscription-id: $

      - name: 'Deploy to Azure Web App'
        uses: azure/webapps-deploy@v3
        id: deploy-to-webapp
        with:
          app-name: 'someapp'
          slot-name: 'Production'
          package: .
name: node-app Note, if you have tests that take a while to run - these can be removed by deleting the line `npm run test --if-present`. This should be done in some cases where default Angular tests with Karma try to open a chromium browser - this will cause the workflow run to "hang" until it times out.
Also, given the size of node_modules historically, copying files from the “build” stage to the “deploy” stage can take tens of minutes, even with a “starter” application, since the . under actions/upload-artifact@v4 is copying file-by-file.
To make this faster, you can zip the contents in the build stage and move it to the deployment stage, which can significantly reduce overall deployment time. Below is a full example:
# Docs for the Azure Web Apps Deploy action: https://github.com/Azure/webapps-deploy
# More GitHub Actions for Azure: https://github.com/Azure/actions

name: Build and deploy Node.js app to Azure Web App - someapp

on:
  push:
    branches:
      - main
  workflow_dispatch:

jobs:
  build:
    runs-on: windows-latest

    steps:
      - uses: actions/checkout@v4

      - name: Set up Node.js version
        uses: actions/setup-node@v3
        with:
          node-version: '18.x'

      - name: npm install, build, and test
        run: |
          npm install
          npm run build --if-present
          npm run test --if-present

      - name: Zip all files for upload between jobs
        run: Compress-Archive -Path .\* -DestinationPath angularssr.zip

      - name: Upload artifact for deployment job
        uses: actions/upload-artifact@v4
        with:
          name: node-app
          path: angularssr.zip

  deploy:
    runs-on: windows-latest
    needs: build
    environment:
      name: 'Production'
      url: $
    permissions:
      id-token: write #This is required for requesting the JWT

    steps:
      - name: Download artifact from build job
        uses: actions/download-artifact@v4
        with:
          name: node-app

      - name: Login to Azure
        uses: azure/login@v2
        with:
          client-id: $
          tenant-id: $
          subscription-id: $

      - name: 'Deploy to Azure Web App'
        uses: azure/webapps-deploy@v3
        id: deploy-to-webapp
        with:
          app-name: 'someapp'
          slot-name: 'Production'
          package: angularssr.zip

      - name: Delete zip file
        run: rm next.zip
You can even go one step further and only zip up the files you exactly need, which in this case, just like with the AZ CLI example above, is dist, web.config and server.js by changing your Zip all files for upload between jobs script to the below:
      - name: Zip all files for upload between jobs
        run: Compress-Archive -Path .\dist, web.config, server.js -DestinationPath angularssr.zip

      - name: Upload artifact for deployment job
        uses: actions/upload-artifact@v4
        with:
          name: node-app
          path: angularssr.zip
In summary, we are:
- Installing node/application packages and building for production to generate
/dist - Zipping the contents from build and pass it to stage
- Deploy the zip from build, which will be extracted on the Kudu site to
wwwroot. - Delete the zip in our pipeline after we’re done
Again, ensure SCM_DO_BUILD_DURING_DEPLOYMENT is false if you have npm install in your pipeline.
Azure Pipelines (ADO)
Much like how GitHub Actions is structured, you can use Azure Pipelines to deploy your Angular SSR/Universal application.
The same as above still applies:
- Ensure your
web.configalready exists in your project root. Or create it on the site’s filesystem after the fact. This pipeline will not auto-generate one, neither will App Service Build Server (explained earlier) - Since we want to have package installation and building done in the pipeline -
SCM_DO_BUILD_DURING_DEPLOYMENTshould befalseor unset.
- Go to your DevOps organization to Create a project. Then go to Pipelines and create New pipeline.
- Select where your repository is stored (GitHub, Azure Repos, etc.)
- Select your code repository.
- Create an empty template template or use the “Starter Pipepine” and override it with the below. To make it easier to authenticate for deployment, when adding the below tasks, use the “Tasks Assistant” on the right-hand side. This will give an option in the UI for the deployment task to Authorize the Service Connection needed for deployment.
trigger:
- main

variables:
  # Agent VM image name
  vmImageName: 'windows-latest'
  environmentName: 'appname'

stages:
- stage: Build
  displayName: Build stage
  jobs:
  - job: Build
    displayName: Build
    pool:
      vmImage: $(vmImageName)

    steps:
    - task: NodeTool@0
      inputs:
        versionSpec: '18.x'
      displayName: 'Install Node.js'

    - script: |
        npm install
      displayName: 'npm install'

    - script: |
        npm run build
      displayName: 'npm run build'

    - task: ArchiveFiles@2
      inputs:
        rootFolderOrFile: '$(System.DefaultWorkingDirectory)'
        includeRootFolder: false
        archiveType: 'zip'
        archiveFile: '$(Build.ArtifactStagingDirectory)/$(Build.BuildId).zip'
        replaceExistingArchive: true

    - task: PublishBuildArtifacts@1
      inputs:
        PathtoPublish: '$(Build.ArtifactStagingDirectory)/$(Build.BuildId).zip'
        ArtifactName: 'drop'

- stage: Deploy
  displayName: Deploy stage
  dependsOn: Build
  condition: succeeded()
  jobs:
  - deployment: Deploy
    displayName: Deploy
    environment: $(environmentName)
    pool:
      vmImage: $(vmImageName)
    strategy:
      runOnce:
        deploy:
          steps:
          - task: AzureWebApp@1
            inputs:
              azureSubscription: 'subscriptionName(00000000-0000-0000-0000-000000000000)'
              appType: 'webApp'
              appName: 'appname'
              package: '$(Pipeline.Workspace)/drop/$(Build.BuildId).zip'
This approach, like with GitHub Actions, will build for production in the pipeline and deploy the dist folder required. Under the hood, ZipDeploy is used to deploy the zip artifact to Kudu.
Additionally, like our updated Github Actions .yml seen earlier - this also zips our content between build and deployment stages in the pipeline to avoid spending a large amount of time on file copying between stages.
NOTE: Just like in the GitHub Actions and AZ CLI examples - you can replace
ArchiveFiles@2and instead zip just only the files you need. Just ensure these are output to a folder under$(Build.ArtifactStagingDirectory)/$(Build.BuildId).zip
Troubleshooting
HTTP 500.1xxx errors after deployments
Review this post for common iisnode-based issues - Troubleshooting Common iisnode Issues
A table of iisnode substatus codes can be found here - this can be used to track down what may be occurring. This usual indicates that node.exe is crashing. A logging-errors.txt file will be created (assuming that App Service Logs are enabled). If an uncaught exception is occurring, it will be logged into this file.
Common scenarios for this directly after a deployment may be:
- Forgetting to add a package into your
package.jsonbut referencing the missing package as an import in code - Forgetting needed environment variables that may otherwise cause the application to crash
- Targeting a version of Node that may not support the Angular version being used or underlying libraries use (ex., outdated Node version - if the App Setting
WEBSITE_NODE_DEFAULT_VERSIONis not set, this falls back to a v0.x version.)
You do not have permission to view this directory or page.
You may see You do not have permission to view this directory or page. when browsing the application. This is normally due to:
- Missing
web.config - Inconfigured
web.config, eg:- Pointing to a non-existent
.jsentrypoint - Pointing to an incorrect location for a
.jsentrypoint web.configis not at the root path (relative topackage.json)
- Pointing to a non-existent
“parking page” is still being displayed
If the “parking page” / default page is being displayed after a deployment - it likely means a following scenario:
- You deployed a nested zip - which means the outer zip was extracted but the inner
.zipwas not. Therefor no relevant site contents can be discovered - You deployed a nested directory. For example, from outside of your project root. This means there is two levels of directories - so site contents can not be ran or discovered.
Hardcoding ports
The quickstart Angular SSR project does not hardcode ports in the sense the port variable is set as the below:
const port = process.env['PORT'] || 4000;
However, if you remove process.env.PORT - the application will fail to start on App Service. Ensure this is always set. For easier switching between local/dev environments and deployed ones - ensure the ternary operator (above) is kept
Timing out and failing to start with HTTP 500.1001’s
See the Requirements for deployment section, specifically step 5, if you’re using Angular v19.
If this is a version prior to this - ensure your server.ts does not have any logic blocking the invocation of express.js startup (or any other engine you may be using). In both of these cases, if express.js (or any other engine) is never successfully starting (or never gets invoked), this will cause no logs to be written unless you add a console.log line earlier on in server.ts, prior to before that logic with server startup/invocation is hit.
If the issue is neither of these, consult Troubleshooting Common iisnode Issues


