React Deployment on App Service Linux
This section provides information for creating, configuring, and deploying a React app on App Service Linux.
Local Development
Create a React app
-
Setup a local environment starting with the package runner tool:
npx create-react-app projectname -
Once the creation is done, cd into projectname folder and then start the server using:
npm startThis will start development server:
projectname> npm start > projectname@0.1.0 start > projectname > react-scripts start Starting the development server... Compiled successfully! You can now view projectname in the browser. Local: http://localhost:3000 On Your Network: http://172.22.240.1:3000 Note that the development build is not optimized. To create a production build, use npm run build. assets by path static/ 1.49 MiB asset static/js/bundle.js 1.48 MiB [emitted] (name: main) 1 related asset asset static/js/node_modules_web-vitals_dist_web-vitals_js.chunk.js 6.93 KiB [emitted] 1 related asset asset static/media/logo.6ce24c58023cc2f8fd88fe9d219db6c6.svg 2.57 KiB [emitted] (auxiliary name: main) asset index.html 1.67 KiB [emitted] asset asset-manifest.json 546 bytes [emitted] runtime modules 31.3 KiB 15 modules modules by path ./node_modules/ 1.35 MiB 99 modules modules by path ./src/ 18.1 KiB modules by path ./src/*.css 8.82 KiB ./src/index.css 2.72 KiB [built] [code generated] ./node_modules/css-loader/dist/cjs.js??ruleSet[1].rules[1].oneOf[5].use[1]!./node_modules/postcss-loader/dist/cjs.js??ruleSet[1].rules[1].oneOf[5].use[2]!./node_modules/source-map-loader/dist/cjs.js!./src/index.css 1.37 KiB [built] [code generated] ./src/App.css 2.72 KiB [built] [code generated] ./node_modules/css-loader/dist/cjs.js??ruleSet[1].rules[1].oneOf[5].use[1]!./node_modules/postcss-loader/dist/cjs.js??ruleSet[1].rules[1].oneOf[5].use[2]!./node_modules/source-map-loader/dist/cjs.js!./src/App.css 2 KiB [built] [code generated] modules by path ./src/*.js 5.71 KiB ./src/index.js 1.81 KiB [built] [code generated] ./src/App.js 2.51 KiB [built] [code generated] ./src/reportWebVitals.js 1.39 KiB [built] [code generated] ./src/logo.svg 3.61 KiB [built] [code generated] webpack 5.68.0 compiled successfully in 63431 ms -
Browse the site with
http://localhost:3000to get the default page.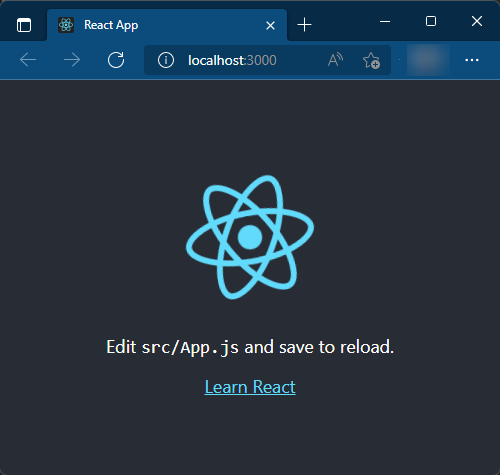
-
To create a production build you can run:
npm run buildThis will create a
buildfolder with all javascript and static files.If you want to test this production build on your local environment you can use serve or pm2, http-server, among others. Here is one example using serve:
     npm install -g serve
     serve -s build
Deployment Options
There are multiple deployment options in App Service Linux as Continuos Deployment(GitHub/GitHub Actions, Bitbucket, Azure Repos, External Git, Local Git), ZipDeploy, Run from Package, FTP, etc.
Local Git
When using Local Git, you are using App Service Build Service also named as (Oryx) to build your application.
To setup this option and deploy a react app follow the next steps:
-
Navigate to your web app and select
Deployment Centerand then click onLocal Gitand then click onSave.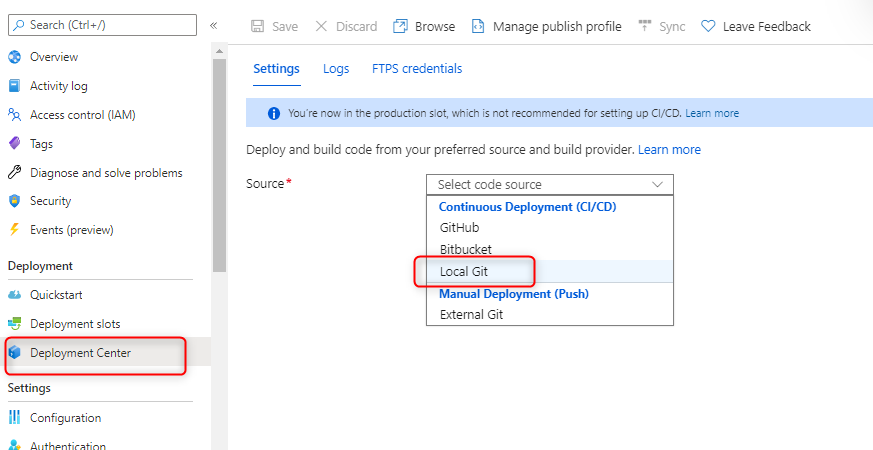
-
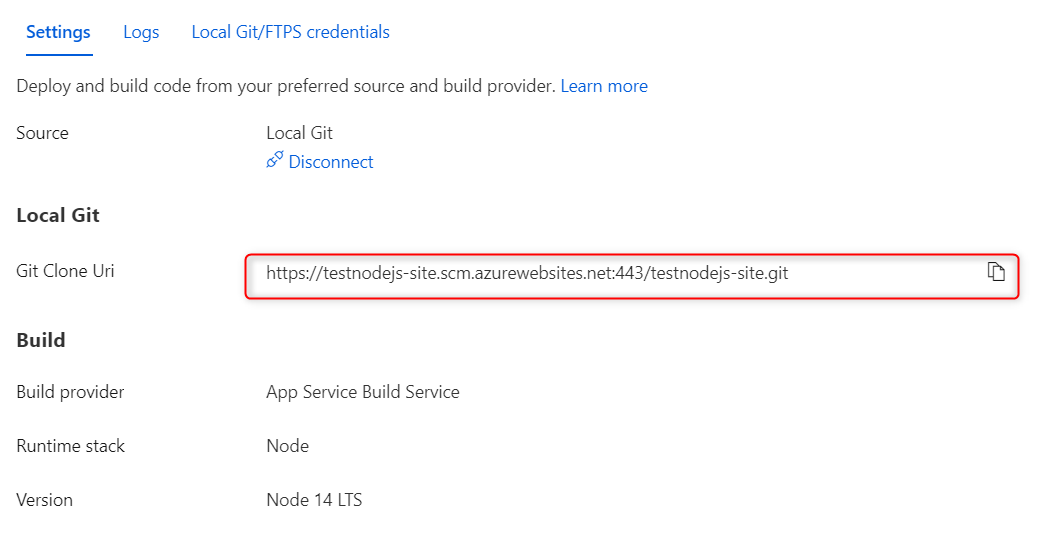
Copy the remote git repository from Azure Portal.
- In your local terminal run the following commands in order:
git add . git commit -m "Initial Commit" git remote add azure https://<sitename>.scm.azurewebsites.net:443/<sitename>.git git push azure master - Then Oryx will build your application:
Enumerating objects: 22, done. Counting objects: 100% (22/22), done. Delta compression using up to 8 threads Compressing objects: 100% (22/22), done. Writing objects: 100% (22/22), 149.72 KiB | 7.49 MiB/s, done. Total 22 (delta 0), reused 0 (delta 0), pack-reused 0 remote: Deploy Async remote: Updating branch 'master'. remote: Updating submodules. remote: Preparing deployment for commit id '96708d75ac'. remote: Repository path is /home/site/repository remote: Running oryx build... remote: Source directory : /tmp/8d9ea6beee02093 remote: Destination directory: /home/site/wwwroot remote:..... remote: Running 'npm install --unsafe-perm'... remote: ............................................................ remote: Running 'npm run build'... remote: > projectname@0.1.0 build /tmp/8d9ea6beee02093 remote: > react-scripts build remote: remote: Creating an optimized production build... remote: .... remote: Compiled successfully. remote: remote: File sizes after gzip: remote: remote: 43.71 kB build/static/js/main.327a8d8a.js remote: 1.78 kB build/static/js/787.3f6c29fa.chunk.js remote: 541 B build/static/css/main.073c9b0a.css remote: remote: Copying files to destination directory '/home/site/wwwroot'... remote: Done in 1 sec(s). remote: remote: Removing existing manifest file remote: Creating a manifest file... remote: Manifest file created. remote: remote: Done in 89 sec(s). remote: Running post deployment command(s)... remote: Triggering recycle (preview mode disabled). remote: Deployment successful. -
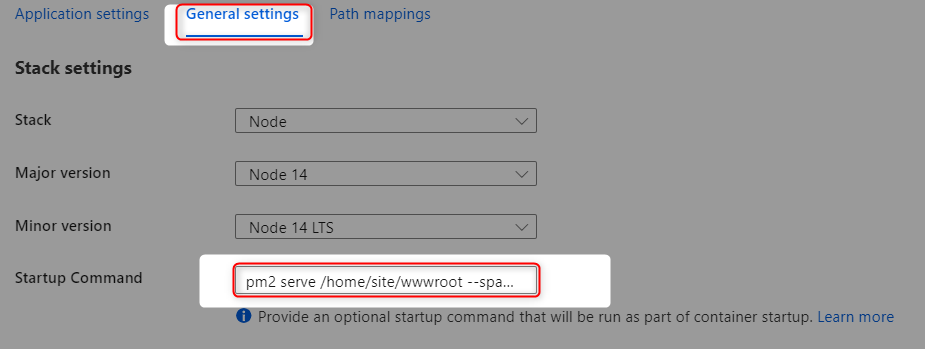
Add a startup command:
pm2 serve /home/site/wwwroot/build --no-daemon --spa.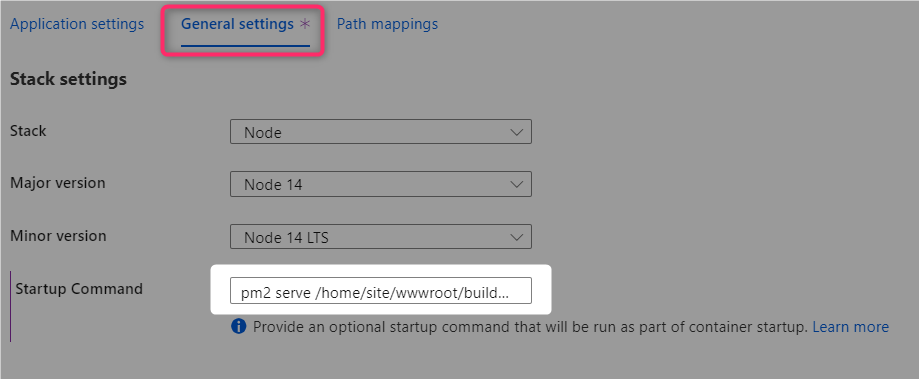
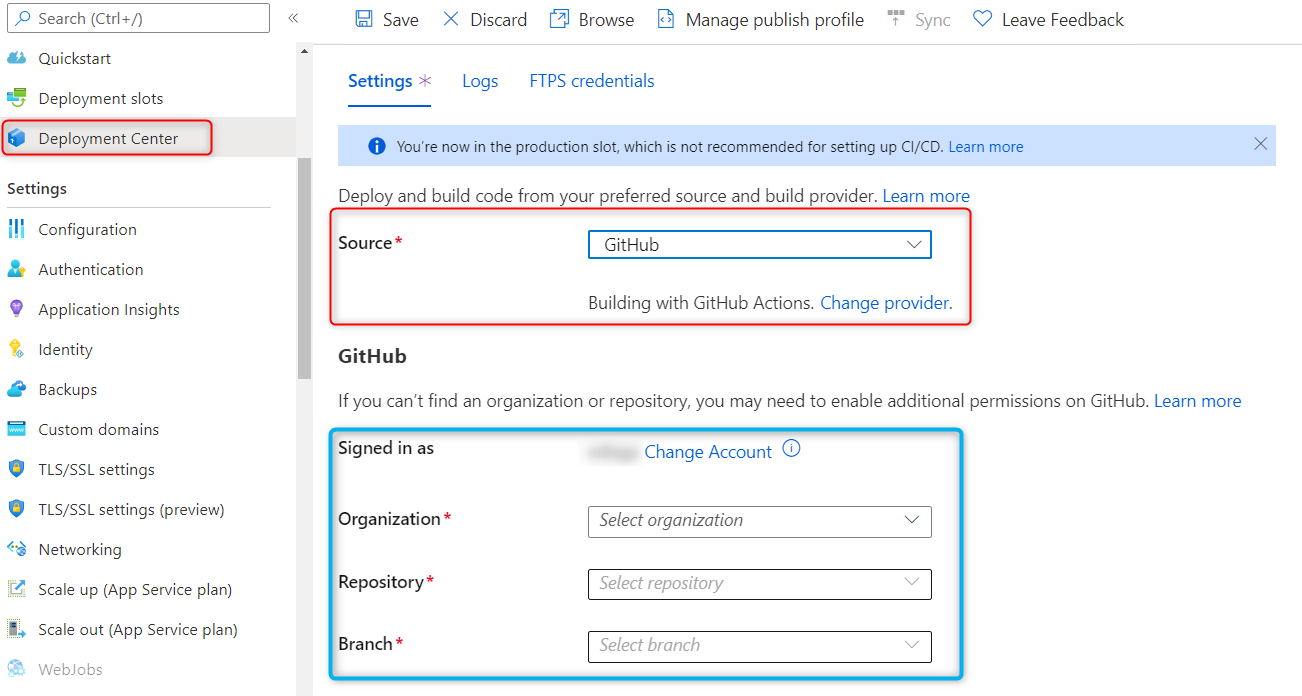
GitHub Actions
You can quickly get started with GitHub Actions by using the App Service Deployment Center. This will automatically generate a workflow file based on your application stack and commit it to your GitHub repository in the correct directory. You can deploy a workflow manually using deployment credentials.
You can find more details about these steps documented here:
For React deployments is recommended to modify the default template with the following recommendations:
-
Just upload the production build folder.
- name: Upload artifact for deployment job uses: actions/upload-artifact@v2 with: name: node-app path: build/ - Remove any npm run test if neccesary.
-
Validate current nodejs version.
- name: Set up Node.js version uses: actions/setup-node@v1 with: node-version: '14.x' - Use yarn or npm.
- name: yarn install, build run: | yarn install yarn run build --if-present -
Implement cache for Npm or Yarn. This can improve in some scenarios the deployment time.
Note: It is not recommended to cache node_modules, as it can break across Node versions and won’t work with npm ci
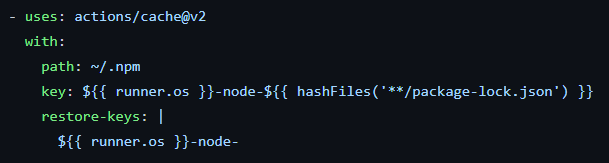
Here is an example with recommendations:
name: Build and deploy Node.js app to Azure Web App - sitename

on:
  push:
    branches:
      - master
  workflow_dispatch:

jobs:
  build:
    runs-on: ubuntu-latest

    steps:
      - uses: actions/checkout@v2

      - name: Set up Node.js version
        uses: actions/setup-node@v1
        with:
            node-version: '14.x'

      - name: npm install, build
        run: |
          npm install
          npm run build --if-present

      - name: Upload artifact for deployment job
        uses: actions/upload-artifact@v2
        with:
          name: node-app
          path: build/

  deploy:
    runs-on: ubuntu-latest
    needs: build
    environment:
      name: 'Production'
      url: $

    steps:
      - name: Download artifact from build job
        uses: actions/download-artifact@v2
        with:
          name: node-app

      - name: 'Deploy to Azure Web App'
        id: deploy-to-webapp
        uses: azure/webapps-deploy@v2
        with:
          app-name: 'sitename'
          slot-name: 'Production'
          publish-profile: $
          package: .
After the deployment, then add a startup command startup command: pm2 serve /home/site/wwwroot --spa --no-daemon.
Azure DevOps
You can use Azure Pipelines to build your React application. For React apps, you can use npm or yarn to install application dependencies. You can review more details here: Implement JavaScript frameworks.
There are several ways to create Azure Pipeline the most common options are using Azure Repos Git (YAML) or using Classic Editor (without YAML).
Classic Editor
Please review the following blog post to create a pipeline with classic editor and deploy a React app.
Azure Repos Git - YAML
- Go to
Pipelinesand createNew pipeline. - Select
Azure Repos Git (YAML) - Select your code repository.
- Select
Node.js Express Web App to Linux on Azuretemplate. - Select the web app where you will deploy.
- Modify your current YAML and add the following points:
- Node.js version should match the same of your web app.
- Validate if you need
npm run test, if not remove it. -
Use npm or yarn to build your dependencies.
- script: | npm install npm run build --if-present displayName: 'npm install and build' -
Just include the production folder in
ArchiveFiles@2task:- task: ArchiveFiles@2 displayName: 'Archive files' inputs: rootFolderOrFile: '$(System.DefaultWorkingDirectory)/build/' includeRootFolder: false archiveType: zip archiveFile: $(Build.ArtifactStagingDirectory)/$(Build.BuildId).zip replaceExistingArchive: true -
Add a startup command in the
AzureWebApp@1task and validate current nodejs version:- task: AzureWebApp@1 displayName: 'Azure Web App Deploy: sitename' inputs: azureSubscription: $(azureSubscription) appType: webAppLinux appName: $(webAppName) package: $(Pipeline.Workspace)/drop/$(Build.BuildId).zip startUpCommand: 'pm2 serve /home/site/wwwroot --spa --no-daemon'
- Save and
runthe pipeline.
Here is an example with recommendations:
trigger:
- master
variables:
# Azure Resource Manager connection created during pipeline creation
azureSubscription: 'subscriptionId'
# Web app name
webAppName: 'webapp-name'
# Environment name
environmentName: 'webapp-name'
# Agent VM image name
vmImageName: 'ubuntu-latest'
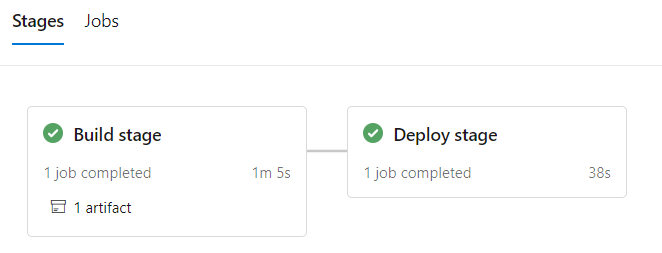
stages:
- stage: Build
displayName: Build stage
jobs:
- job: Build
displayName: Build
pool:
vmImage: $(vmImageName)
steps:
- task: NodeTool@0
inputs:
versionSpec: '14.x'
displayName: 'Install Node.js'
- script: |
npm install
npm run build --if-present
displayName: 'npm install and build'
      - task: ArchiveFiles@2
      displayName: 'Archive files'
      inputs:
          rootFolderOrFile: '$(System.DefaultWorkingDirectory)/build/'
          includeRootFolder: false
          archiveType: zip
          archiveFile: $(Build.ArtifactStagingDirectory)/$(Build.BuildId).zip
          replaceExistingArchive: true
- upload: $(Build.ArtifactStagingDirectory)/$(Build.BuildId).zip
artifact: drop
- stage: Deploy
displayName: Deploy stage
dependsOn: Build
condition: succeeded()
jobs:
- deployment: Deploy
displayName: Deploy
environment: $(environmentName)
pool:
vmImage: $(vmImageName)
strategy:
runOnce:
deploy:
steps:
- task: AzureWebApp@1
displayName: 'Azure Web App Deploy: webapp-name'
inputs:
azureSubscription: $(azureSubscription)
appType: webAppLinux
appName: $(webAppName)
package: $(Pipeline.Workspace)/drop/$(Build.BuildId).zip
startUpCommand: 'pm2 serve /home/site/wwwroot --spa --no-daemon'
Troubleshooting
Slow Startup
When you are running npm start it will trigger react-scripts start and this will use development server and compile the assets. This can take some time in the startup and also can be consuming memory.
```log
    2022-02-07T20:38:33.660837525Z > projectname@0.1.0 start /home/site/wwwroot
    2022-02-07T20:38:33.660844926Z > react-scripts start
    2022-02-07T20:38:33.660849426Z
    2022-02-07T20:38:36.964131328Z Starting the development server...
    2022-02-07T20:38:36.964162630Z
    2022-02-07T20:38:44.178924445Z Compiled successfully!
    2022-02-07T20:38:44.178963448Z
    2022-02-07T20:38:44.178968348Z You can now view projectname in the browser.
    2022-02-07T20:38:44.178972049Z
    2022-02-07T20:38:44.178975349Z   Local:            http://localhost:8080
    2022-02-07T20:38:44.178978949Z   On Your Network:  http://172.17.252.5:8080
    2022-02-07T20:38:44.178982749Z
    2022-02-07T20:38:44.179030053Z Note that the development build is not optimized.
    2022-02-07T20:38:44.179038553Z To create a production build, use npm run build.
    2022-02-07T20:38:44.179042254Z
    2022-02-07T20:38:44.224896919Z assets by path static/ 1.49 MiB
    2022-02-07T20:38:44.224953323Z   asset static/js/bundle.js 1.48 MiB [emitted] (name: main) 1 related asset
    2022-02-07T20:38:44.224960423Z   asset static/js/node_modules_web-vitals_dist_web-vitals_js.chunk.js 6.96 KiB [emitted] 1 related asset
    2022-02-07T20:38:44.224982425Z   asset static/media/logo.6ce24c58023cc2f8fd88fe9d219db6c6.svg 2.57 KiB [emitted] (auxiliary name: main)
    2022-02-07T20:38:44.224988225Z asset index.html 1.67 KiB [emitted]
    2022-02-07T20:38:44.224992425Z asset asset-manifest.json 546 bytes [emitted]
    2022-02-07T20:38:44.224996526Z runtime modules 31.3 KiB 15 modules
    2022-02-07T20:38:44.225000526Z modules by path ../../../node_modules/ 1.35 MiB 99 modules
    2022-02-07T20:38:44.225004826Z modules by path ./src/ 18.3 KiB
    2022-02-07T20:38:44.225008926Z   modules by path ./src/*.css 9.12 KiB
    2022-02-07T20:38:44.225013027Z     ./src/index.css 2.85 KiB [built] [code generated]
    2022-02-07T20:38:44.225018527Z     ../../../node_modules/css-loader/dist/cjs.js??ruleSet[1].rules[1].oneOf[5].use[1]!../../../node_modules/postcss-loader/dist/cjs.js??ruleSet[1].rules[1].oneOf[5].use[2]!../../../node_modules/source-map-loader/dist/cjs.js!./src/index.css 1.39 KiB [built] [code generated]
    2022-02-07T20:38:44.225026428Z     ./src/App.css 2.85 KiB [built] [code generated]
    2022-02-07T20:38:44.225030628Z     ../../../node_modules/css-loader/dist/cjs.js??ruleSet[1].rules[1].oneOf[5].use[1]!../../../node_modules/postcss-loader/dist/cjs.js??ruleSet[1].rules[1].oneOf[5].use[2]!../../../node_modules/source-map-loader/dist/cjs.js!./src/App.css 2.02 KiB [built] [code generated]
    2022-02-07T20:38:44.225035328Z   modules by path ./src/*.js 5.53 KiB
    2022-02-07T20:38:44.225039428Z     ./src/index.js 1.74 KiB [built] [code generated]
    2022-02-07T20:38:44.225044029Z     ./src/App.js 2.44 KiB [built] [code generated]
    2022-02-07T20:38:44.225050029Z     ./src/reportWebVitals.js 1.35 KiB [built] [code generated]
    2022-02-07T20:38:44.225054330Z   ./src/logo.svg 3.61 KiB [built] [code generated]
    2022-02-07T20:38:44.225058530Z webpack 5.68.0 compiled successfully in 7843 ms
```
- Resolution: Use PM2 to serve the production build
buildfolder already built in Oryx deployment process using this startup commandpm2 serve /home/site/wwwroot/build --no-daemon --spathis will avoid running React development mode. You can find more details in this reference.
404 Not Found
Since React is a SPA (Single Page Application) you will probably get a 404 trying to browse the site in certain routes. You need to redirect all queries to the index.html.
Resolution: Use a startup command passing --spa argument to PM2 as followed: pm2 serve /home/site/wwwroot/build --no-daemon --spa or using a process file.
GitHub Actions Timeout and slow deployments
A normal deployment doesn’t need to take more than 5-15 mins. If the workflow is taking more than that then you might need to review current implementation. Here is a list of things to check:
-
Running tests. There are scenarios where GitHub Actions Agent takes more than 360 minutes (6 hrs) to give you a status and fails with:
The job running on runner Hosted Agent has exceeded the maximum execution time of 360 minutes.. If you havenpm run testdefined in yourpackage.json, this will be triggered by the workflow created from Azure App Service. The best option is to evaluate if this is required to be executed in the workflow since the majority of these tests will run Chrome browser, if this is not needed then it is better to remove it. -
Too many files and slow deployments. Using
actions/upload-artifact@v2to allow sharing data between jobs and store data once the a workflow is complete, it will depend on the JavaScript framework but Angular/React applications tends to have more than 10,000 files when it is compiled including node_modules folder, when this condition is met, it will trigger the following warningThere are over 10,000 files in this artifact, consider creating an archive before upload to improve the upload performance., this will delay your deployment by several mins or hrs.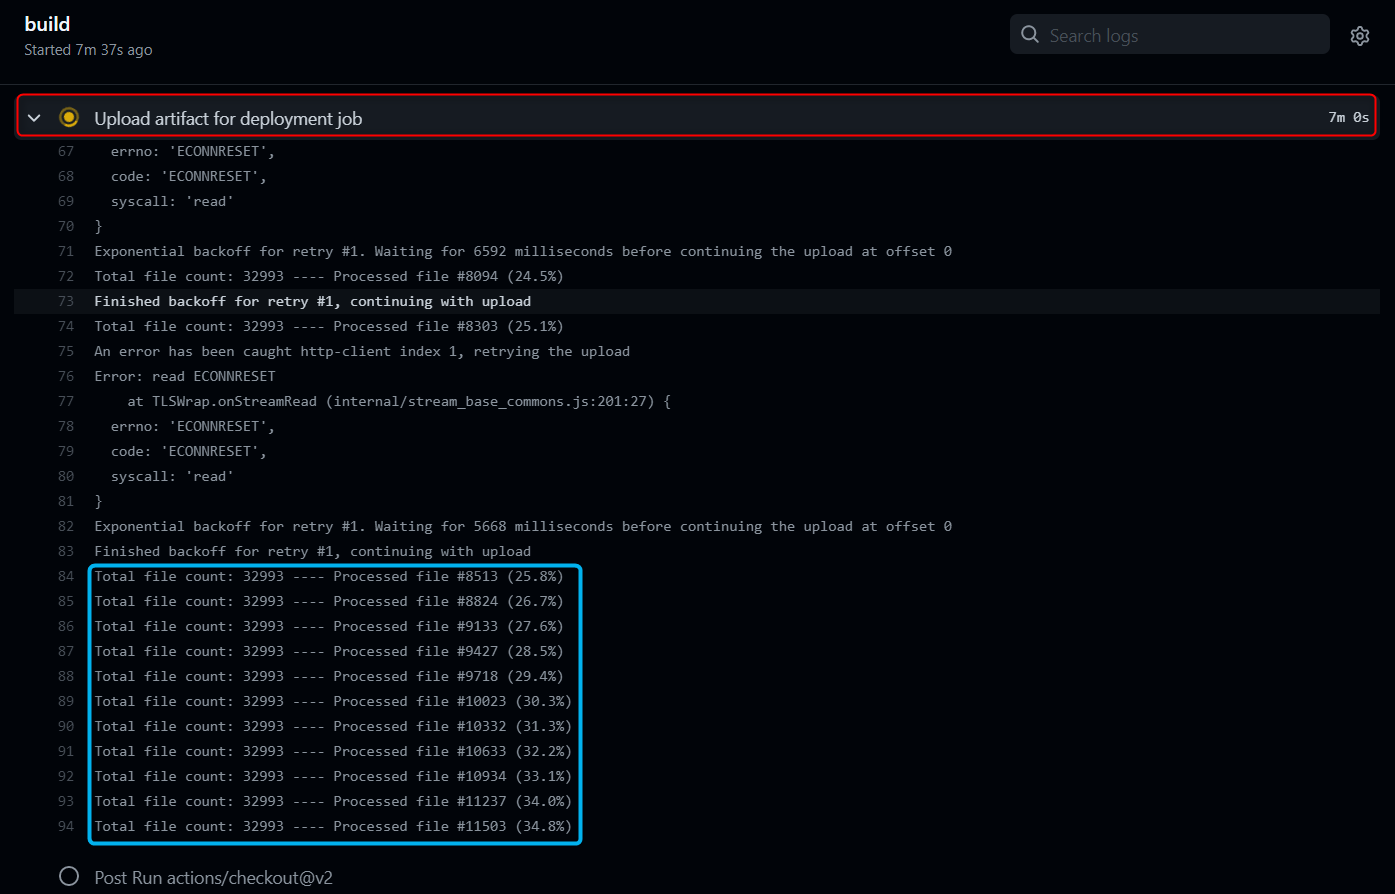
From Official Documentation: During upload, each file is uploaded concurrently in 4MB chunks using a separate HTTPS connection per file. Chunked uploads are used so that in the event of a failure, the upload can be retried. If there is an error, a retry will be attempted after a certain period of time.
Uploading will be generally be faster if there are fewer files that are larger in size vs if there are lots of smaller files. Depending on the types and quantities of files being uploaded, it might be beneficial to separately compress and archive everything into a single archive (using something like tar or zip) before starting and artifact upload to speed things up.
For those scenarios, you can implement the following alternatives:
-
(Recommended) Upload just production build folder in
actions/upload-artifact@v2action:- name: Upload artifact for deployment job uses: actions/upload-artifact@v2 with: name: node-app path: build/
-
Or Zip/unzip your application files between jobs.
build job:
 - name: Zip all files for upload between jobs
     run: zip react.zip ./*

 - name: Upload artifact for deployment job
     uses: actions/upload-artifact@v2
     with:
     name: node-app
     path: react.zip
deploy job:
 deploy:
     runs-on: ubuntu-latest
     needs: build
     environment:
     name: 'Production'
     url: $

     steps:
     - name: Download artifact from build job
         uses: actions/download-artifact@v2
         with:
         name: node-app

     - name: 'Deploy to Azure Web App'
         id: deploy-to-webapp
         uses: azure/webapps-deploy@v2
         with:
         app-name: 'sitename'
         slot-name: 'Production'
         publish-profile: $
         package: react.zip

     - name: Delete zip file
         run: rm react.zip
-
Deployments to Kudu timing out, or taking an extended amount of time, due to number of files
In your deployment task when using CI/CD (for either Azure Pipelines or Github Actions), you may notice occasional output showing the below:
Processed 38841 files...

Processed 39162 files...

Processed 39562 files...
Depending on the project, this can end up with upwards of 70k+ files. This is typically due to node_modules. The message shown in the deployment task that shows this is when the artifact is deployed to the Kudu site and is being handled by the deployment engine to extract the .zip deployed.
If this is a React application - in the sense it’s just client-side code, then as mentioned in the above section regarding GitHub and slow deployments - you should only deploy the /build folder or just the contents within the folder. You should leave out all non-essential files - especially development-only related libraries and others.
This means that node_modules and potentially other irrelevant files for non-prod are left out - which could save tens of thousands of files that don’t need to be deployed - saving overall deployment time by tens of minutes.
In scenarios where SSR is used and /build plus other server-side aspects are needing to be included - this may be more tricky. But, it is possible to ultimately pick and choose what your production build ends up like (meaning the files contained within the .zip) - still saving much needed deployment time.
In the event that none of above can truly be done - the App Setting SCM_DEPLOYMENT_TIMEOUT_MINS can be added to the App Service and increased by a value of minutes (eg., 80, 90). The default deployment timeout time is 40 minutes. However, a general best practice is to first try to reduce the overall size of the artifact first rather than immediately relying on this setting.
Environment variables are missing after deployment
If the application does not have access to the environment variables during build time or if the environment variable is not prefixed with REACT_APP_ they will appear as undefined.
Resolution:
- Syntax: Ensure the variable is prefixed with
REACT_APP_. Such asREACT_APP_MY_ENV_VARand not justMY_ENV_VAR. The variable can be accessed usingprocess.env.REACT_APP_MY_ENV_VAR. TheREACT_APP_prefix is specific to React. - Oryx Build: If building the application with Oryx make sure to add the AppSetting for the environment variable first. This will make sure the environment variable is available during the build. If the application is deployed first without adding the AppSetting, add the AppSetting and then redeploy the application.
-
GitHub Actions: All the build process will happen on the GitHub Agent, so the environment variables will need to be added in the workflow.
You can add custom environment variables in the first level before jobs:
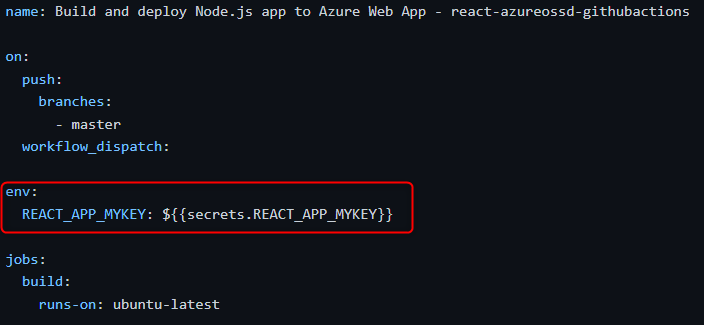
And then add these secrets in GitHub. This can be done going to your project -> Settings -> Secrets -> Actions.
Note: Since the build is done on the GitHub agent with the variables scoped to the Agent you do not need to re-add those AppSettings in the Azure Web App Portal.
-
Azure DevOps: Since the build will happen on the DevOps Agent, so the environment variables will need to be added in the pipeline.
This can be done by going to Pipeline -> Click on the Pipeline again -> Edit -> Variables.
After adding the needed environment variables in the pipeline trigger a build. The variables will now be replaced during the build.
Note: Since the build is done on the DevOps agent with the variables scoped to the Agent you do not need to re-add those AppSettings in the Azure Web App Portal.
Note: For more information on how React uses and expects environment variables click here.


