Deploying JAR based Java applications with CI/CD (GitHub Actions, Azure DevOps) on App Service Linux
In this blog post we’ll cover some examples of how to deploy jar based applications using Azure DevOps and GitHub Actions.
Overview
Source code for these GitHub Action workflows and Azure DevOps pipelines can be found here.
This section will cover deploying jar files - specifically for deploying jar files to Java SE applications on Java with App Service Linux. The approach to build the jar will generally be the same across different Java frameworks, although there may be some minor differences depending on what is needing to done. This can be used as a starting approach.
It’s important to note that the concept of deploying a jar file to Java on App Service Linux is one what has an embedded server in it. Such as Spring Boot (with embedded Tomcat), but any other frameworks that can run an embedded Web Server, like Jetty, Tomcat, Undertow, or others, and be packaged as a jar, can be used.
This post will also include deployment differences for Maven and Gradle.
Local Development
For simplicity, we’ll be using Spring Boot to create the application we’ll be deploying.
Configuring for Maven
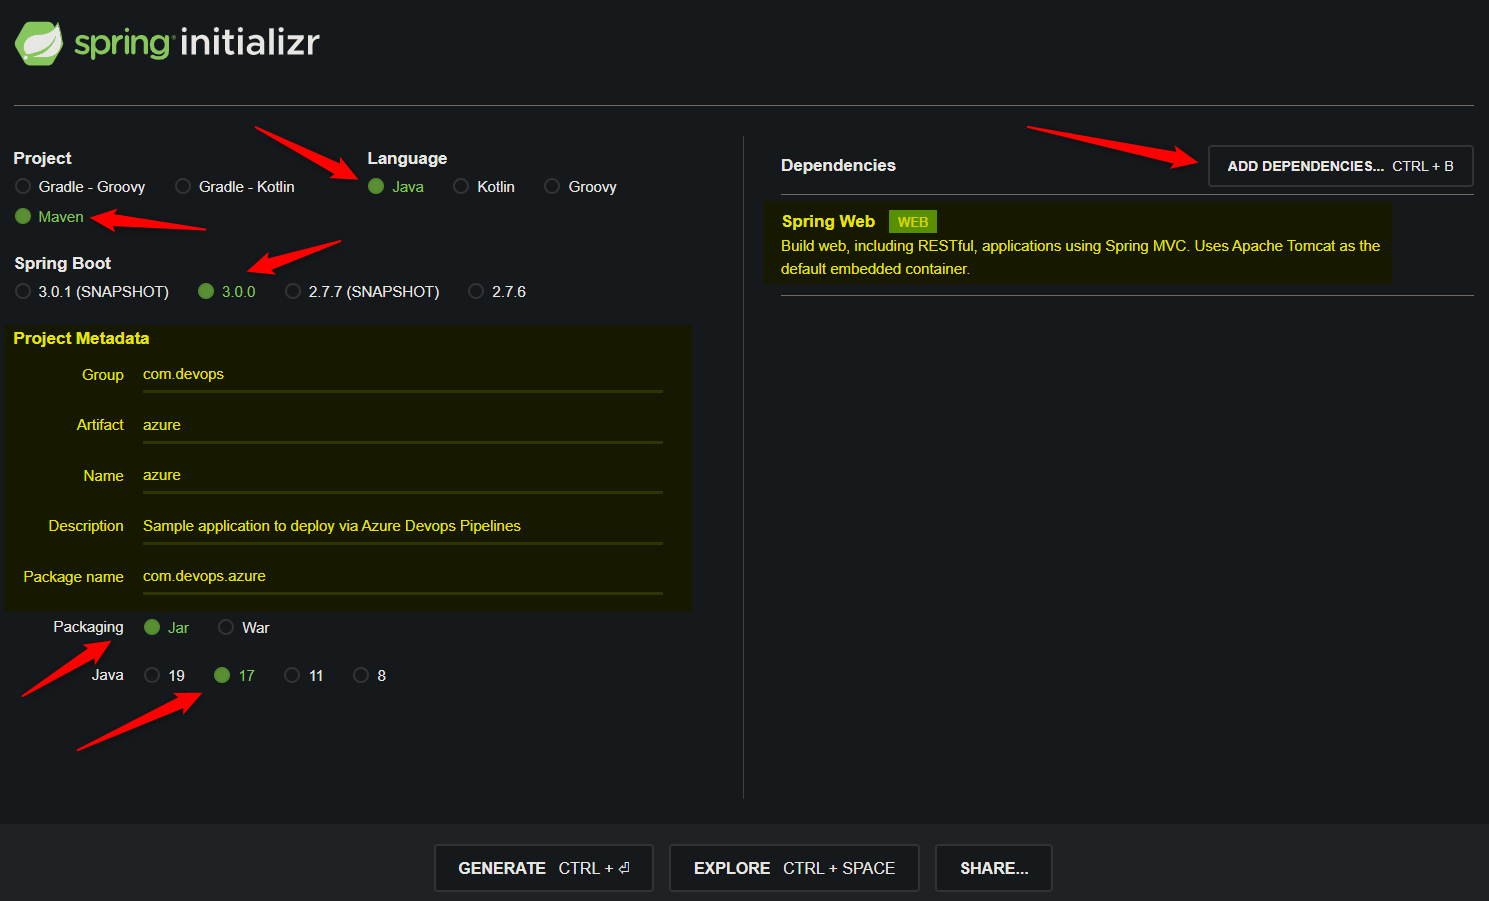
- Go to Spring Initializr and create the application with the following properties:
- Project: Maven
- Language: Java
- Spring Boot: 3.0.0
- Project Metadata: Fill this as fits your needs
- Packaging: War
- Java: 17
For Dependencies, go to Add Dependencies and choose Spring Web. Click Generate after this, which will download a zip which we’ll extract into a project workspace.
- After downloading the zip, extract it on your local machine and cd into the folder with the source code.
- In a terminal, run either of the following:
- If Maven is on $PATH, run
mvn spring-boot:runrelative to thepom.xml. - If Maven is not on $PATH, run
./mvnw spring-boot:runrelative to thepom.xml
- If Maven is on $PATH, run
NOTE: This assumes you have Java 17 locally. Maven needs to point to a Java 17 installation as well. If you’re unsure to what Maven is using, use
mvn -v.
After running the above command, you should see some output like the below in your terminal:
2022-12-05T18:44:00.226-05:00  INFO 6068 --- [           main] o.apache.catalina.core.StandardService   : Starting service [Tomcat]
2022-12-05T18:44:00.227-05:00  INFO 6068 --- [           main] o.apache.catalina.core.StandardEngine    : Starting Servlet engine: [Apache Tomcat/10.1.1]
2022-12-05T18:44:00.461-05:00  INFO 6068 --- [           main] o.a.c.c.C.[Tomcat].[localhost].[/]       : Initializing Spring embedded WebApplicationContext
2022-12-05T18:44:00.463-05:00  INFO 6068 --- [           main] w.s.c.ServletWebServerApplicationContext : Root WebApplicationContext: initialization completed in 1566 ms
2022-12-05T18:44:00.975-05:00  INFO 6068 --- [           main] o.s.b.w.embedded.tomcat.TomcatWebServer  : Tomcat started on port(s): 8080 (http) with context path ''
2022-12-05T18:44:00.992-05:00  INFO 6068 --- [           main] com.devops.azure.AzureApplication        : Started AzureApplication in 2.929 seconds (process running for 3.44)
- Browsing to localhost:8080 should show a Whitelabel Error Page, which is expected, since we have no Controllers serving our root path.
- Let’s add a Controller to show some type of content when hitting the root path. Under your project src, relative to your entrypoint
.javafile, create a controller. Let’s name is HomeController.java. The project structure should look like this:
| - src
|   | - main
|       | - java
|           | - com
|               | - some
|                   | - reversedns
|                       | - name
|                           | Name.java
|                           | HomeController.java
Add the following code to HomeController.java:
package com.some.package;
import org.springframework.web.bind.annotation.GetMapping;
import org.springframework.web.bind.annotation.RestController;
@RestController
public class HomeController {
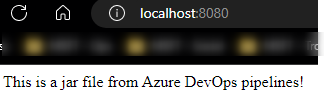
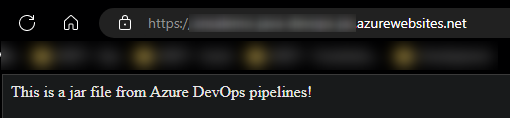
String message = "This is a jar file from Azure DevOps pipelines!";
@GetMapping("/")
public String index() {
return message;
}
}
- Restart the application. Refresh the browser, we should now see the below:
- Push this code to a repository of your choosing to use later on for the DevOps section. To use with GitHub Actions, it’s recommended to push this to a GitHub repository.
Configuring for Gradle
- Follow the steps under the Local Development - Maven section above to create a Spring Boot application with Gradle. Choose either Gradle - Kotlin or Gradle - Groovy for the Project field on Spring Initializr, the rest of the properties can remain the same.
- Continue to follow all other Local Development section steps to create a Controller, as we did earlier.
- On your local machine, in your terminal, run
./gradlew bootRunto start the Spring Boot application. You should see the same output above as discussed in th Maven section.
DevOps
Maven
Prerequisites:
- If not done so already, create an Azure DevOps Organization.
- Next, create a Azure DevOps Project to host our pipeline after this.
Creating the pipeline:
In your Azure DevOps project go to:
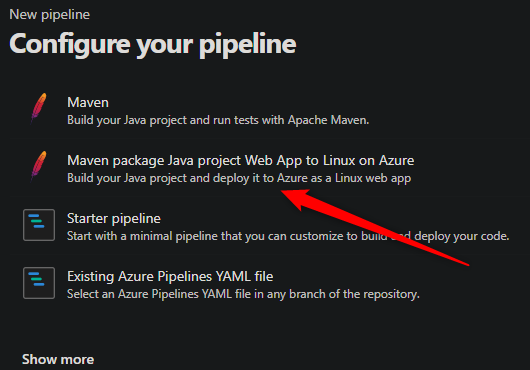
- Pipelines -> Pipelines -> Create Pipeline
- Select the repository that is hosting the code
- Select the Maven package Java project Web App to Linux on Azure template:
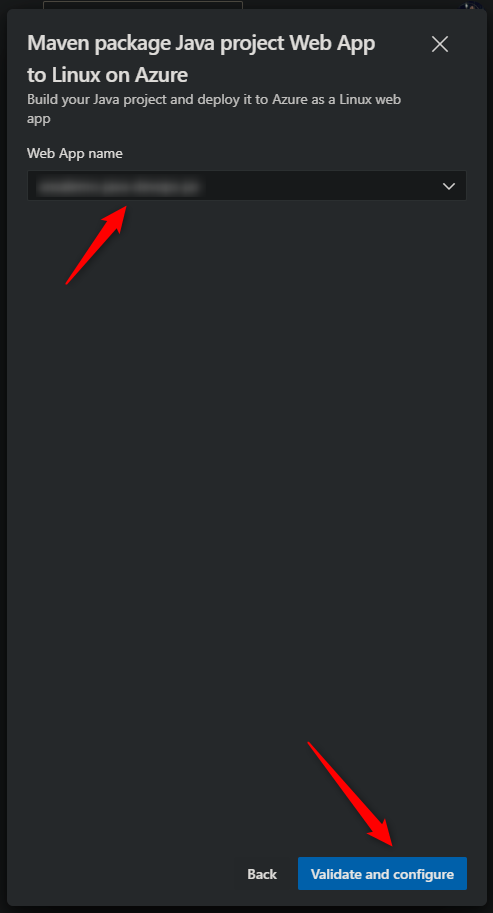
- Select your subscription in the right-hand navbar, when prompted.
- Select the Web App you’re deploying to. Then select Validate and Configure:
- This should generate the following
.yaml, which ideally is enough to get us started for a deployment:
# Maven package Java project Web App to Linux on Azure
# Build your Java project and deploy it to Azure as a Linux web app
# Add steps that analyze code, save build artifacts, deploy, and more:
# https://docs.microsoft.com/azure/devops/pipelines/languages/java

trigger:
- main

variables:

  # Azure Resource Manager connection created during pipeline creation
  azureSubscription: '00000000-0000-0000-0000-0000000000'

  # Web app name
  webAppName: 'myapp'

  # Environment name
  environmentName: 'myapp'

  # Agent VM image name
  vmImageName: 'ubuntu-latest'

stages:
- stage: Build
  displayName: Build stage
  jobs:
  - job: MavenPackageAndPublishArtifacts
    displayName: Maven Package and Publish Artifacts
    pool:
      vmImage: $(vmImageName)

    steps:
    - task: Maven@4
      displayName: 'Maven Package'
      inputs:
        mavenPomFile: 'pom.xml'

    - task: CopyFiles@2
      displayName: 'Copy Files to artifact staging directory'
      inputs:
        SourceFolder: '$(System.DefaultWorkingDirectory)'
        # NOTE: You can use glob patterns to specify a jar, without having to explicitly name one
        # eg. like:
        # Contents: '**/target/*.jar'
        # Assuming that only one (1) jar exists or the glob pattern is specific to avoid passing multiple jars to the next stage
        # Which may fail
        Contents: '**/target/$(YOUR_JAR).jar'
        TargetFolder: $(Build.ArtifactStagingDirectory)

    - upload: $(Build.ArtifactStagingDirectory)
      artifact: drop

- stage: Deploy
  displayName: Deploy stage
  dependsOn: Build
  condition: succeeded()
  jobs:
  - deployment: DeployLinuxWebApp
    displayName: Deploy Linux Web App
    environment: $(environmentName)
    pool:
      vmImage: $(vmImageName)
    strategy:
      runOnce:
        deploy:
          steps:
          - task: AzureWebApp@1
            displayName: 'Azure Web App Deploy: myapp'
            inputs:
              azureSubscription: $(azureSubscription)
              appType: webAppLinux
              appName: $(webAppName)
              package: '$(Pipeline.Workspace)/drop/**/target/*.?(war|jar)'
However, since we’re using Java 17 we need to update the Maven task to the below, JAVA_HOME (at the time of writing this) points to /usr/lib/jvm/temurin-11-jdk-amd64. We need to point this to a Java 17 JDK. If you don’t do this we’ll get an Fatal error compiling: error: invalid target release: 17
    - task: Maven@4
      displayName: 'Maven Package'
      inputs:
        mavenPomFile: 'pom.xml'
        jdkVersionOption: 1.17
- Make sure to Authorize the pipeline for deployment. Click into the pipeline to view and permit this. This should be a one time operation.

- At this point after deployment, we should be able to browse our application on Azure.
You can view the Maven task documentation for further configuration here.
Gradle
In your Azure DevOps project go to:
- Pipelines -> Pipelines -> Create Pipeline
- Select the repository that is hosting the code
- Select Show more, do not choose the Gradle one that appears by default.
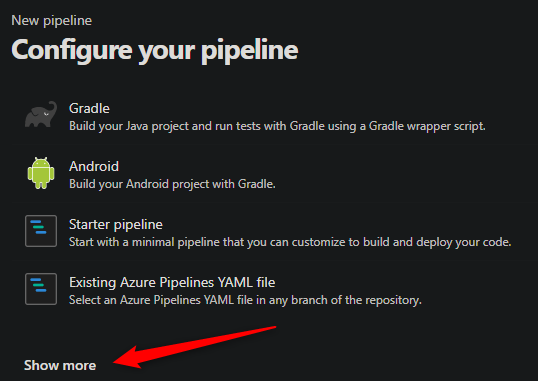
- For simplicity, we’ll choose the Maven package Java project Web App to Linux on Azure template, like we did in the above section, but instead change out the Maven task with a Gradle one.
Below is the .yaml file we’ll use for our Gradle deployment. This is generated from the Maven template but with three notable changes below - that of explicitly setting our Java version to 17, switching our Maven task for our Gradle one and changing our CopyArtifacts task to reflect where Grade outputs our built jar to.
NOTE: At the time of writing this, the
Gradle@3task only has up to JDK 11 support in the Task Assistant. If needed, this can manually be configured to point to a different JDK installation with the Path option.
Below is the .yaml with the recommended changes. Replace $(JAR_NAME) with the name of your jar file.
# Maven package Java project Web App to Linux on Azure
# Build your Java project and deploy it to Azure as a Linux web app
# Add steps that analyze code, save build artifacts, deploy, and more:
# https://docs.microsoft.com/azure/devops/pipelines/languages/java

trigger:
- main

variables:

  # Azure Resource Manager connection created during pipeline creation
  azureSubscription: '00000000-0000-0000-0000-000000000000'

  # Web app name
  webAppName: 'myapp'

  # Environment name
  environmentName: 'myapp'

  # Agent VM image name
  vmImageName: 'ubuntu-latest'

stages:
- stage: Build
  displayName: Build stage
  jobs:
  - job: GradlePackageAndPublishArtifacts
    displayName: Gradle Package and Publish Artifacts
    pool:
      vmImage: $(vmImageName)
    steps:

    # We add this to set Java 17 for our pipeline environment
    - task: JavaToolInstaller@0
      inputs:
        versionSpec: '17'
        jdkArchitectureOption: 'x64'
        jdkSourceOption: 'PreInstalled'

    # We add this Gradle task to build with Gradle
    - task: Gradle@3
      inputs:
        gradleWrapperFile: 'gradlew'
        tasks: 'build'
        javaHomeOption: 'JDKVersion'

    # We change this to reflect Gradles build output location for our jars
    # Which is /build/libs/<jar>.jar
    # Replace JAR_NAME with the name of your jar -eg., azure-0.0.1.SNAPSHOT.jar
    # NOTE: You can use glob patterns to specify a jar, without having to explicitly name one, eg. like:
    # Contents: '**/target/*.jar'
    # Assuming that only one (1) jar exists or the glob pattern is specific to avoid passing multiple jars to the next stage - Which may fail
    - task: CopyFiles@2
      displayName: 'Copy Files to artifact staging directory'
      inputs:
        SourceFolder: '$(System.DefaultWorkingDirectory)'
        Contents: '**/build/libs/$(JAR_NAME).jar'
        TargetFolder: $(Build.ArtifactStagingDirectory)

    - upload: $(Build.ArtifactStagingDirectory)
      artifact: drop

- stage: Deploy
  displayName: Deploy stage
  dependsOn: Build
  condition: succeeded()
  jobs:
  - deployment: DeployLinuxWebApp
    displayName: Deploy Linux Web App
    environment: $(environmentName)
    pool:
      vmImage: $(vmImageName)
    strategy:
      runOnce:
        deploy:
          steps:
          - task: AzureWebApp@1
            displayName: 'Azure Web App Deploy: myapp'
            inputs:
              azureSubscription: $(azureSubscription)
              appType: webAppLinux
              appName: $(webAppName)
              # We can change this to reflect the proper Gradle build output path for our jars
              # Replace JAR_NAME with the name of your jar -eg., azure-0.0.1.SNAPSHOT.jar
              package: '$(Pipeline.Workspace)/drop/**/build/libs/$(JAR_NAME).jar'
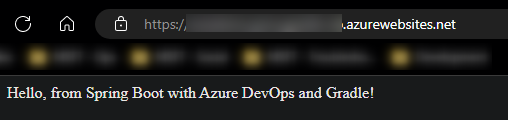
Deploying this to a new Java App Service on Linux should show updated site content, for example:
To view other configuration that can be used with Gradle for the Gradle@3 task, view the documentation here.
Troubleshooting
Java tests failing during build
If tests are failing and are able to be excluded, a Maven Options property can be added to the task, like the below:
- task: Maven@4
  displayName: 'Maven Package'
  inputs:
    mavenPomFile: 'pom.xml'
    options: '-DskipTests=true'
For Gradle, we can pass the -x flag for exclusions, like the below:
- task: Gradle@3
  inputs:
    gradleWrapperFile: 'gradlew'
    tasks: 'build'
    javaHomeOption: 'JDKVersion'
    options: '-x test'
Since Gradle outputs the tasks its running, you can confirm that Task :test is removed from this in the Azure DevOps task logs:
(Before adding -x test)
...other tasks
> Task :testClasses
> Task :test
> Task :check
> Task :build
(After adding -x test)
> Task :compileJava
> Task :processResources
> Task :classes
> Task :resolveMainClassName
> Task :bootJar
> Task :jar
> Task :assemble
> Task :check
> Task :build
Maven or Gradle is pointing to a different Java version
Maven and Gradle are configured to point to a specific Java version. What is the default set to JAVA_HOME may not be what is the target release goal for Maven or source compatability for Gradle. This can be changed through the jdkVersionOption property for both Maven and Gradle tasks.
You can alternatively use the JavaToolInstaller@0 task to point to a specific JDK version, this will be set to $PATH, which Maven and Gradle will pick up. You can alternatively use the javaHomeOption option to point JAVA_HOME to the JDK that’s installed and discovered (i.e through the JavaToolInstaller) or to a specific path on the agent.
For example (using JavaToolInstaller):
- task: JavaToolInstaller@0
  inputs:
    versionSpec: '17'
    jdkArchitectureOption: 'x64'
    jdkSourceOption: 'PreInstalled'
If there is a version mismatch, you’ll see Gradle exit with a message like this in the task logs:
...
Incompatible because this component declares an API of a component compatible with Java 17 and the consumer needed a runtime of a component compatible with Java 11
...
Maven will look like this if targeting a mismatched version from what it’s pointing towards:
Fatal error compiling: error: invalid target release: <versionNumber>
Application Error : ( is shown at runtime
This is a very generic message, but this means your application/container is either timing out or crashing. A crucial step is to ensure you have App Service Logs enabled. Review here on how to do so.
You can now view your Application Logging (stdout/err) in any of these following areas, or more:
- Diagnose and Solve Problems -> Application Logs detector
- Diagnose and Solve Problems -> Container Crash or Container Issues detector
- Log Stream
- Browsing the Kudu site directly or through FTP
- Using the AZ CLI, and others
Two general reasons this would happen after a new deployment is:
- Container Crash - Due to an unhandled exception/fatal error on start up. Examples such as: making a dependency call but this application wasn’t whitelisted to be allowed to access the resource, missing files (doing some type of i/o operation on a non-existent file from an application level), missing environment variables, bad syntax, forgetting to change your Spring Profile (or other localhost based values) to that of remote resources, etc.
- Container Timeout - Due to the application/container starting, but timing out at 240 (s) (the default). Common scenarios are trying to start the application on localhost or a port that is not actually being exposed/listened to (typical defaults for Java Blessed Images (SE) is port 80, picked up by Tomcat automatically via
server.port.)
Default “parking page” is showing
This typically means your jar is not under wwwroot or is not named app.jar. Using the deployment tasks defined in these pipelines will automatically rename our jars to app.jar since this is expected if we want the platform to run our jar automatically.
If you absolutely need to run a jar with a specific name, then you must use a startup command as defined here.
It is advised to review the file content under /home/site/wwwroot when these scenarios occur (such as with FTP), to check that you’re not accidentally deploying a nested zip. If this is the case we fallback to showing the default hosting page
Pipeline is failing on the build or deploy stage
This can fail for various reasons, and is usually a product of the tasks being configured here - troubleshooting this needs to be on the Azure DevOps or GitHub Actions side, especially if this is failing only in the Build stage. This alone would mean this is not an App Service issue, but rather a pipeline issue.
You can review Azure DevOps task logs by clicking into each specific task in your pipeline UI - and can additionally enable debug logs.
The same be done from the GitHub Actions Actions tab in GitHub.
One common scenario is Error: No package found with specified pattern: /some/path/zip.zip. This may is normally related to the CopyFiles task or when trying to download said artifact into the Deploy stage. Review the CopyFiles task to ensure the file(s) or folders it’s transferring to the next stage actually actually matches whats specified under the Contents property. Additionally, ensure your SourceFolder property is not set to a path that does not contain the Contents you’re trying to transfer. You may need to investigate the SourceFolder, TargetFolder and Contents property locations all together.
Another is on the Deployment task - such as "Error: No such file or directory or directory, stat /path/to/file/or/folder" when the Zip Deploy is initiated. This can happen due to the above, if deploying an incorrect file (non jar, or non-zip), or the application source is missing a file from the build stage.
This is a direct product of how the pipeline is configured.
DevOps - Java Configuration for runtime
One popular configuration for Java (SE) applications on App Service Linux is using JAVA_OPTS to pass various arguments to the application and JVM at runtime. We can do all of this from our pipeline, in our our Deployment task, without having to manage it from the Azure Portal. Such as below:
- task: AzureWebApp@1
  displayName: 'Azure Web App Deploy: myapp'
  inputs:
    azureSubscription: $(azureSubscription)
    appType: webAppLinux
    appName: $(webAppName)
    package: '$(Pipeline.Workspace)/drop/**/build/libs/somejar.jar'
    appSettings: -JAVA_OPTS "-Dfoo=bar"
Use the -JAVA_OPTS "-Dsome=value -Dfoo=bar" syntax, make sure to use double qoutes, or else this will fail at runtime with a message like:
Error: Could not find or load main class '-Dfoo=bar'
Caused by: java.lang.ClassNotFoundException: '-Dfoo=bar'
GitHub Actions
Maven
To get started with GitHub Actions, create a Java on App Service Linux application. In this case, we’ll still use a Java 17 runtime. After creating the application, do the following:
- Go to Deployment Center in the Azure Portal on the App Service and select GitHub as the source
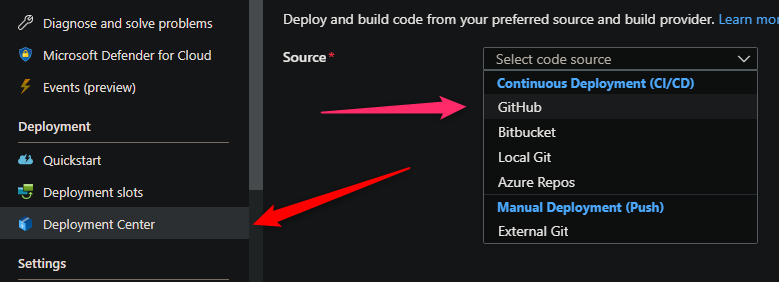
- Select Organization, Repository and Branch - then click Save
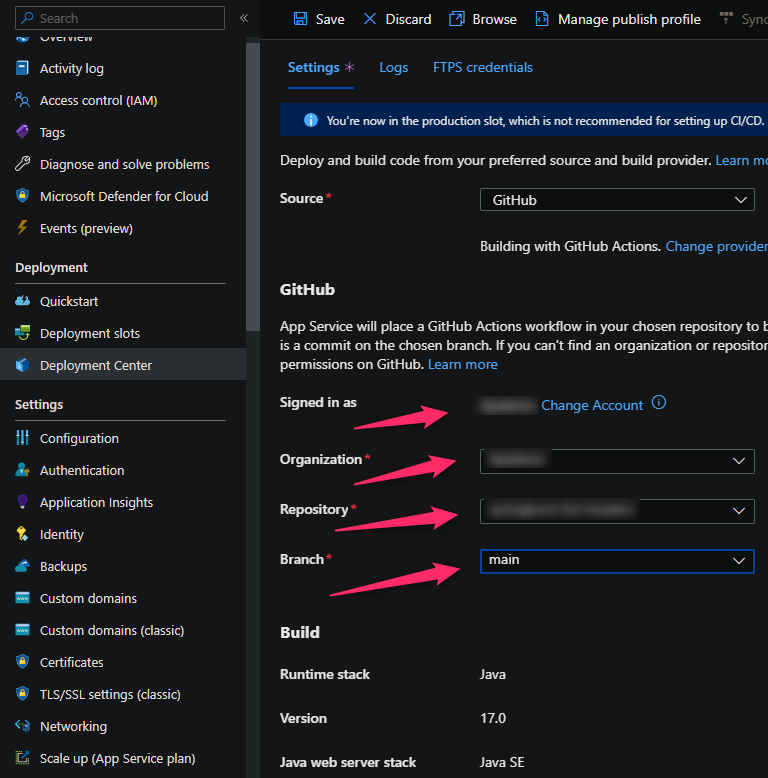
- Choose whether “User Assigned Identity” or “Publish Profile” authentication will be used. Publish Profile authentication requires “Basic Authentication” to be enabled on the App Service.
- For User Assigned Identity authentication this will generate the following
.ymlwhich will be committed and created under.github/<branch>_<appname>.yml
# Docs for the Azure Web Apps Deploy action: https://github.com/Azure/webapps-deploy
# More GitHub Actions for Azure: https://github.com/Azure/actions

name: Build and deploy JAR app to Azure Web App - myapp

on:
  push:
    branches:
      - main
  workflow_dispatch:

jobs:
  build:
    runs-on: ubuntu-latest

    steps:
      - uses: actions/checkout@v4

      - name: Set up Java version
        uses: actions/setup-java@v4
        with:
          java-version: '17'
          distribution: 'microsoft'

      - name: Build with Maven
        run: mvn clean install

      - name: Upload artifact for deployment job
        uses: actions/upload-artifact@v4
        with:
          name: java-app
          path: '$/target/*.jar'

  deploy:
    runs-on: ubuntu-latest
    needs: build
    environment:
      name: 'Production'
      url: $
    permissions:
      id-token: write #This is required for requesting the JWT

    steps:
      - name: Download artifact from build job
        uses: actions/download-artifact@v4
        with:
          name: java-app

      - name: Login to Azure
        uses: azure/login@v2
        with:
          client-id: $
          tenant-id: $
          subscription-id: $

      - name: Deploy to Azure Web App
        id: deploy-to-webapp
        uses: azure/webapps-deploy@v3
        with:
          app-name: 'someapp'
          slot-name: 'Production'
          package: '*.jar'
- For publish profile authentication this will generate the following
.ymlwhich will be committed and created under.github/<branch>_<appname>.yml
# Docs for the Azure Web Apps Deploy action: https://github.com/Azure/webapps-deploy
# More GitHub Actions for Azure: https://github.com/Azure/actions

name: Build and deploy JAR app to Azure Web App - someapp

on:
  push:
    branches:
      - main
  workflow_dispatch:

jobs:
  build:
    runs-on: ubuntu-latest

    steps:
      - uses: actions/checkout@v4

      - name: Set up Java version
        uses: actions/setup-java@v4
        with:
          java-version: '17'
          distribution: 'microsoft'

      - name: Build with Maven
        run: mvn clean install

      - name: Upload artifact for deployment job
        uses: actions/upload-artifact@v4
        with:
          name: java-app
          path: '$/target/*.jar'

  deploy:
    runs-on: ubuntu-latest
    needs: build
    environment:
      name: 'Production'
      url: $

    steps:
      - name: Download artifact from build job
        uses: actions/download-artifact@v4
        with:
          name: java-app

      - name: Deploy to Azure Web App
        id: deploy-to-webapp
        uses: azure/webapps-deploy@v3
        with:
          app-name: 'someapp'
          slot-name: 'Production'
          package: '*.jar'
          publish-profile: $
Since the Maven executable being used here is a typical CLI approach, you pass additional parameters as needed. For example:
mvn clean install -DskipTests=true && mvn -v
After setting up GitHub Actions, go to the Actions tab on the GitHub side to view your pipeline progress and task details. The site should be viewable after this.

Gradle
We’ll set up GitHub Actions with our Spring Boot project and Gradle using the same approach as seen under the GitHub Actions - Maven section.
NOTE: When setting this up from the Azure Portal as a first time project, it will default to using Maven, so your initial build may fail. We’ll need to change the generated .yml file to the below:
# Docs for the Azure Web Apps Deploy action: https://github.com/Azure/webapps-deploy
# More GitHub Actions for Azure: https://github.com/Azure/actions

name: Build and deploy JAR app to Azure Web App - myapp

on:
  push:
    branches:
      - main
  workflow_dispatch:

jobs:
  build:
    runs-on: ubuntu-latest

    steps:
      - uses: actions/checkout@v4

      - name: Set up Java version
        uses: actions/setup-java@v2
        with:
          java-version: '17'
          distribution: 'microsoft'

      # This is the important change we need to make to switch between Maven to Gradle
      # Gradle is available on these runners through typical [CLI commands](https://docs.gradle.org/current/userguide/command_line_interface.html)
      - name: Build with Gradle
        run: gradle build

      - name: Upload artifact for deployment job
        uses: actions/upload-artifact@v4
        with:
          name: java-app
          path: '$/build/libs/*.jar'

  deploy:
    runs-on: ubuntu-latest
    needs: build
    environment:
      name: 'Production'
      url: $

    steps:
      - name: Download artifact from build job
        uses: actions/download-artifact@v4
        with:
          name: java-app

      - name: Deploy to Azure Web App
        id: deploy-to-webapp
        uses: azure/webapps-deploy@v3
        with:
          app-name: 'someapp'
          slot-name: 'Production'
          package: '*.jar'
          publish-profile: $
GitHub Actions - Java Configuration for runtime
As with Azure DevOps deployment tasks, you can use the azure/appservice-settings@v1 and azure/login@v1 tasks to configure runtime settings for your Java application. The approach between the two differs - to set up proper credentials and authentication to add these App Settings, follow the documentation for appservice-settings here.
Below is an example of using JAVA_OPTS in our deploy stage:
deploy:
    runs-on: ubuntu-latest
    needs: build
    environment:
      name: 'Production'
      url: $

    steps:
      - name: Download artifact from build job
        uses: actions/download-artifact@v4
        with:
          name: java-app

      - uses: azure/login@v2
        with:
          creds: '$'

      - uses: azure/appservice-settings@v1
        with:
          app-name: 'myapp'
          app-settings-json: '[{ "name": "JAVA_OPTS", "value": "-Dfoo=bar" }]'

      - name: Deploy to Azure Web App
        id: deploy-to-webapp
        uses: azure/webapps-deploy@v3
        with:
          app-name: 'someapp'
          slot-name: 'Production'
          package: '*.jar'

      - run: |
          az logout
Troubleshooting
Error: More than one package matched with specified pattern: *.jar. Please restrain the search pattern.
This may happen in the default generated template where a glob pattern is specified for any file matching a .jar extension. As with Maven and Gradle both, they package a “plain” .jar file as well as a “fat” jar (or jar-with-dependencies), which means, unless otherwise configured - per build you will be outputting two (2) .jar files to the /build (Gradle) or /target (Maven) directory.
This same issue can happen in any of the pipelines where using a glob pattern for a wild-card or general search pattern.
To resolve this, either tighten down the glob pattern being used or, if using a specific or easily identified naming scheme for your jar file, replace the path and package properties in the above .yml with the name of the jar specifically - example: azure-0.0.1-SNAPSHOT.jar . This same approach can be used in any of the CI/CD examples in this post.
Other troubleshooting
Most other troubleshooting can follow whats listed under the DevOps troubleshooting section, respective of task syntax differences.


