Configuring NGINX as a reverse proxy on Azure Linux Virtual Machines
This post will cover setting up NGINX on an Azure Linux Virtual Machine to be used as a Reverse Proxy.
Overview
The contents of this post will primarily use an Ubuntu 20.04 LTS Azure Linux Virtual Machine. The backend that NGINX will be proxying requests to an application running on the machine. The process of targeting the backend to forward requests to will generally be the same regardless if it’s running as a Docker Container or not.
Additionally, the concept of installation and configuration for NGINX should also be the same for most distributions - the main differences here would be the commands ran when using different package managers (eg., yum, dnf, apk, etc.). Some installations will install packages at slightly differing paths than what’s described here for Ubuntu.
You can use the whereis command to locate these installations.
Getting started
- Create an Azure Linux Virtual Machine (Ubuntu 20.04 LTS), or use an existing one. If creating a new Virtual Machine, you can click on Create a resource in the portal and look for Virtual Machine in the Azure Marketplace. This option will let you select Inbound ports to open which are ports 22, 80 and 443.
NOTE: If choosing the SSH key credential option, make sure to download the private key
- This will either have you create a new VNET with an associated NSG (Network Security Group) or have you join with an existing one.
- Ensure that for the duration of this walkthrough, that ports 22 (for SSH), 80 and 443 are opened for traffic. Either for your client or public.
- Ensure a client such as PuTTY or a terminal with the
sshCLI tool is enabled, to be able to connect to the Virtual Machine.
Connecting to the Virtual Machine - CLI
You can connect via the ssh CLI tool, where x.x.x.x is the public IP address of your Virtual Machine (This can be found in the Azure Portal -> Overview Blade, on the Virtual Machine resource). You can also use the Connect (Preview) blade for additional connection assistance.:
For User/Password authentication, you’d use this (which will prompt for credentials)
ssh someuser@x.x.x.x
For SSH key authentication, you’d use this - using the private key you downloaded earlier:
ssh -i /path/to/your/key.pem someuser@x.x.x.x
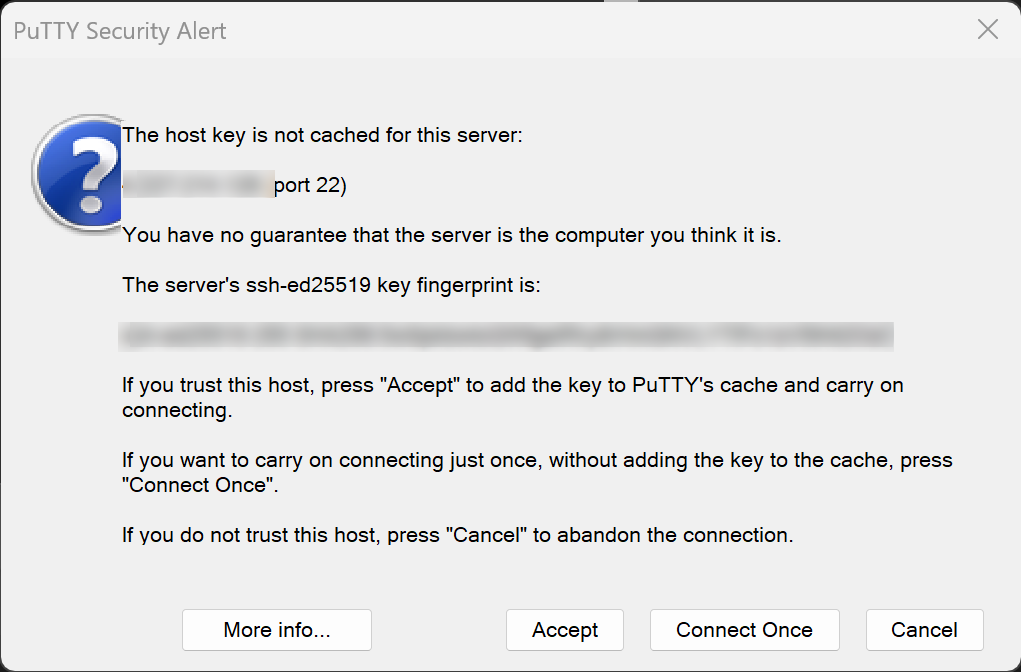
When connecting for thie first time, you may see this:
The authenticity of host 'x.x.x.x (x.x.x.x)' can't be established.
ED25519 key fingerprint is SHA256:0000000000000aaaaab000000000ab0000000a0.
This key is not known by any other names.
Are you sure you want to continue connecting (yes/no/[fingerprint])?
Type “yes”. You may be prompted to log in again. This is normal to see. After successfully logging in you’ll end up on the home path of your user of your Virtual Machine.
To logout of the Virtual Machine, type exit.
Connecting to the Virtual Machine - PuTTY
PuTTY will behave in generally the same way as doing this through the terminal/CLI.
-
In the Host Name (or IP address field), enter the Public IP of your Virtual Machine

-
Then accept the host key fingerprint message. This popup is normal.
-
Log into the Virtual Machine (if using username and password credentials). After successfully logging in you’ll end up on the home path of your user of your Virtual Machine.
Setting up the Reverse Proxy
Download NGINX
Let’s start with downloading NGINX with the following command:
sudo apt-get update -yy && sudo apt-get install nginx -yy
A successful download should start NGINX automatically. You can validate this with the systemctl status nginx command. You’ll see the below output indicating NGINX is now running.
azureuser@azurevm:~$ systemctl status nginx
● nginx.service - A high performance web server and a reverse proxy server
     Loaded: loaded (/lib/systemd/system/nginx.service; enabled; vendor preset: enabled)
     Active: active (running) since Mon 2023-03-27 23:16:04 UTC; 36s ago
       Docs: man:nginx(8)
   Main PID: 5272 (nginx)
      Tasks: 2 (limit: 4035)
     Memory: 4.9M
     CGroup: /system.slice/nginx.service
             ├─5272 nginx: master process /usr/sbin/nginx -g daemon on; master_process on;
             └─5273 nginx: worker process

Mar 27 23:16:04 azurevm systemd[1]: Starting A high performance web server and a reverse proxy server...
Mar 27 23:16:04 azurevm systemd[1]: Started A high performance web server and a reverse proxy server.
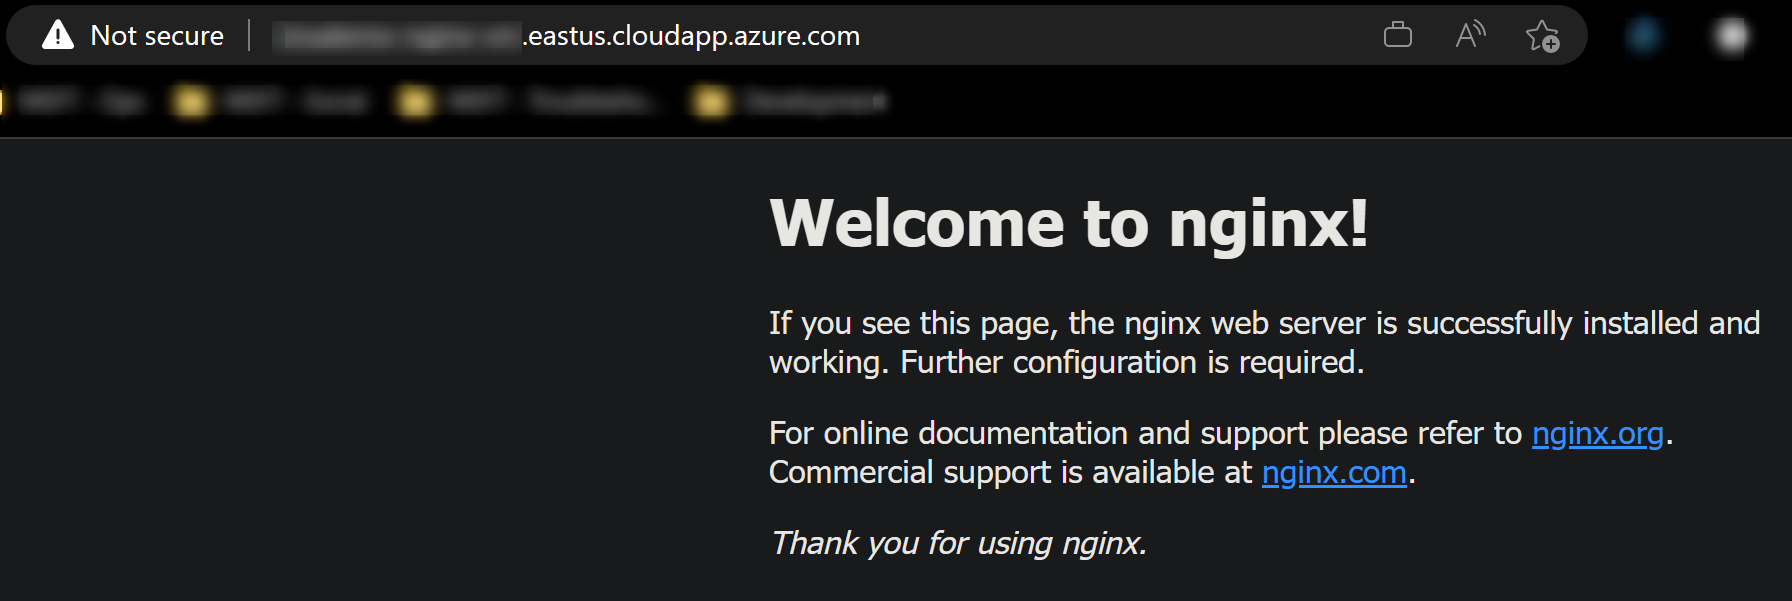
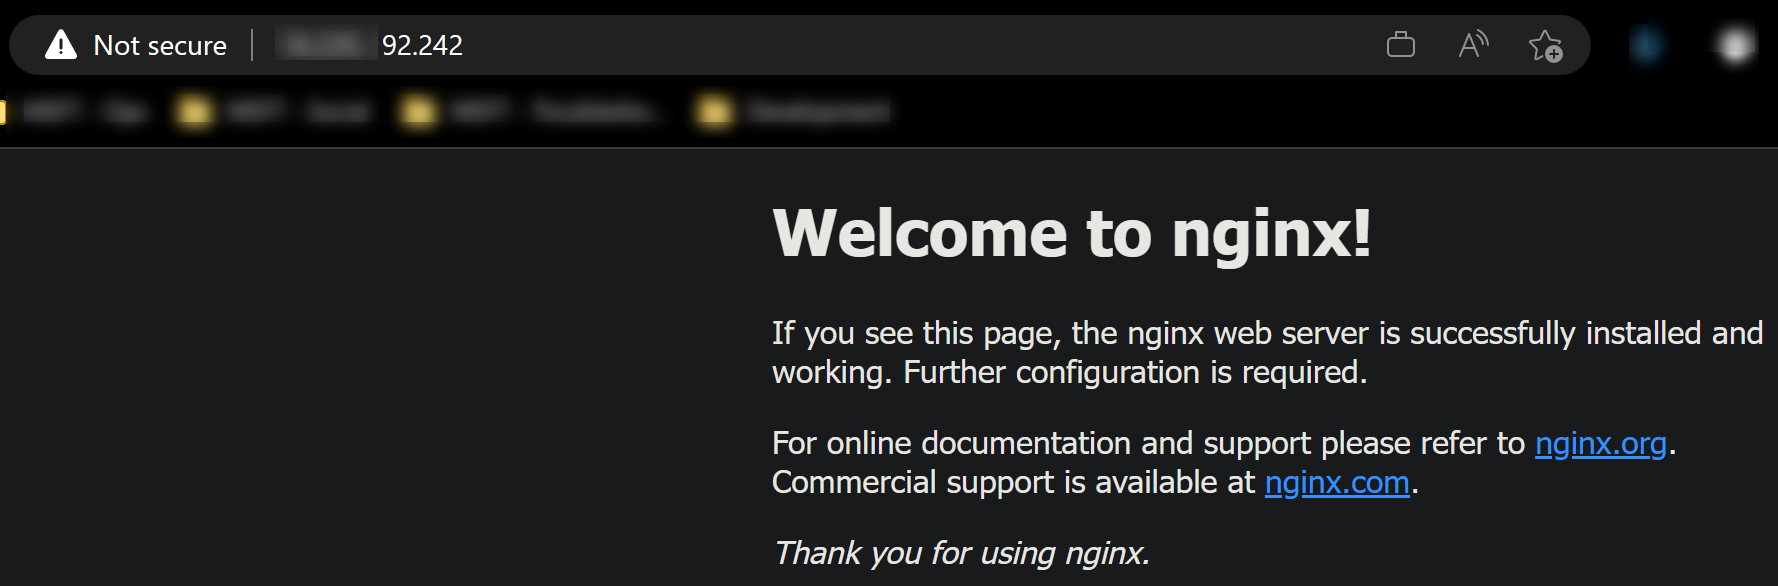
If port 80 is opened on your NSG, you can immediately hit your public Virtual Machine IP or FQDN assigned (.cloudapp.azure.net), which should present the default NGINX page.
(FQDN)
(Public IP)
Setup the upstream application
This will be the application that requests are forwarded to by NGINX. This can be essentially application that’s listening on an exposed port. This can be containerized, or, non-containerized.
As an example, I’ll be using a Go application that logs out all headers. It will consist of the following - you can use your own application, or this one - take note of the port the application is listening on:
-
main.gopackage main import ( "encoding/json" "fmt" "net/http" "log" ) func main() { http.HandleFunc("/", func(w http.ResponseWriter, r *http.Request) { for name, values := range r.Header { // Loop over all values for the name. for _, value := range values { fmt.Println(name, value) e := json.NewEncoder(w) e.Encode(name + ": " + value) } } }) log.Println("Server listening on port 8080.") err := http.ListenAndServe(":8080", nil) if err != nil { log.Fatal(err) } } -
go.modmodule github.com/azureossd/envoy-proxy-container/application go 1.20
Validate your application is listening on a port. Assuming the port is known - You can do this with netstat -ano | grep [portnumber]:
azureuser@azurevm:~$ netstat -ano | grep 8080
tcp6       0      0 :::8080                 :::*                    LISTEN      off (0.00/0/0)
Configure NGINX
Enabling reverse proxy functionality
NOTE: to ensure that nginx starts after a machine reboot or stop/start, run
sudo systemctl enable nginx. Otherwise you may have to manually start the service.
Now that NGINX is installed and our application is listening on a local port, we need to point NGINX to proxy these requests to it.
- Since we’re doing a basic set up, we won’t be adding additional virtual hosts.
- Navigate to
/etc/nginx/sites-available/and use a text editor to open and edit the file nameddefaultin this directory. There should be only one file after a fresh installation. - Edit the existing location block in
defaultto include theproxy_passdirective pointing to the port your application is running on:
location / {
        # First attempt to serve request as file, then
        # as directory, then fall back to displaying a 404.
        try_files $uri $uri/ =404;
        # IMPORTANT: This is the key to enabling proxying
        # Add this line
        proxy_pass http://localhost:8080;
}
- Run
sudo nginx -tto check if syntax is valid.
azureuser@azurevm:/etc/nginx/sites-available$ sudo nginx -t
nginx: the configuration file /etc/nginx/nginx.conf syntax is ok
nginx: configuration file /etc/nginx/nginx.conf test is successful
- Lastly, reload NGINX with
sudo systemctl reload nginx -
Refresh the browser. You should now see NGINX forwarding the request to the application. In this case, we can see our Go application:
To further prove that NGINX is proxying to our application, we can see the
serverheader is set to NGINX in the Browser Dev Tools -> Networking tab: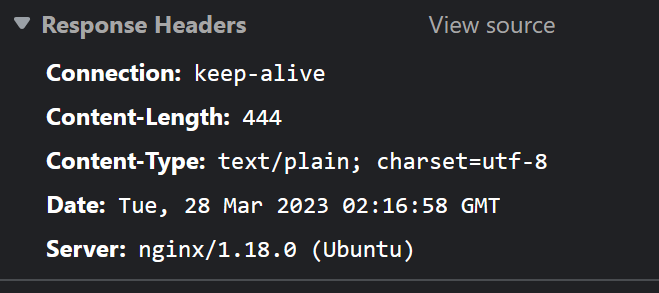
Further configuration changes
Now that the core functionality is set up, we can do some various changes. Such as:
- Removing some information on the
serverheader, for security:- NOTE: This needs to be done in the
nginx.conffile by uncommenting theserver_tokens off;line.
- NOTE: This needs to be done in the
- Adding X-Forwarded for headers
- Adding custom headers
- Changes to client buffering for possible performance
Changing our default conf, we add in the following:
 location / {
                # First attempt to serve request as file, then
                # as directory, then fall back to displaying a 404.
                try_files $uri $uri/ =404;
                proxy_pass http://localhost:8080;
                # Headers for various security aspects
                add_header X-Frame-Options "SAMEORIGIN";
                add_header Strict-Transport-Security "max-age=31536000; includeSubdomains; preload";
                add_header X-XSS-Protection "1; mode=block";
                add_header Content-Security-Policy "default-src 'self' http: https: data: blob: 'unsafe-inline'" always;
                add_header Referrer-Policy "strict-origin";
                # Custom headers
                add_header X-Custom-Header "SomeValue";
                # XFF headers
                proxy_set_header    X-Real-IP       $remote_addr;
                proxy_set_header    X-Forwarded-for $remote_addr;
                # Set GZIP headers
                proxy_set_header Accept-Encoding "gzip";
                # Disable proxy buffering
                proxy_buffering off;
        }
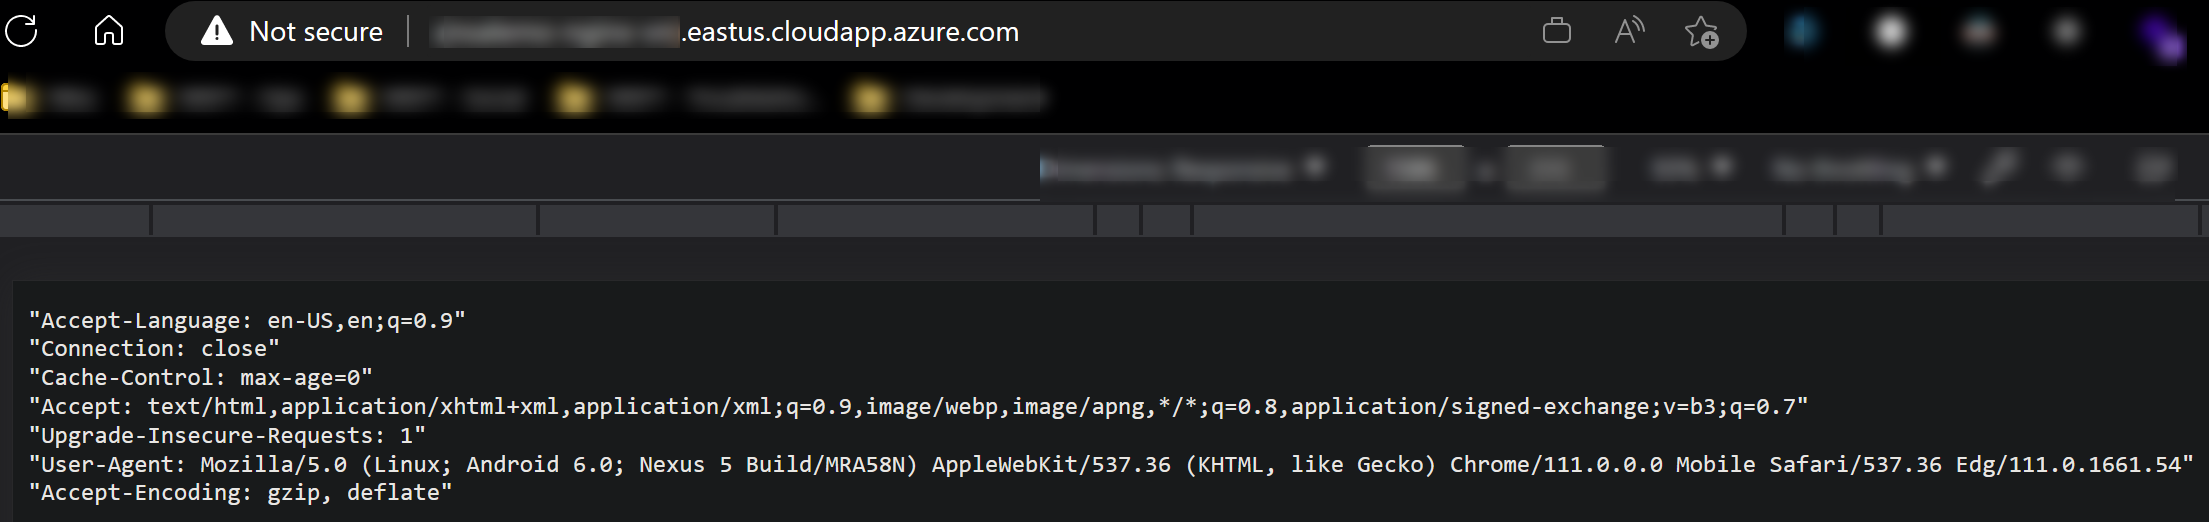
We can see this reflect in the headers when inspecting the request:
Response headers:
Content-Security-Policy: default-src 'self' http: https: data: blob: 'unsafe-inline'
Content-Type: text/plain; charset=utf-8
Date: Tue, 28 Mar 2023 02:29:24 GMT
Referrer-Policy: strict-origin
Strict-Transport-Security: max-age=31536000; includeSubdomains; preload
X-Custom-Header: SomeValue
X-Frame-Options: SAMEORIGIN
Server: nginx
X-XSS-Protection: 1; mode=block
Request headers:

We can add additional location blocks to our existing default conf file under /etc/nginx/sites-available/, to proxy based off of different routes to different locations. Take the below examples:
- The first location block example proxies to google.com if the path
/api/gis hit - The second location block examples proxies to bing.com if the exact match of
/api/b/is hit
Example 1::
location /api/g/ {
    # You can add other headers in here
    proxy_pass https://www.google.com/;
}
Example 1::
location = /api/b/ {
    # You can add other headers in here
    proxy_pass https://www.bing.com/;
}
An important concept here is that these routes do not actually exist on the application itself. In our Go example, the only route that exists is “/”. They don’t need to - these are routes that NGINX is only aware of, and not the application. However, if you were to proxy requests to an application that is supposed to have the same path name, then the application will need to have an existing route of the same name.
NOTE: If you’re proxying to an external site and don’t have static assets on the origin, some static content may not load.
Enabling SSL/TLS with your reverse proxy
To enable SSL/TLS on NGINX, for SSL/TLS offloading with your reverse proxy, see these two posts:
- How to configure Let’s Encrypt Certificates for Nginx or Apache in Azure Linux Virtual Machines
- Adding SSL/TLS certificates for Apache and NGINX on Azure Virtual Machines
Troubleshooting
If the site is inaccessible through the reverse proxy, it may due to some of the below issues (or others). Review the status of NGINX by running sudo systemctl status nginx. This will normally give a description of the reason why it could not reload the new configuration.
nginx: [emerg] invalid URL prefix
If this is seen, review if a http:// or https:// protocol scheme is missing in the proxy_pass directive.
“proxy_pass” cannot have URI part in location given by regular expression
If you’re trying to proxy based off of a regular express in the route, this will throw.
Regular expressions are a valid location block value, however, with proxying throug this, NGINX will fail to reload the configuration as it’s invalid.
HTTP 502/503/504
If NGINX is throwing any of these errors, review if the application is running or able to return a response normally. Try to see if the application is accessible on the Virtual Machine by bypassing the proxy (eg., curl localhost:[port]).
Review application logs in this scenario in case there is an error occurring.
HTTP 500
This is generally a runtime error thrown by an application - if this is being returned by NGINX review the application logs of the application the request is being proxied to.
HTTP 404
Review if the route being proxied to actually exists - if it’s an external hostname, ensure this is able to be properly accessed and resolved by bypassing the proxy first, if possible.
ERR_CONNECTION_REFUSED or “[somepage] took too long to respond”
Review if your NSG is letting traffic through on the port that NGINX is exposed on, which, by default is 80 (and 443 if SSL/TLS is enabled).
If this is set through a custom domain - check if bypassing the domain and instead hitting the Virtual Machine public IP or the cloudapp DNS name is successful. Else, if NSG ports are opened to appropriate traffic - check that the FQDN/IP of this VM is resolvable from the current client, in case additional networking is a cause here.


