Installing Oracle database instant client for Nodejs on Linux and Widows apps service
The Oracle database client is not available by default in Azure App Service. However, it can be added quickly with a few simple commands. I’ll show you how you can install the client on Linux and Windows App Services. In my example, i’m using a Node.js as the language, for other languages you can use these same methods to install the instant client, but the linux startup command other language will be different.
The steps below are derived from the Oracle documentation found here: Install the free Oracle Instant Client ‘Basic’ ZIP file
Linux
Downloading the Linux Client
- Browse to the Kudu webssh terminal for your app service.
- <appName>.scm.azurewebsites.net/webssh/host
- Run the following commands:
cd /home/site
wget https://download.oracle.com/otn_software/linux/instantclient/instantclient-basic-linuxx64.zip
unzip instantclient-basic-linuxx64.zip
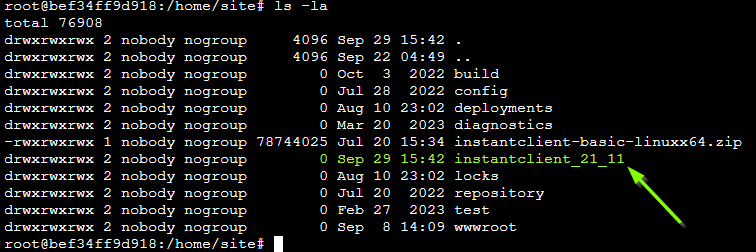
ls -la
- The output from “ls” will show us the directory name we will need later. The directory name you see may be different than in the screenshot below. The download link used in the wget command will always choose the most recent version of the instant client.
Startup Script
For Linux Apps, we need to utilize a startup command. The Oracle instant client has a dependency, libaio1, which will need to be installed on startup.
- Add file, startup.sh, to the root of your application (/home/site/wwwroot in most cases) with the following contents.
#!/bin/bash
# required dependency for the instant client.
apt install libaio1

# Start your application. This will depend on your application stack.
npm start
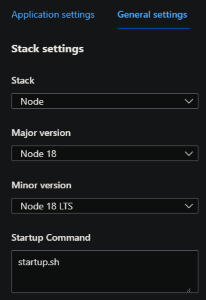
- Then, set startup.sh as the startup script in the Startup Command box in Configuration > General Settings > Startup Command.
App Setting
-
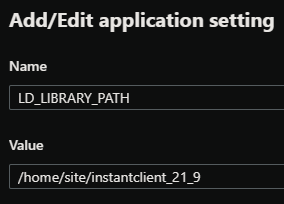
For the application to recognize the client, we need to add the app setting LD_LIBRARY_PATH where the value is the directory of the instant client. In my case, this is /home/site/instantclient_21_11, this will depend on the directory name mentioned in the previous step.
-
Add a new app setting from Configuration > Application settings > + New application setting
-
-
Your Linux App Service is now configured and you should be able to successfully connect to your Oracle Database.
Windows
Considerations
The Oracle client comes as either x86 or x64. Windows App Services can be 32bit or 64bit depending on the application stack and configuration.
Windows App Services are 32-bit by default. However, Java apps can only be 64-bit.
In this example, we’re utilizing x64 because node-oracledb does not come with a prebuilt x86 version. I will include configuration instructions for x86, but not for building the x86 node module from source.
- Prebuilt offerings: https://github.com/oracle/node-oracledb/releases/tag/v5.5.0
- Building node-oracledb from source: https://node-oracledb.readthedocs.io/en/latest/user_guide/installation.html#github
You can check which version your Windows App Service is using from the debug console.
echo %PROCESSOR_ARCHITECTURE%

You can switch between x64 and x86 here: Configuration > General Settings > Platform Settings > Platform.

Downloading the Windows Client
The process here is similar to Linux, but we use curl instead of wget. You can also manually download a specific version then upload to App Service using FTP or the drag and drop feature on the Kudu site.
- Browse to the Kudu CMD console for your app service, then run the following commands.
- <appName>.scm.azurewebsites.net/DebugConsole
x86
cd /home/site

curl https://download.oracle.com/otn_software/nt/instantclient/instantclient-basic-nt.zip --output client.zip

unzip client.zip
x64
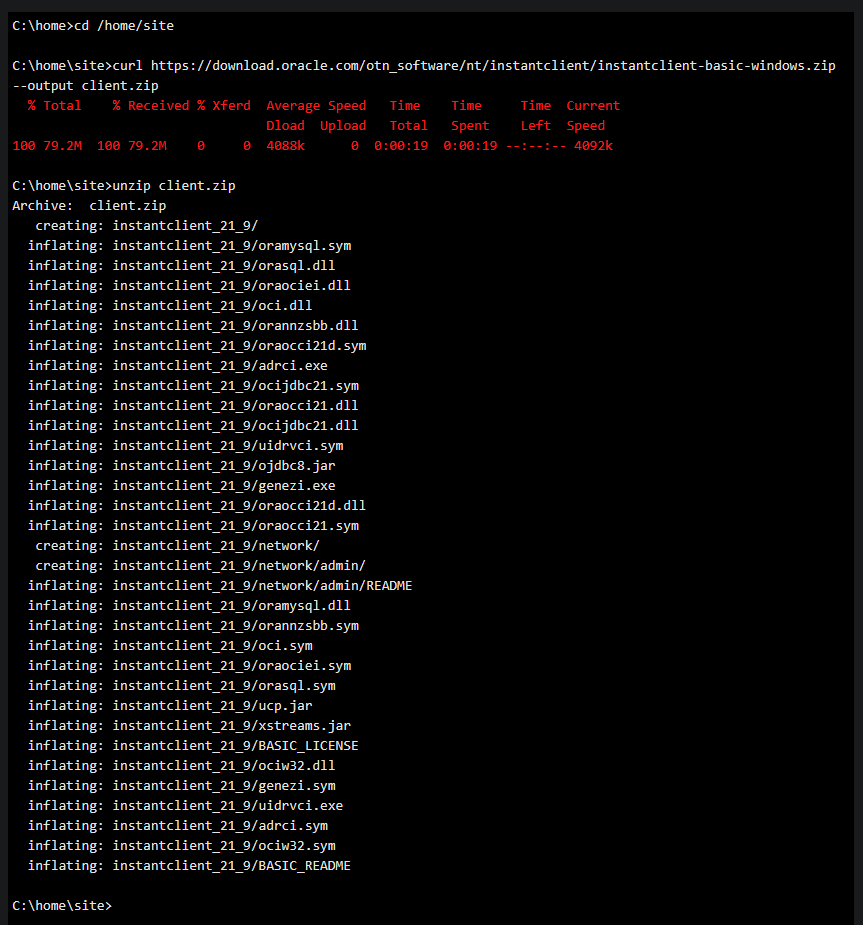
cd /home/site

curl https://download.oracle.com/otn_software/nt/instantclient/instantclient-basic-windows.zip --output client.zip

unzip client.zip
Output
Configuration
For your application to find the Oracle client, we need to add the instant client to the PATH variable.
- From the DebugConsole, create a new file inside of /home/site and name it applicationHost.xdt

- Edit the newly created file and include the following configuration.

<?xml version="1.0"?>
<configuration xmlns:xdt="http://schemas.microsoft.com/XML-Document-Transform">
    <system.webServer>
        <runtime xdt:Transform="InsertIfMissing">
            <environmentVariables xdt:Transform="InsertIfMissing">
                <add name="PATH" value="%PATH%/home/site/instantclient_21_9/;"
                    xdt:Locator="Match(name)" xdt:Transform="InsertIfMissing" />
            </environmentVariables>
        </runtime>
    </system.webServer>
</configuration>


